If you are based in the North West of the UK, why don’t you go to the TeachMeet at Calderstones School in September?
For more information click here or search #tmnorthwest on twitter.

If you are based in the North West of the UK, why don’t you go to the TeachMeet at Calderstones School in September?
For more information click here or search #tmnorthwest on twitter.
Earlier this year I adapted an idea from Pinterest for tutor time. The concept was having a framed photo of your class on the wall by the door. Pupils could be checked in/out using dry-wipe marker on the glass.
I printed out a small size picture of my form from SIMs and put it in a £1 Tolsby double-sided frame from Ikea. It was small enough to sit behind my monitor when not in use.

In registration, if my computer was slow to load, I just ticked off their faces so that my students wouldn’t be late for lessons. If I was busy giving out letters or speaking to a student, I gave a marker and the frame to another student to tick off. The supply teacher found it very useful when I was ill – especially as I had more than one pupil with the same first name.
When the new timetable starts I will be doing this again – especially as it will be a whole new form group!
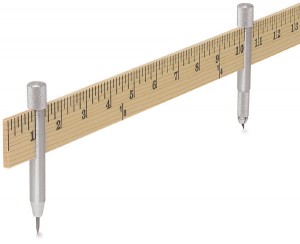
What are these?
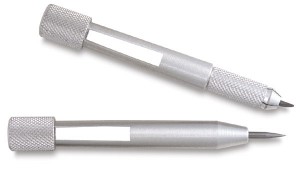
I came across them when I was making a circle skirt and it occurred to me they’d be a great teacher tool. They’re generally known as a yardstick compass. You attach the pointy end to one end of a metre (or yard) stick and the pencil end at your desired radius. Each end has a cap which tightens to the height of your ruler. Hey presto – a giant pair of compasses! Never again will you search high and low for something big and circular to draw around or try using a drawing pin and a piece of string.
There are lots of American websites that sell them, but in the UK I’ve only seen them on Art supply sites eg Handover.co.uk
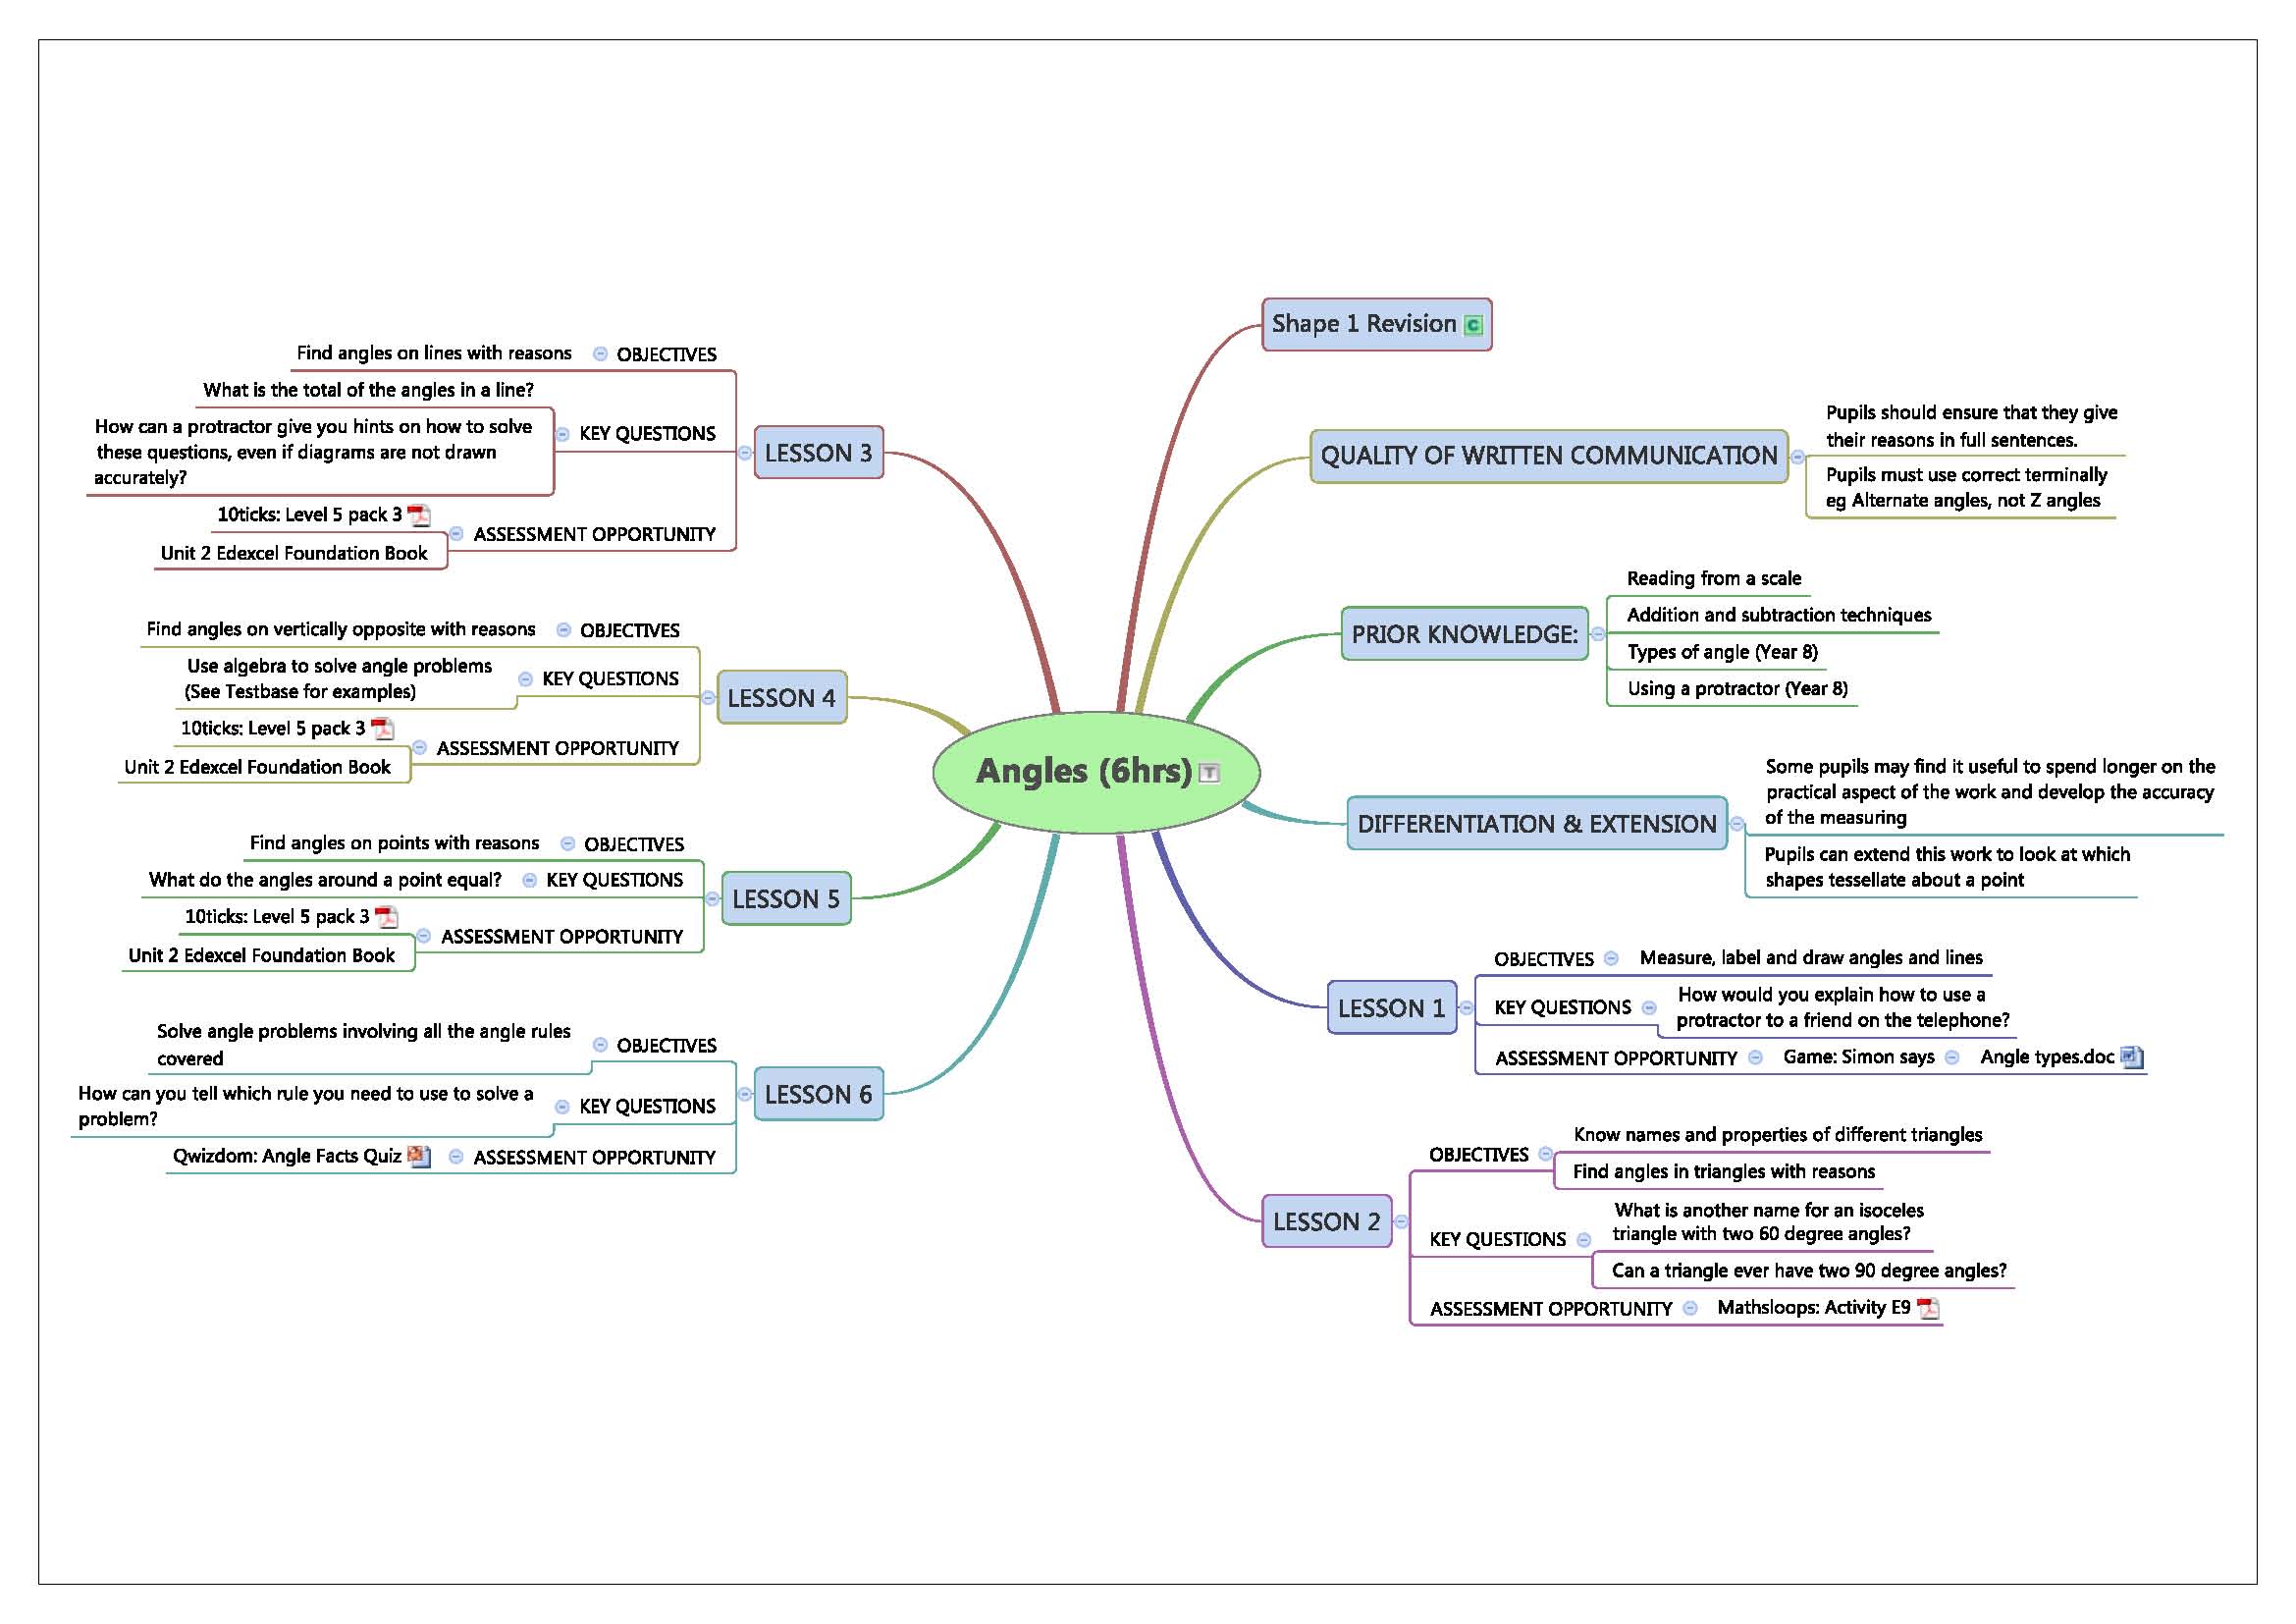
My HoD introduced me to Xmind earlier in the year. It is mind-mapping software that is available for free and compatible with Windows, Mac OS and Linux systems. You can download it from Xmind.net. The initial mind-map can be linked to subsequent maps with the click of a button. Each new mind-map appears on a separate page, just like worksheets in Excel. Here are three examples of it’s use:
1. Schemes of work
This year I’ve taken a more abstract look at schemes of work. We’ve changed over from modular to linear with our foundation GCSE pupils (Higher are already linear) and the scheme needed a shake up.
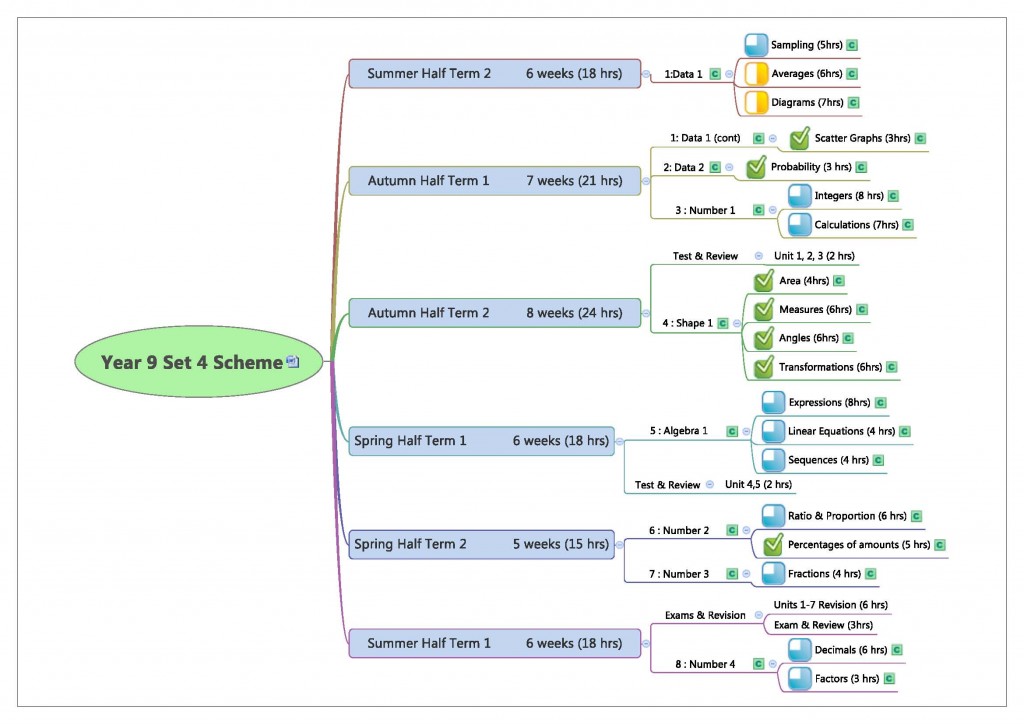
Instead of word documents or spreadsheets of topics, you can mind-map every aspect of your scheme from outline programme of study through to resourced, objective-led lessons. You can insert links from the scheme to resources and create hyperlinks to web pages. If a unit is moved within the scheme, you simply drag it to the new place – no fuss or cutting/pasting. Even the techno nervous can confidently use this software in under ten minutes.
Personally, I like the fact that I can stick the whole plan for a unit of work on the wall on one sheet of paper next to the A4 overview of the year.
2. Mindmaps
Of course, Xmind is mind-mapping software and students can also use it. Recently I’ve used it to consolidate group work by getting each group to contribute an idea to a central mind-map, they then kept going until all the ideas in the room were included. Then I took on the role of editor and dragged common themes together. I also added anything they’d missed. The class could have a readable mind-map each, confident that it had been checked by the teacher and knowing that they had contributed to it. I could also then use the map as a starter in the following lesson, without having to stick bits of flip chart paper on the board.
3. Survey Feedback
You can also use each page of the mind-map to represent a survey question, which had a written answer. You can summarise and categorise a lot of information in a single page.
Note
There are similar compatible smartphone apps which means you can sketch out an idea on your phone and finish it on a computer.
Here is a quick consolidation/revision/application task for constructions, which involves very little preparation. If the sun isn’t shining you could always adapt this for indoors.

Equipment
Chunky chalk (look in your local pound shop)
String
Straight edge and tape measure or just a metre stick
Usual classroom textbook/notes
Task
A company has sketched out a set of new signs and it is your job to accurately draw them without a protractor. The task is differentiated by sign design.
Sign 1
Made from a rectangle and two equilateral triangles.

Sign 2
Same as sign 1, but with a border of constant width

Sign 3
Made from a rectangle, an equilateral triangle and a right angled isosceles triangle.

Sign 4
Same as sign 3, with a border of constant width.

Skills used:
Constructing an equilateral triangle (1,2,3,4)
Constructing the locus of a moving point (2,4)
Bisecting an angle (3,4)
Constructing a perpendicular bisector (optional in all cases)
Activity
Once the signs are allocated, each group must present a plan to the teacher on how they will draw it. They may use their notes, textbooks and smartphones (if your school allows this).
When the groups are outside, they can easily increase their understanding by moving on to the next design or developing their own arrows.
Examples of work


Health Warning!
These signs, when viewed from the end, can look rather like rockets. All I will say is:
rockets + construction arcs + pink chalk + teenager boys’ level of humour= ….
If you liked the post Algebra with a dash of probability check out Keith Turton’s Tes resources. He has made a teaching resource to go with the activity for you to download.
Thank you Keith for sharing!
All you need is you, a class and a playground. Easy!
Loci around a single point
You stand in the middle of the yard and the class must all stand 2m away. Hopefully you will end up with a circle of radius 2m. Discuss why this happens.
Equal distance from two lines/Bisecting an angle
Find part of the playground which has two edges, ideally at 90 degrees. The class must stand the same distance from each edge – this should look like an angle bisector. Discuss.
Locus of a line
Get a few pupils to stand in a straight line. Everyone must stand 1m away from them. Discuss why the lines are parallel and the ends are semi-circles.
Locus around an object
Repeat the previous task around an object eg building, bench. Why do right angles produce quarter circle loci?