Monthly Archives: March 2014

205. Percentages cubed

This neat little activity combines nets of cubes with non-calculator percentages. It doesn’t necessarily replace teaching basic percentages, but it is a good starting point.

Objectives

  • To understand the link between different percentages.
  • To construct a cube, using a 2D net.
  • To calculate percentages.

Equipment
Pre-printed nets of cubes on card
Scissors
Glue
Felt-tip pens

Task 1
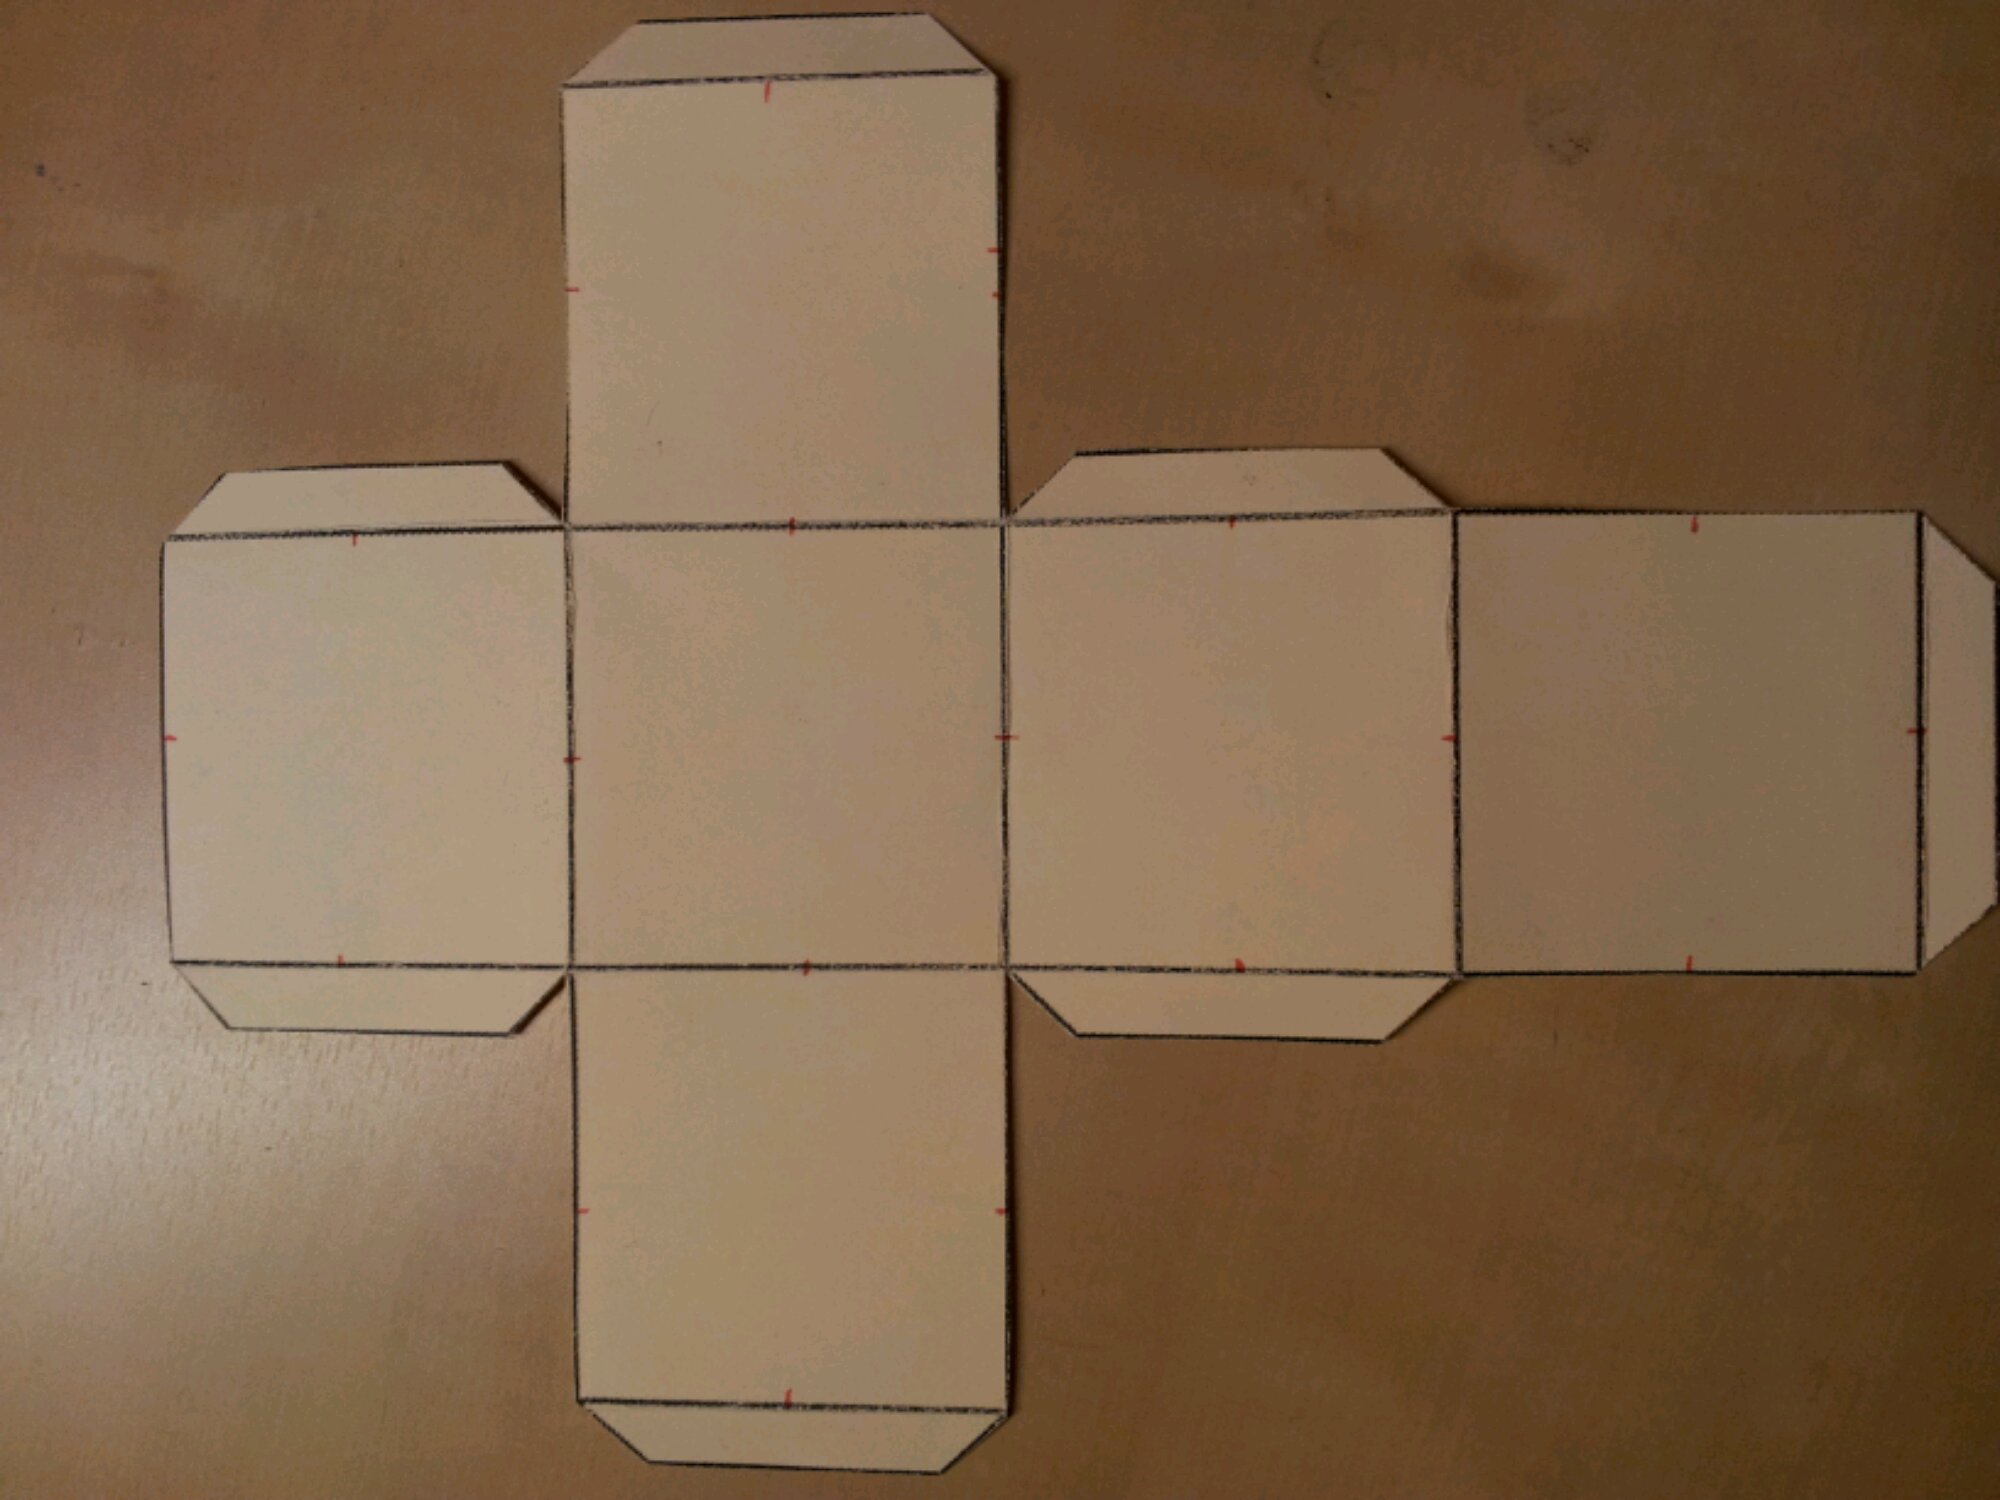
Cut out the net of the cube and mark the midpoint of each edge, ensuring matching points on the joins.

image

The matching points are important later on. Fold in both directions along each line.

Task 2
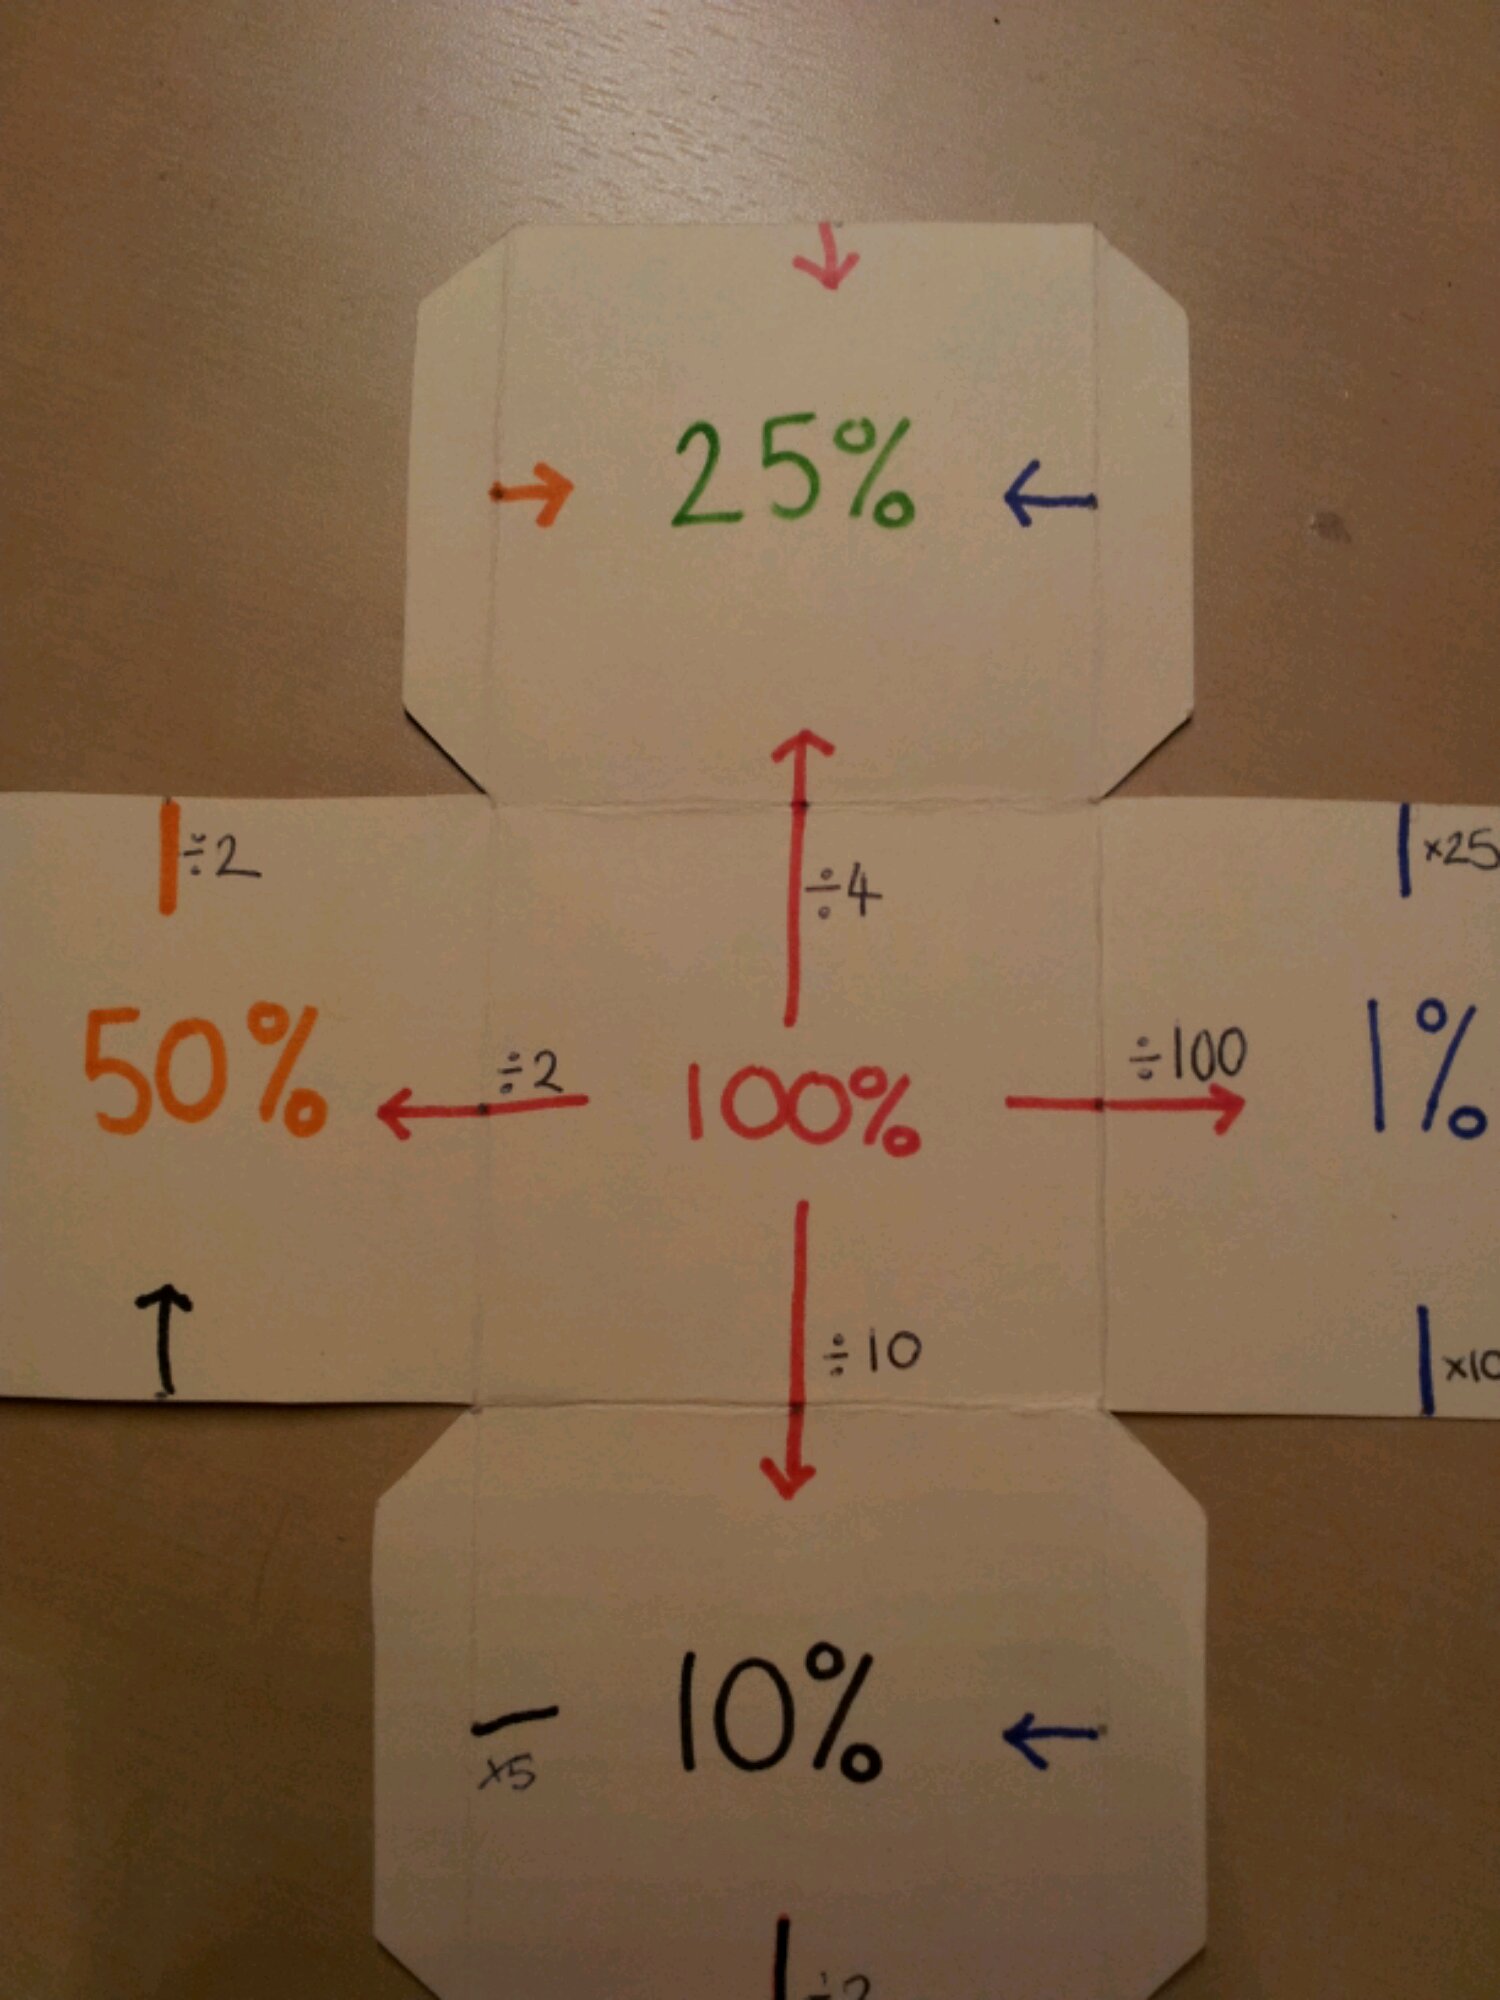
Label the middle square 100%.
Draw horizontal and vertical arrows going away from it with divide by 2, 4, 10 & 100. What percentages should go on these squares?

image

You will notice the arrows go through the midpoints.

Task 3
After your class have identified the squares as 50%, 25%, 10% & 1%, ask your class how these are linked.

This bit wowed my class.

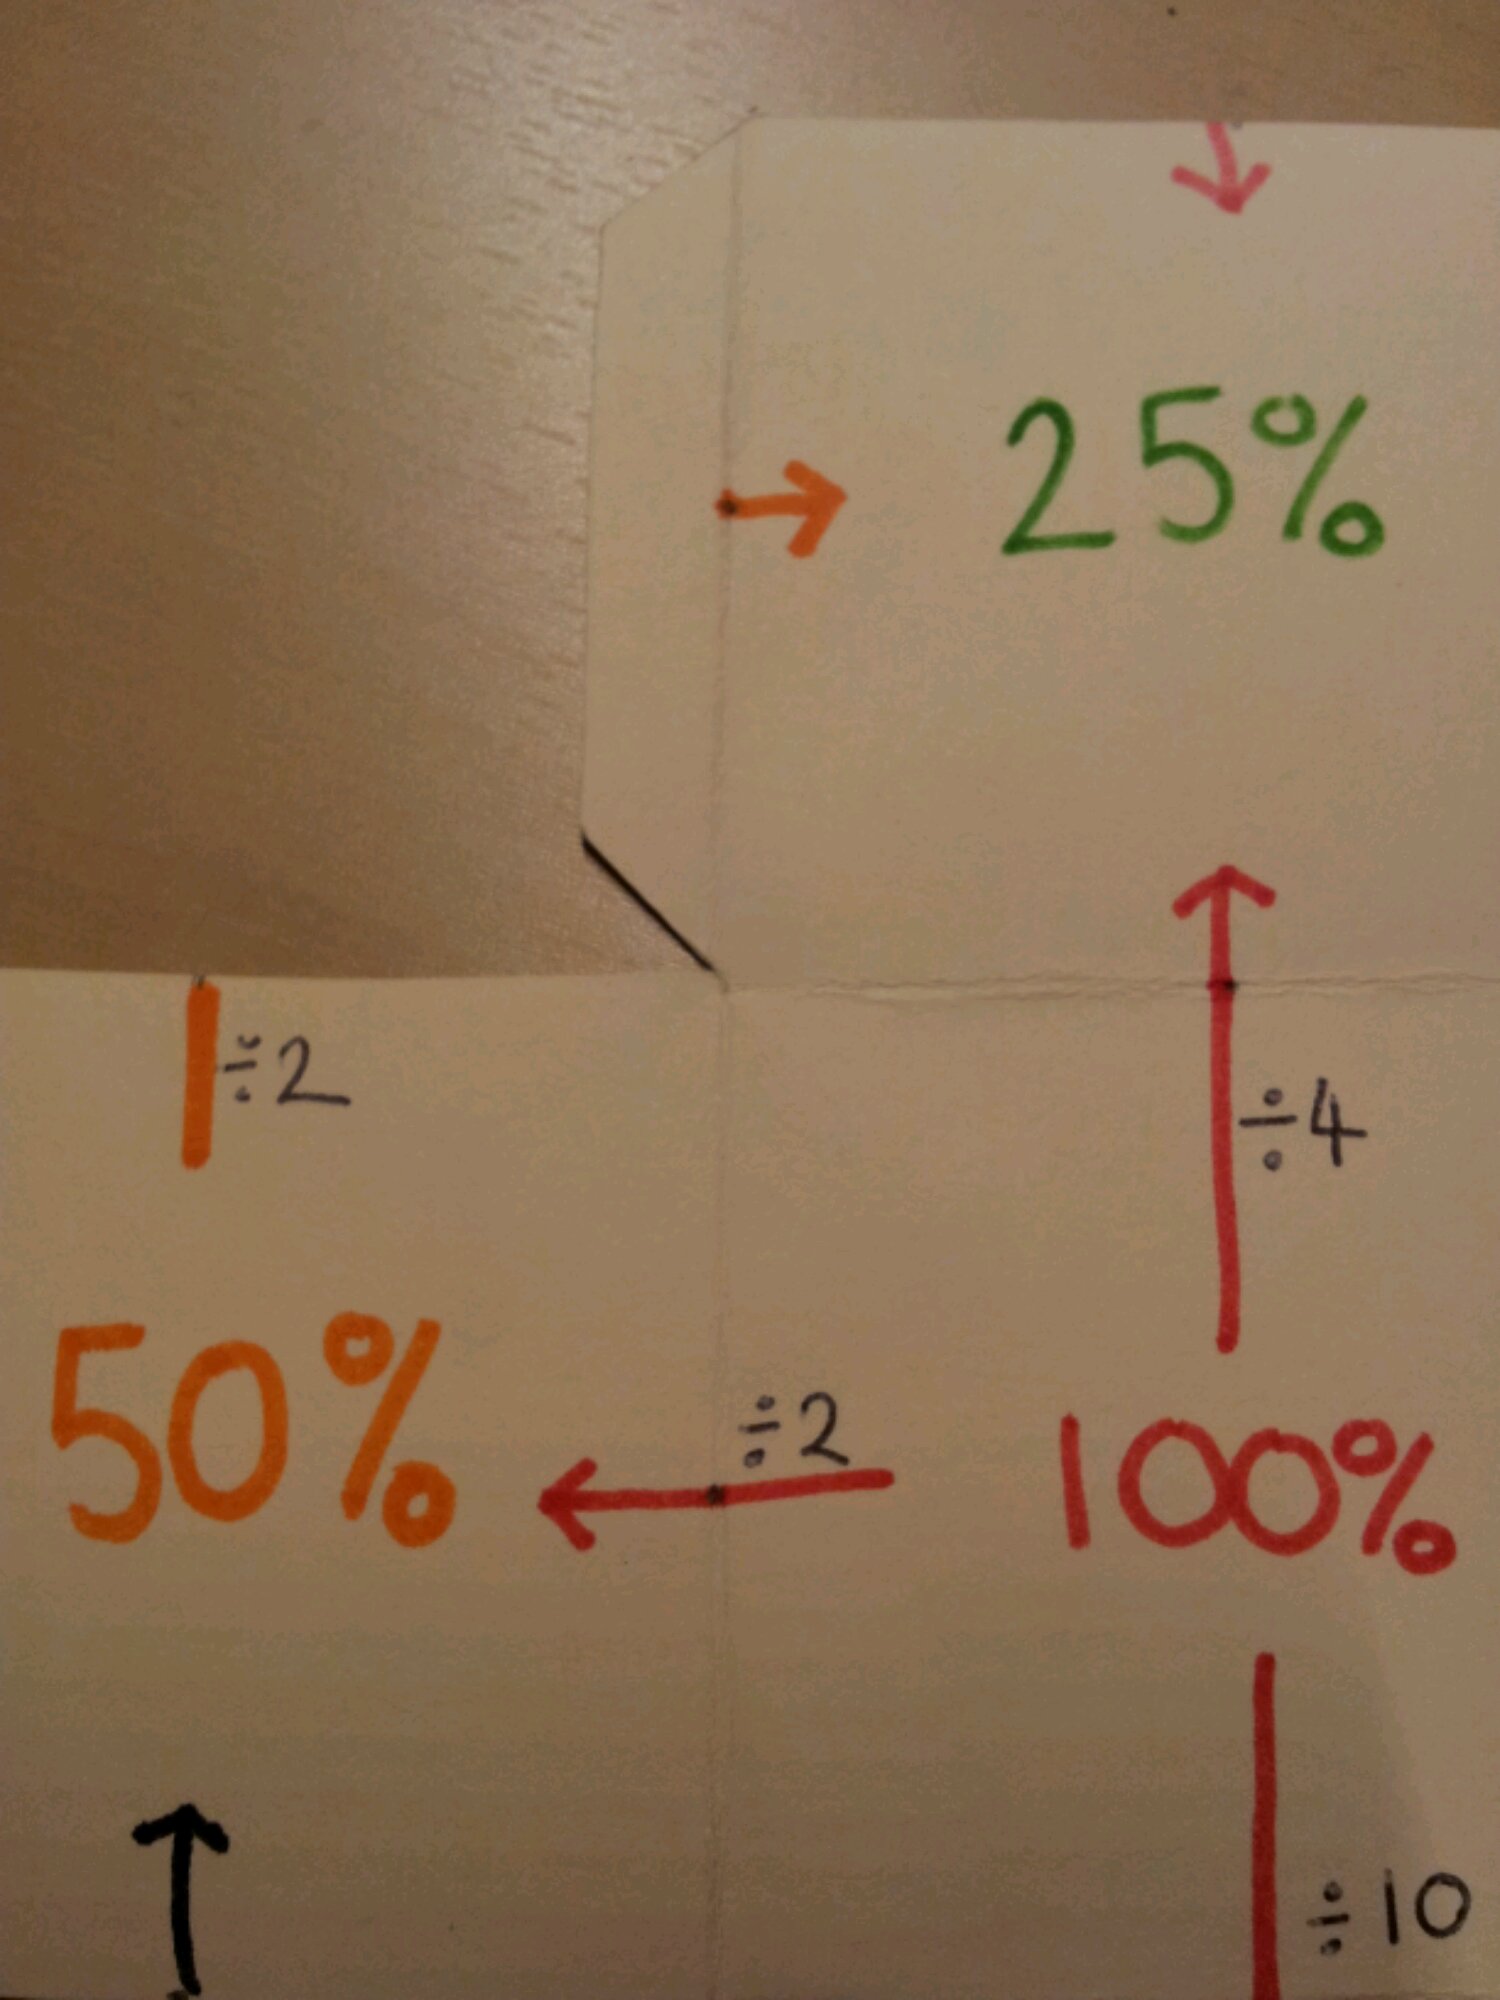
Draw a vertical line up from 50%.
Label it divide by 2.
Draw an arrow coming in from the left of the 25%.

image

What happens if you fold the cube up?
The arrow joins up! This is why you need the midpoints.

Task 4
Ask your class to complete the labels linking the other percentages.

image

Task 5
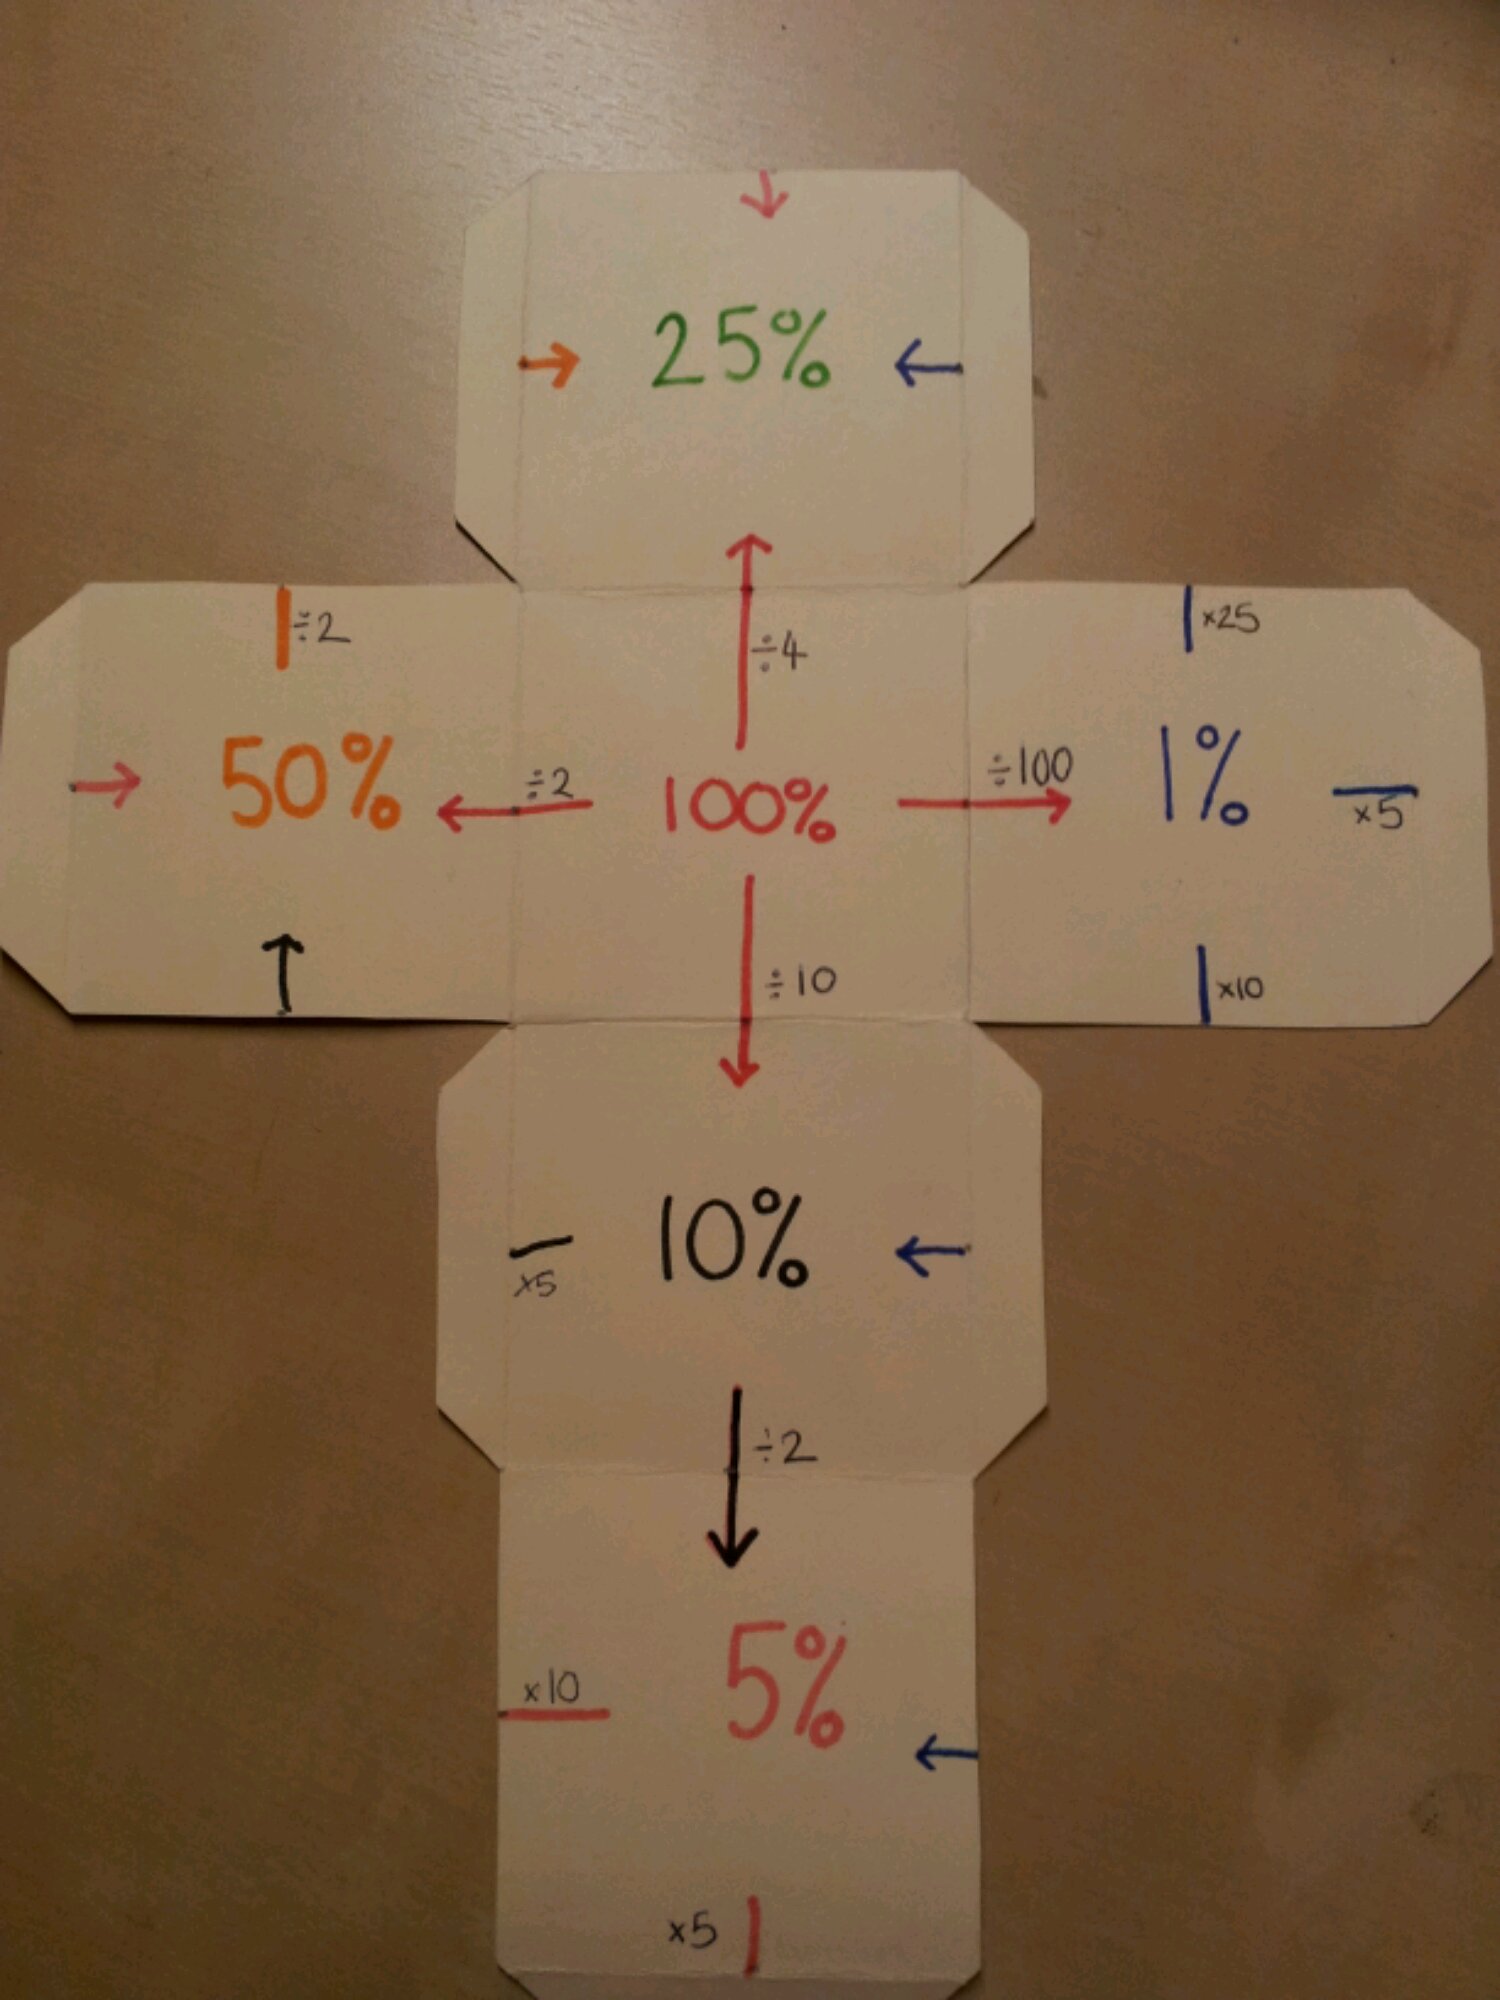
You should have one empty square. Label this 5%.

Ask your pupils to complete their arrows. They can be completed with divide or multiply.

image

You will notice that mine is colour coded, based on the original percentage in each calculation.

Task 6
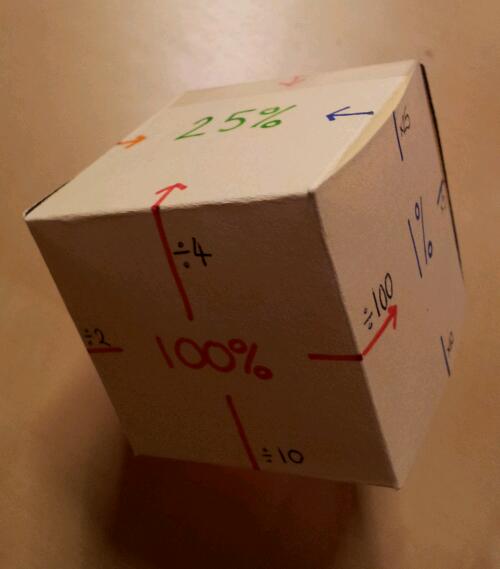
Glue the 5% square flap to the 25% square. This allows you to temporarily tuck in the other flaps, whilst allowing the cube to be folded flat to go in a book.

image

Task 7
Give pupils a starting number eg 360. This represents 100%.
By following the arrows on the cube, they can work out all these percentages quickly and efficiently.

204. Revolution in Volume

Most elements of Core Maths can be visualised with a good diagram, but volume of revolution can be tricky if your technical drawing skills leave something to be desired. My colleague JA came up with a visualisation which is simple and elegant, yet also fun and memorable.

Step 1
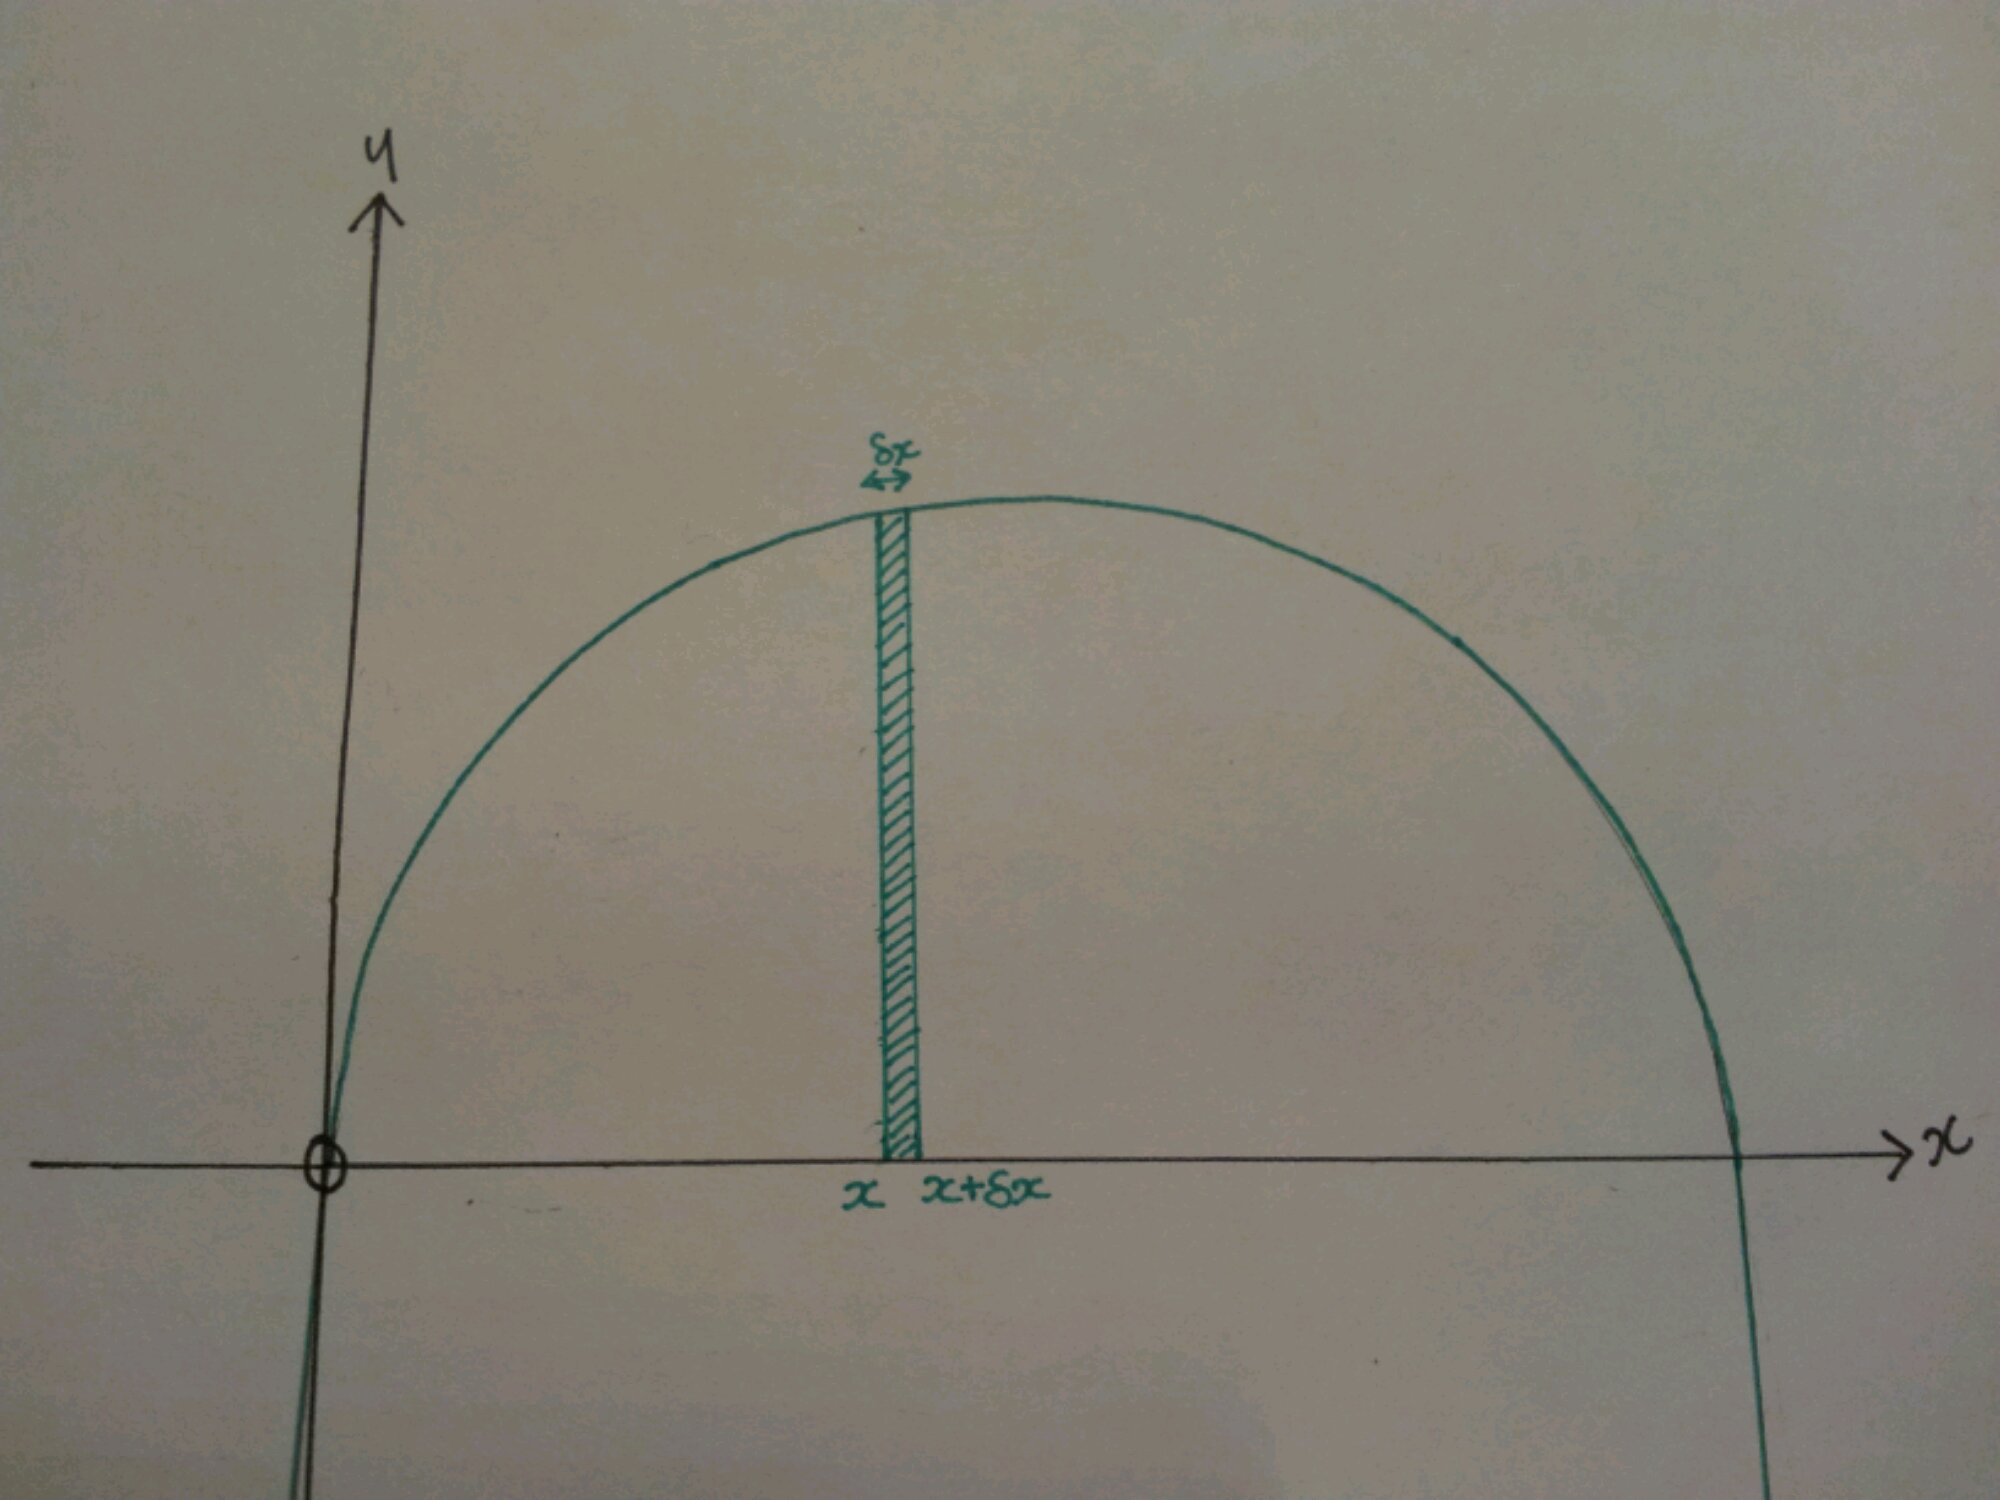
Start with a curve. Introduce the limits a and b. Discuss what shape a thin strip would make: a disc.

image

Step 2
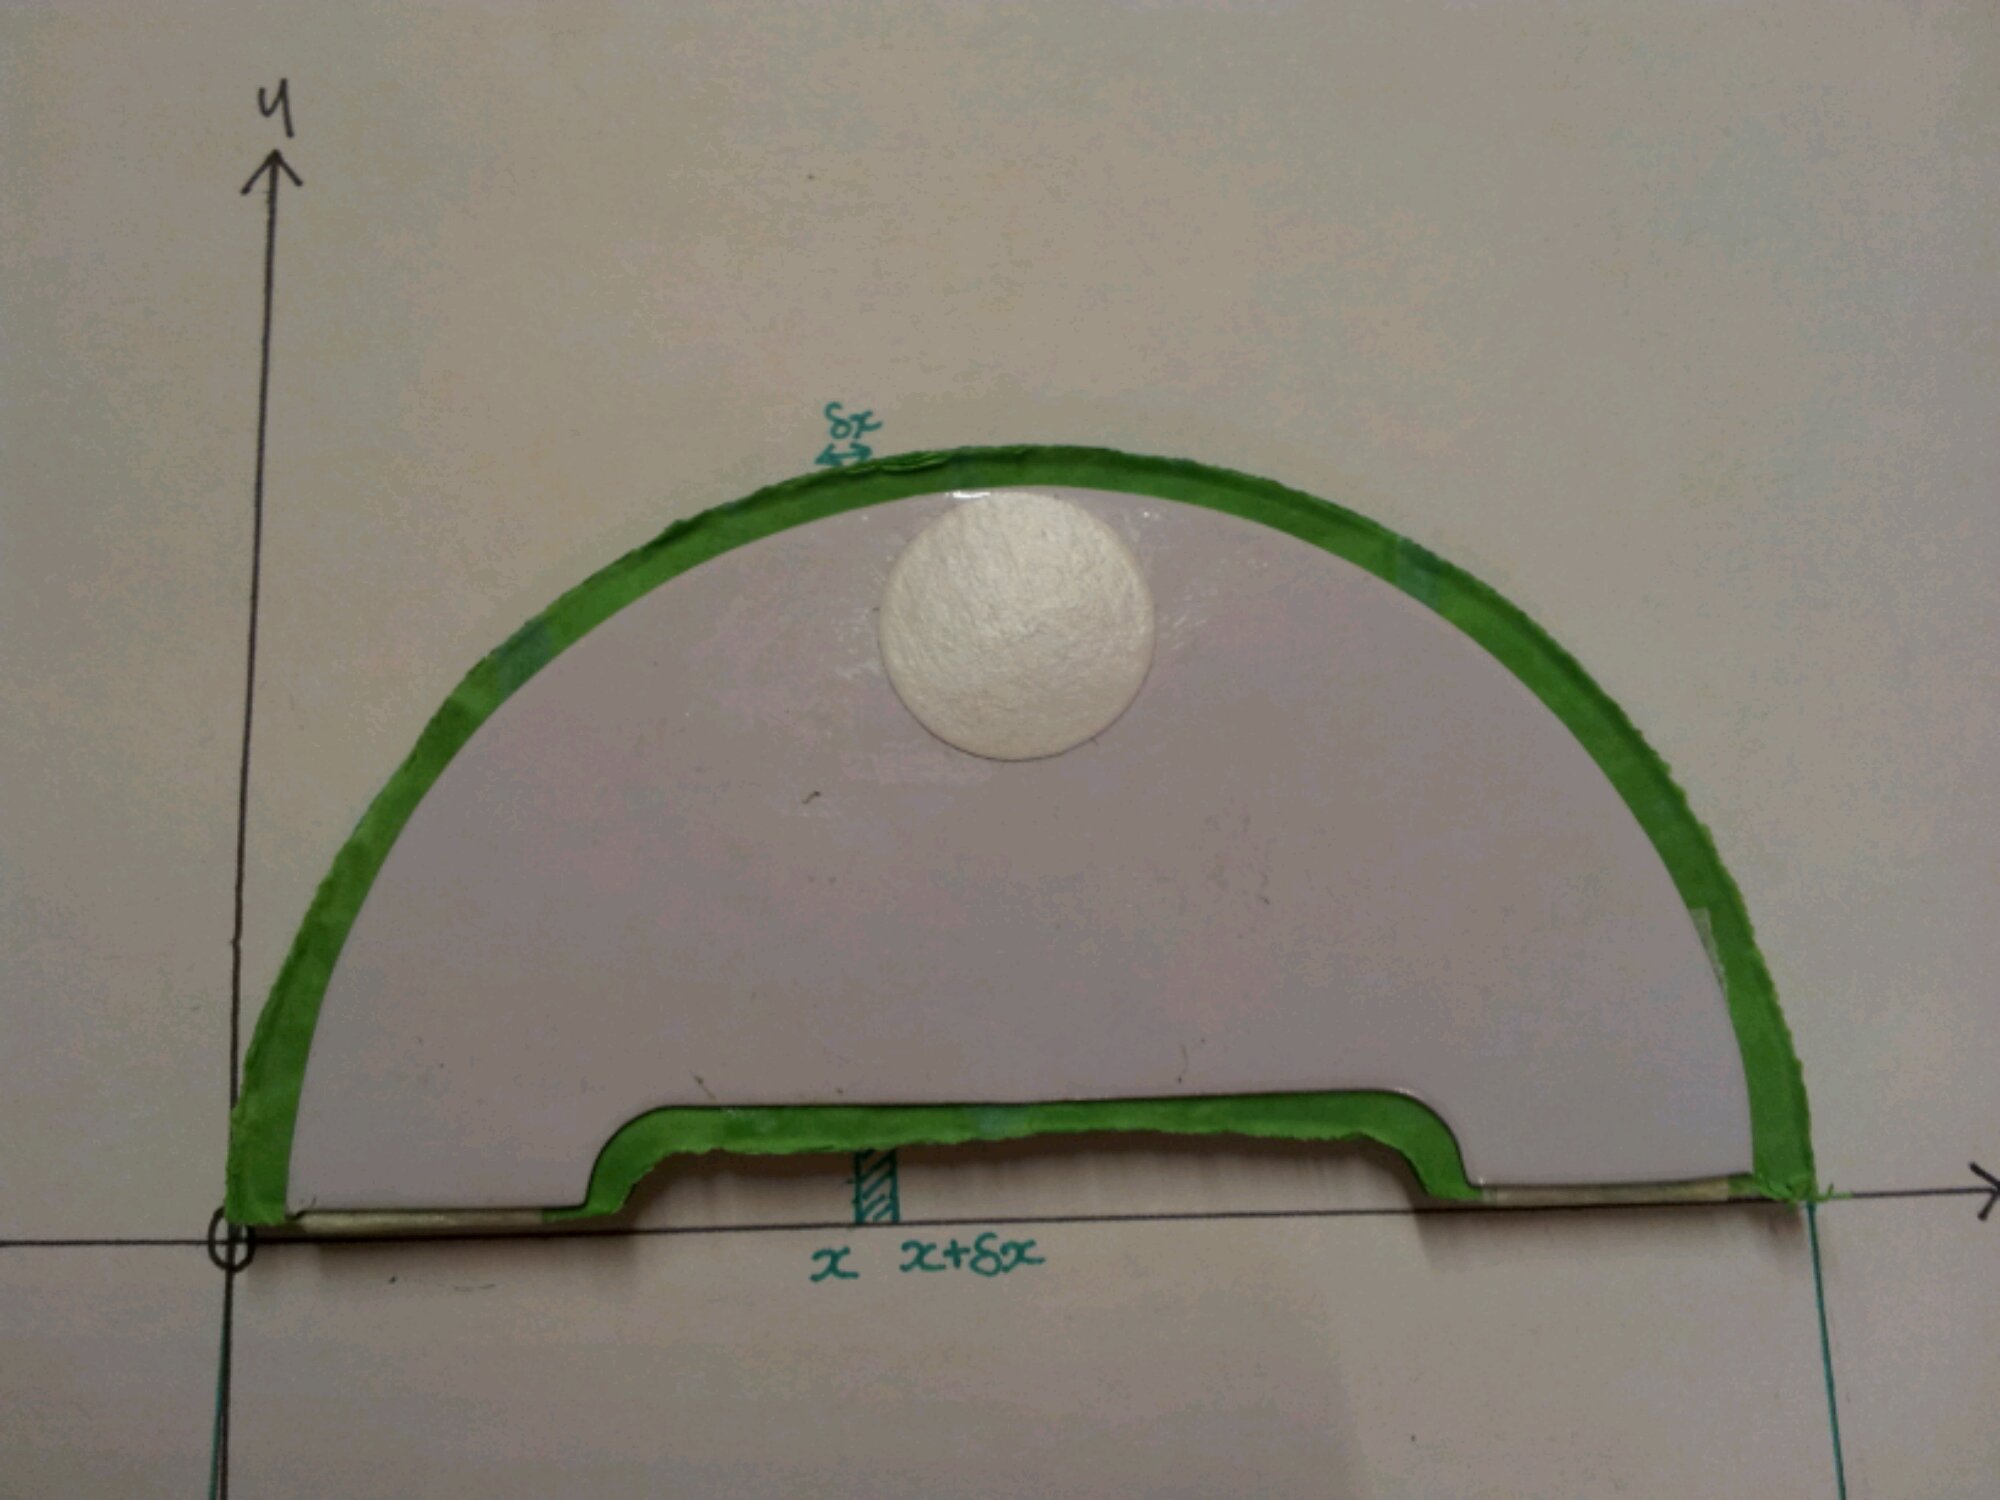
What would several discs make?
Now this is the cool bit:

image

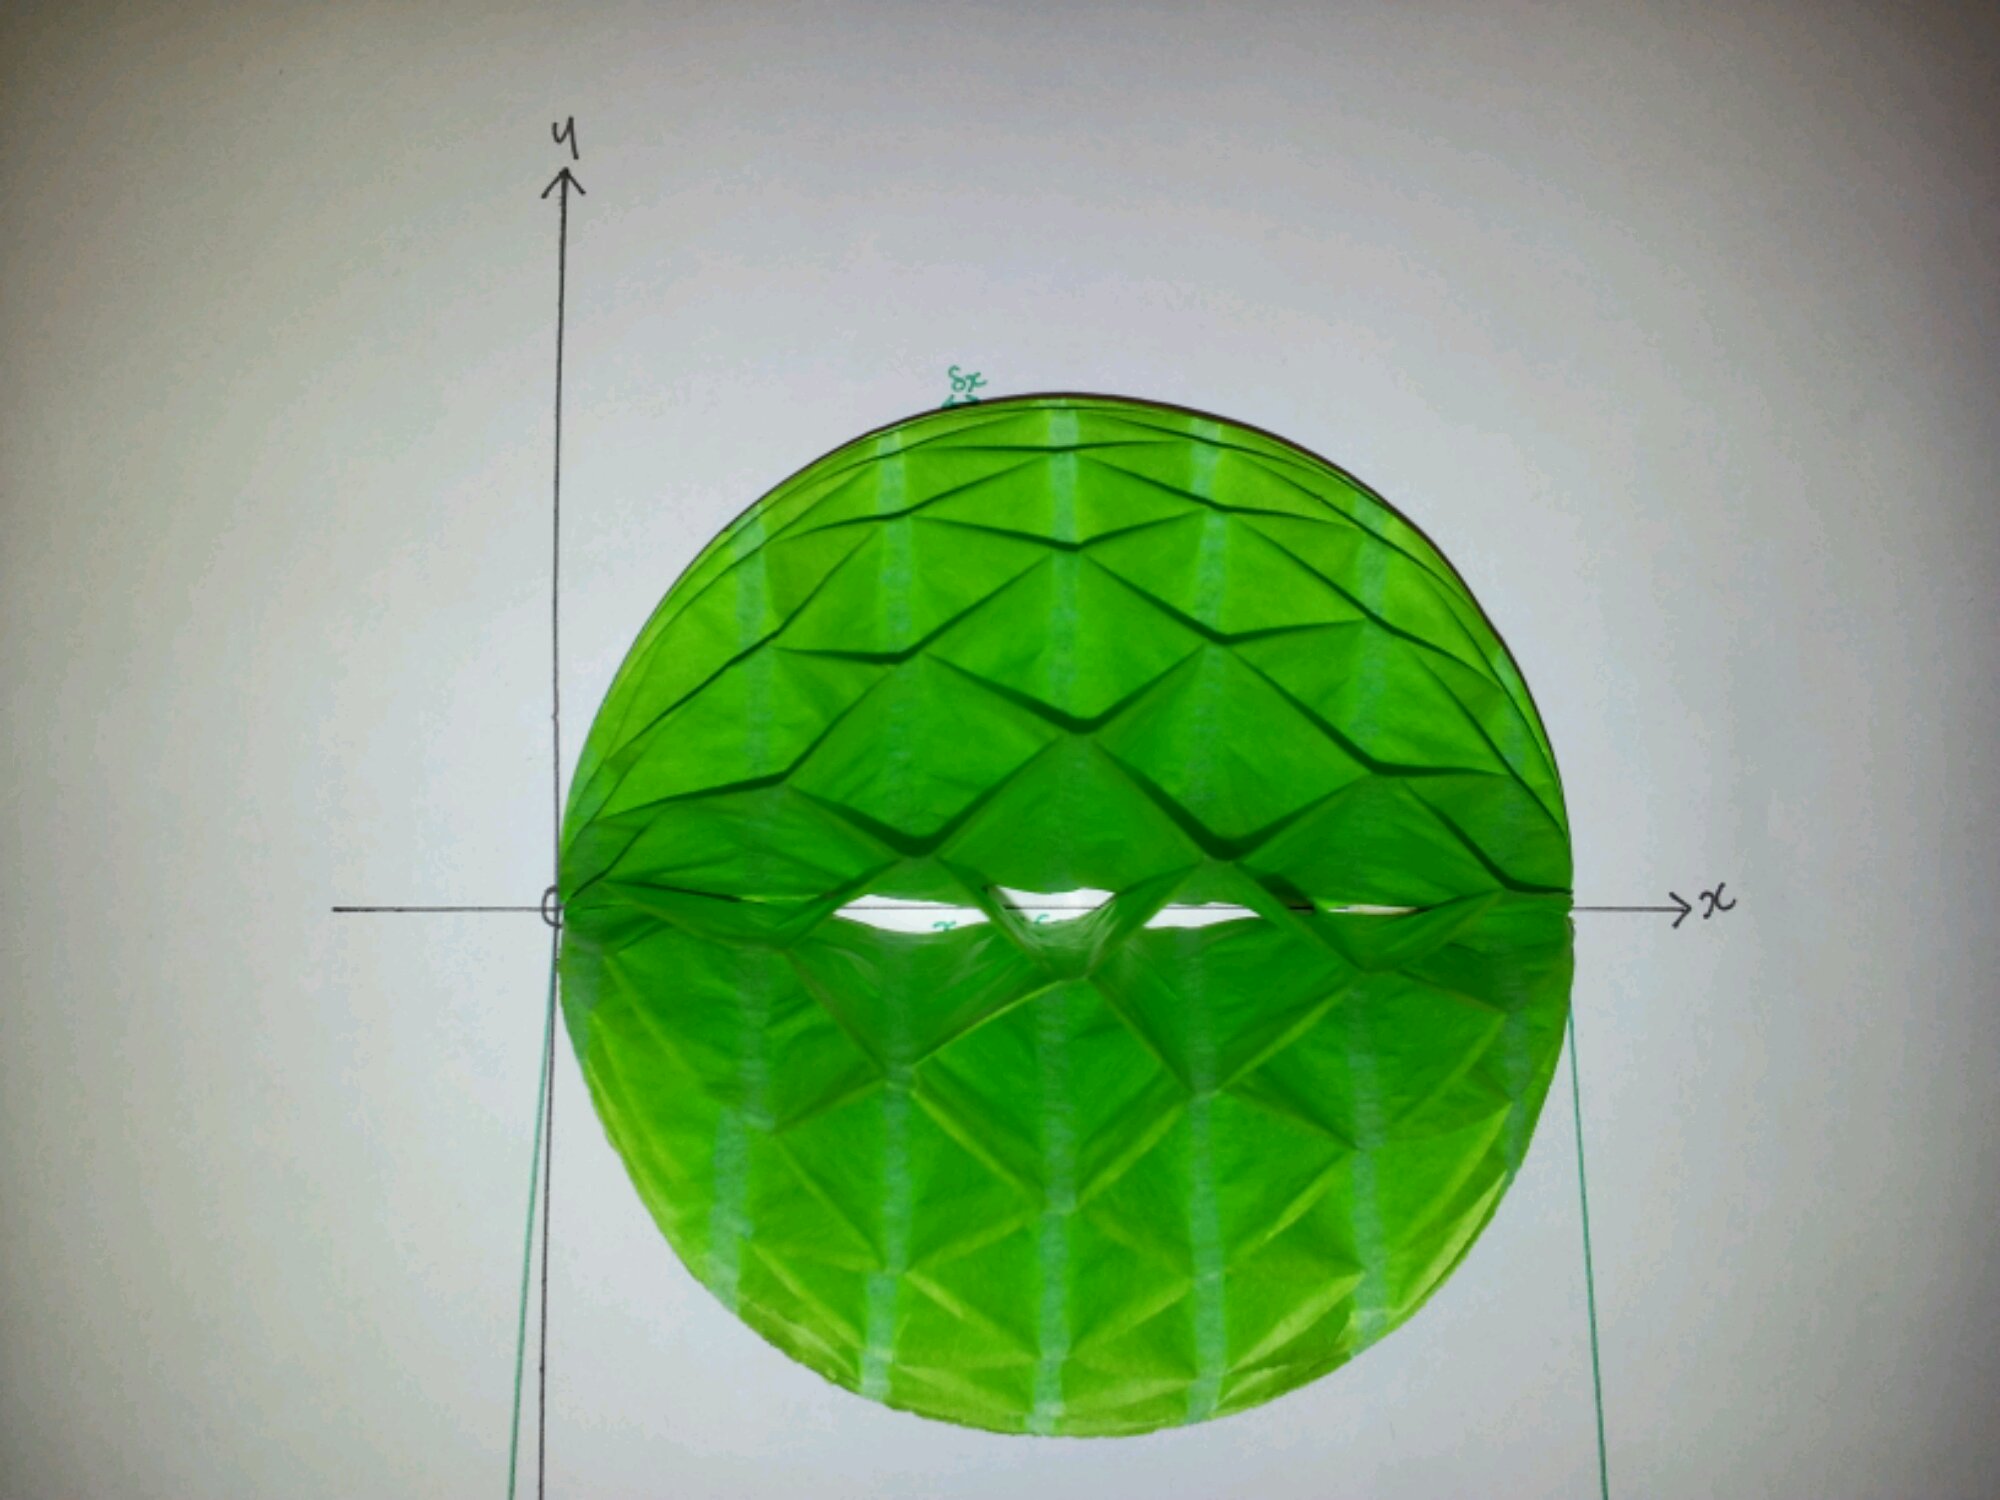
This innocent looking shape is a pop up gift tag:

image

You can demonstrate what happens if the curve rotates 180 degrees around the x-axis.

Step 3
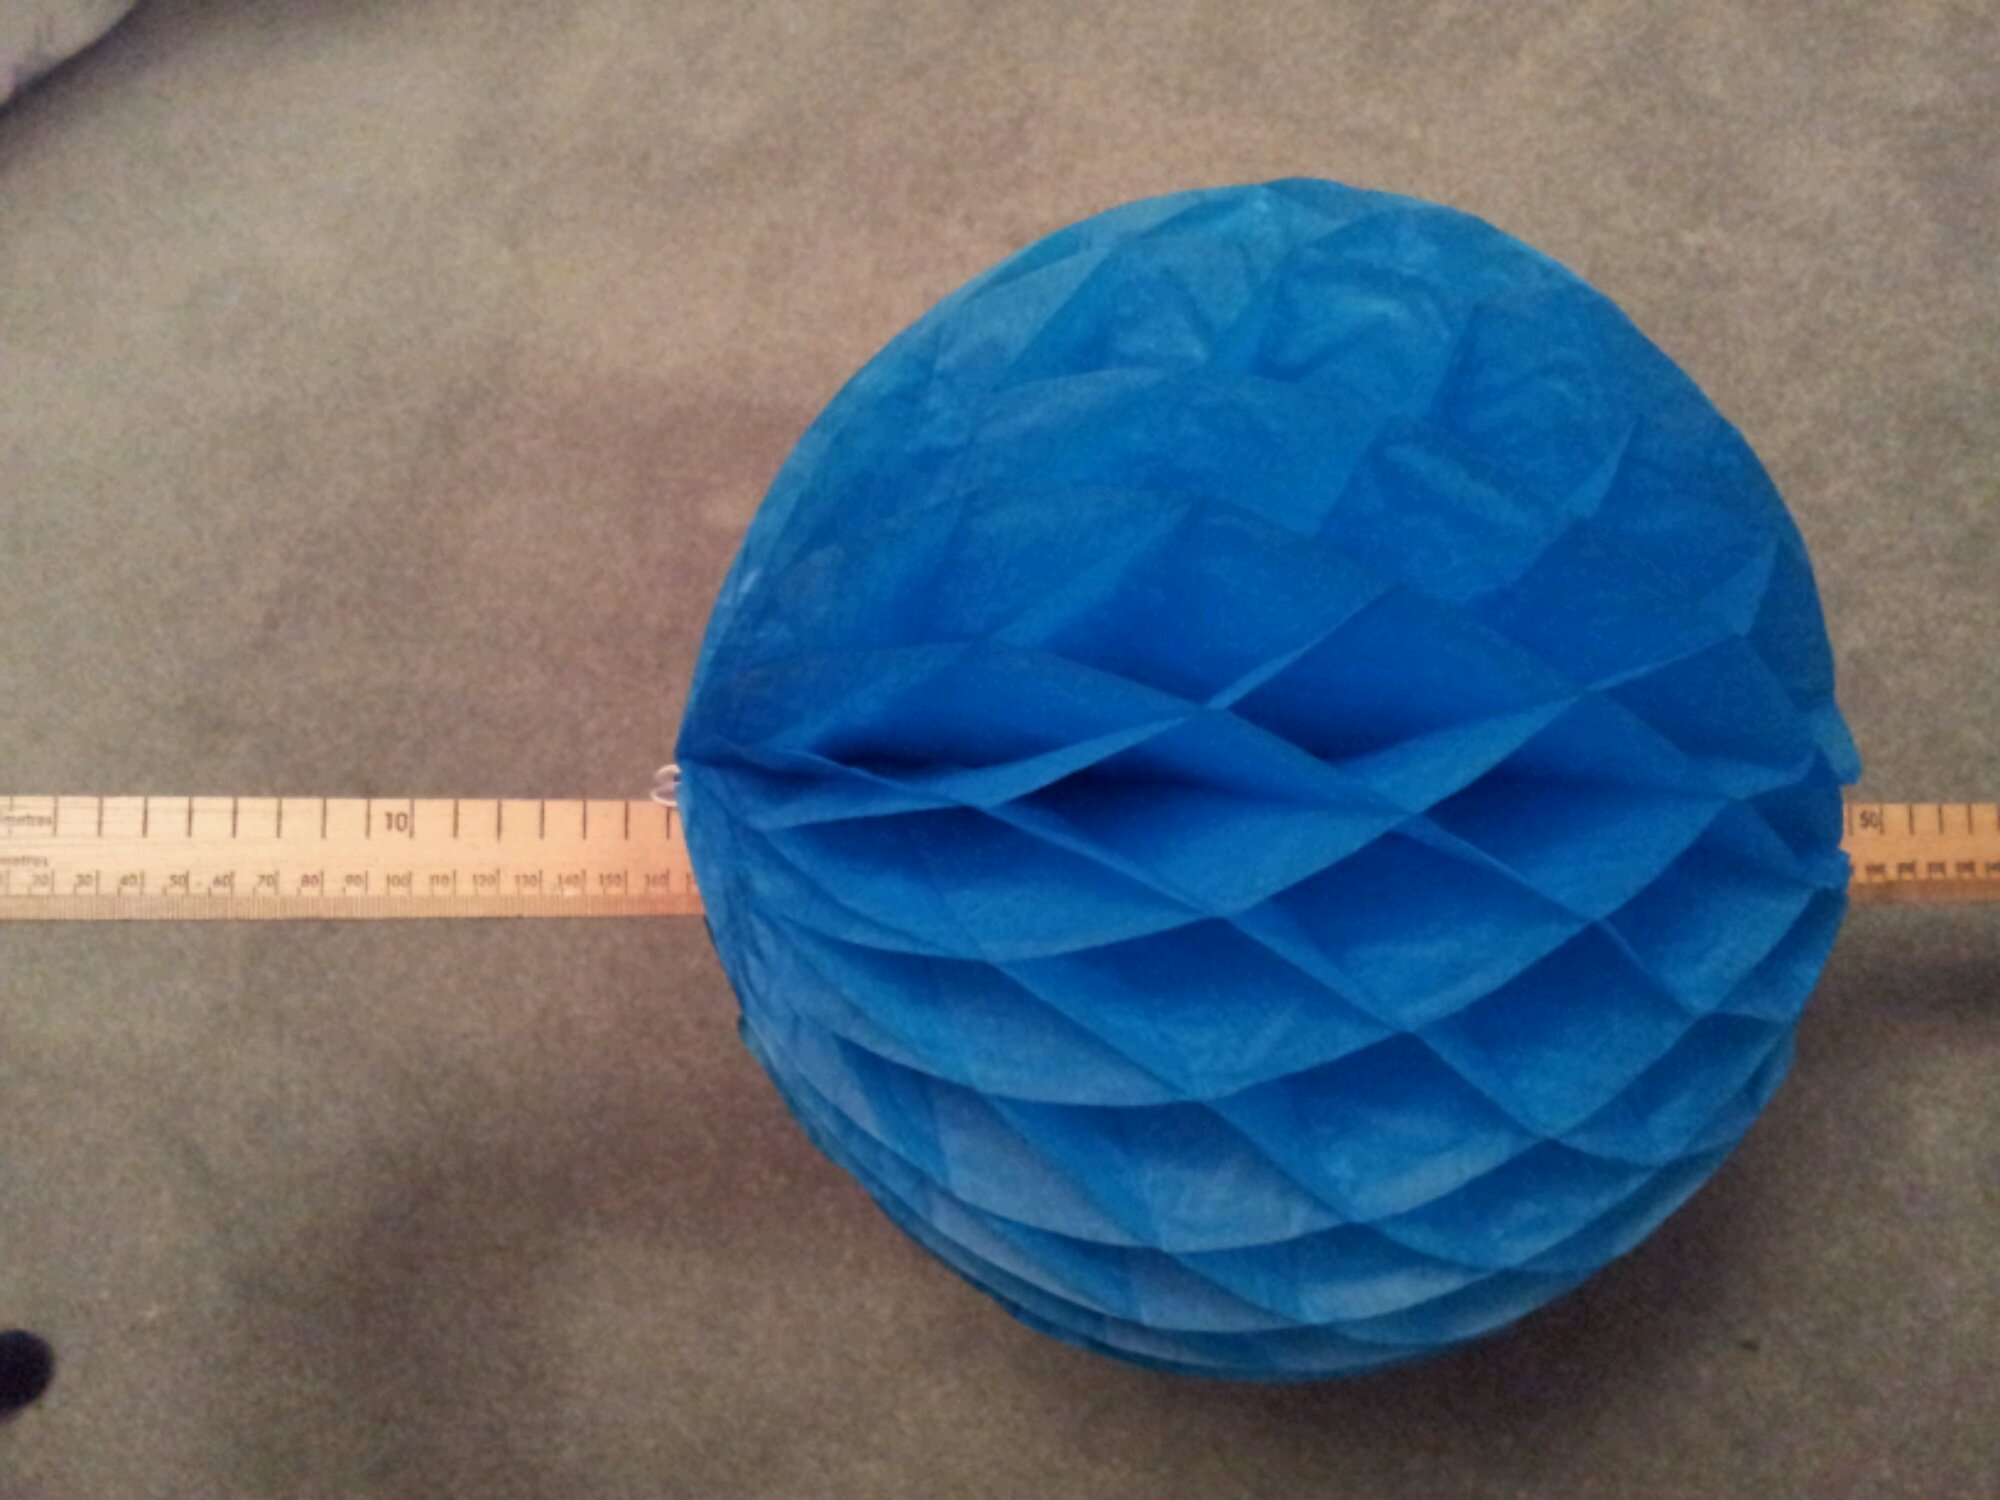
Now the really fun bit: dig out those interesting honeycomb christmas decorations, a metre stick and some tape:
image

The metre stick represents the scale on the x axis. The decoration represents the full 360 degree revolution about the axis.

Hint
Since these decorations are made from paper and card. You can use a sturdy craft knife to cut them into other curves. They also make great wall displays.

203. Sunny Surd Sunflower

Today we have a guest contributor to the Sandpit – my colleague BH.

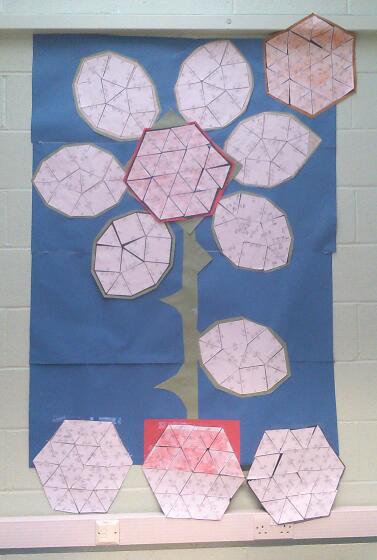
His Year 9 class have been studying Surds. They have just completed two particularly difficult Tarsia puzzles on simplifying surds. He celebrated their success by getting the class to create a ‘Sunny Surd Sunflower’ – what a great way to celebrate springtime and achievement.

image

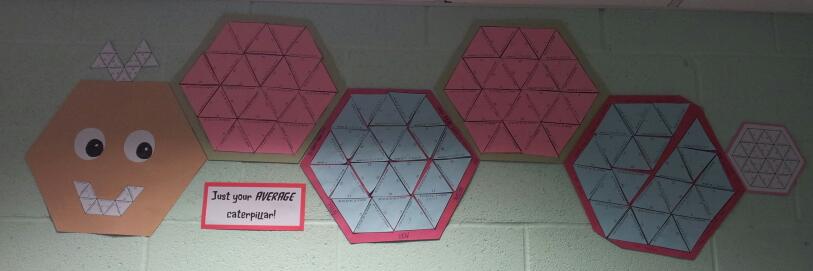
UPDATE: Inspired by the bright sunflower, my class created an AVERAGE caterpillar!

image

202. Curling your A-Level

Whilst watching the Winter Olympics it occurred to me that the sport of curling would be an excellent discussion starter for teaching the motion of particles, momentum & impulse.

  • The motion of the curling stone on ice relates to F=ma.
  • The moment the player pushes off the hack, whilst still pushing the stone relates to the motion of connected particles.
  • The collision of stones relates to momentum and impulse.
  • The action of the sweeper changes the friction.

On YouTube I discovered this physics video by NBC Learning. They have many videos explaining the Science of the Winter Olympics.

I  pulled my ideas together in this Prezi, which allows plenty of student discussion: the task is blank for your own resource as I used a textbook.

201. BBC Crispies

There was an interesting discussion on the BBC Breakfast programme this morning about the exchange of maths teaching ideas between British and Chinese teachers.

The guests on the sofa were from the NCETM and a serving Head of Maths. There was mention of the innovative ideas used to teach Maths in Britain – including some of mine. I’m not being presumptive, I happen to know that Head of Maths – in fact some of his ideas are on this site (JDs Tree Diagrams). So just in case you missed Breakfast, here is some Cake.


200. Website/Resource of the week 4

Wow! This is proper blog post number 200. How should I mark this occasion? Why, by recommending another splendid site of course!

To quote the folks themselves: JustMaths is born from the passion and spirit of three full time teachers at the “most improved school in England” (January 2013).

The site has both free and subscription resources. The latest initiative is the ‘Bread & Butter’ worksheets. It consists of straight-forward starter worksheets to practice essential skills for students: Just Maths: Bread & Butter. My class use them every lesson and I’ve noticed a real improvement in their confidence and quality of solutions in just two weeks.

199. Video of the week: Constructing Pentagons

I came across this video whilst looking for 3D construction ideas for a 7 year olds homework. It is a very easy to follow video explaining how to construct a pentagon using a ruler, pencil anda  pair of compasses. When I say easy, I mean it. The voiceover is in Spanish and all my knowledge of Spanish comes from watching ‘Dora the Explorer’ with the children – and I still understood how to do this.

Not only will it help pupils improve their fine motor skills using compasses, you could also ask more able students why it works. You could also ask Spanish speakers to translate!