Monthly Archives: September 2013

129. A pie without a stab wound

A pie? Without a stab wound? What craziness is this?

image

From a cook’s perspective this pie divider is a great way to cut pie and not stab yourself. Google ‘pie divider’ for other genius/bonkers ideas.

But … back to school:

Imagine you are teaching pie charts. You’ve discussed what they are about, how to calculate angles, you may even have used the earlier blog post on Human Pie Charts. The class settle down to apply all their knowledge, when the floodgates open:

  • ‘What’s that thingy you draw circles with?’
  • ‘My pencil doesn’t fit in my compasses?’
  • ‘I haven’t got a compass.’ (Do you mean pair of compasses?)
  • ‘I did have a compass (!), but Mr X took it off me in Y.’ (Why?) ‘ I was stabbing Z with it!’
  • ‘My compasses keep going wiggly’
  • ‘I’ve made a hole in my book’
  • ‘I forgot to mark where I put the point bit’
  • …..etc

By the time all this is sorted out, all their shiny new knowledge has shrivelled away.


A helping hand

To assist with this issue, I’ve put together an A4 sheet of 6 piechart templates that you could enlarge on a copier. They’ll get you through the first pie-chart drawing lesson and set you up for
Round 2
:

‘You know that pointy thing you told us to bring to this lesson and I even wrote it in my homework planner well I had one in my new geometry set aren’t you impressed that I finally bought one but my mum said I had to lend it to my brother for his test and he’s only just given it back and he’s wrecked it and he said he’ll get me a new one but he doesn’t get paid until next Saturday and he’ll forget but that’s the reason …I haven’t got a compass(!) today.

128. Book of the Week 1

If you haven’t had a chance to take part in the rather excellent ‘How to Learn Maths’ online course at Stanford University, led by Jo Boaler – don’t worry!


Get reading the rather brilliant book ‘The Elephant in the Classroom’ instead. You’ll find yourself going ‘Yes, I know what you mean!’, ‘I’d never thought of that …’ and ‘I need to try this out’, before you’ve even finished it.


127. How to save money

A nice easy question to start the term with:

image

You go to the supermarket to buy your favourite shower gel (or other product). It usually costs £2.99. You have three £1 coins ready, when you notice the price has temporarily been reduced to £1.

What is the most money you can save?

Hint: Think of future gain

Solution:
It’s not the obvious £1.99 saved – that is instant gratification.

It is actually better to buy 3 bottles:

Saving = Actual price x 3 – Reduced price x 3

Saving = £2.99 x 3 – £1 x 3 = £8.97 – £3 = £5.97

If you spent the whole £3 (which is one bottle plus one pence), you get a long term saving which is worth far more, for just 1p more.

Teaching the concept of delayed benefit is rather useful, especially if you are trying to encourage open investigations or looking at time spent on personal revision.

126. Kusudama to meet you

Wow … September again and many people will be meeting new faces for the first time. Learning names, setting out classroom rules, figuring out who’s got all the textbooks you need …

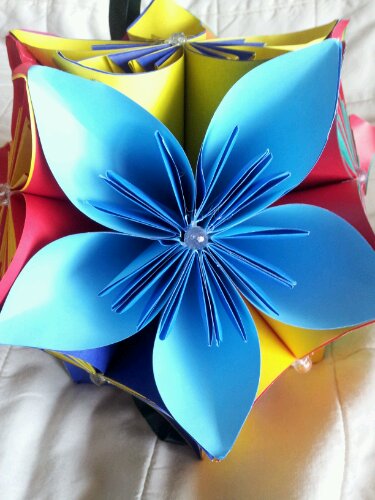
image Made using origami paper.

Back in July I made Kusudama flower balls with a couple of classes. It occurred to me then what a great ice-breaker they could be. They’d also be a nice maths club project.

Definition of Kusudama from Wikipedia

The Japanese kusudama (薬玉; lit. medicine ball) is a paper model that is usually (although not always) created by sewing multiple identical pyramidal units (usually stylized flowers folded from square paper) together through their points to form a spherical shape. Alternately the individual components may be glued together. Occasionally, a tassel is attached to the bottom for decoration.
Resources

You will need:

  • 5 squares of paper for a flower
  • 12 flowers for a ball
  • 60 squares of paper in total (sugar paper is cheap, but doesn’t tape together well)
  • String if you wish to hang it up
  • Card if you wish to mount a half ball on the wall
  • Sticky stuff: glue sticks or glue dots or pva glue or tape or a hot glue gun – whatever works for you!
  • Beads or ribbon for decoration (optional)

Activity

It has an instructional video and very clear step by step photographs. It’s so easy a six year old can (and did) do it!
image
  1. The instructions assume 30 pupils in a class. Let each pupil make a petal following the step by step instructions and then independently make another (2 petals each).
  2. Pupils pair up and stick two petals together (1 petal each and 1 pair stuck together).
  3. Pairs team up with another pair and stick their pairs together (1 petal each and 4 petals stuck together).
  4. One person in the four uses their extra petal to complete the flower – that person is in charge of the flower ( three people with 1 petal, one person with a flower).
  5. Flower pupils form a group and start sticking their flowers together.
  6. Petal pupils work with new people in groups of 5 and create another flower.
  7. Eventually 12 flowers are completed and stuck together.


Notes:

  • String should be firmly attached before the ball is complete.
  • It is advisable to staple a half ball to card or the wall to prevent it collapsing.


Thank you to @c0mplexnumber for the original inspiration for this activity.

Have fun folks!