Author Archives: admin

351. No more glue sticks

Apologies for the infrequent blog posts. Life happens.

I thought I’d share an inspired idea that I saw on Twitter. AJSmith (@MrSmithRE) shared this brilliant video on how to efficiently use hole punched exercise books.

Hole punching exercise books

I converted to using A4 exercise books with Year 11 in September and the improvement was amazing. From low ability students who wanted to bin their Year 10 notes (Do I have to keep them?), to so much pride in their work that they are still using their A4 exercise books for personal study and revision whilst on study leave.

Now I’ve seen this video on tagging notes together, this could be a game changer. Fewer sheets stuck in means fewer pages filled with stuck in sheets, which means the books will last longer. So the Department saves on the cost of both glue sticks and exercise books. Those infuriating students who seem incapable of sorting out their books have got one less excuse now.

I plan on using this with my new Year 10 class in September – they are the exact opposite of my previous GCSE group, so this should make for an interesting comparison. I’ll feedback how it goes.

Now go and watch that video and start saving for an industrial strength hole punch.

347. Maximising space

As you start to plan the layout of your (new) classroom, I have a handy little tip for you. It’s really useful to have key dates up in the room, but where to put them. Print them out and you lose valuable wall display space, odds are you’ll forget to update it during the year. Put it on the whiteboard and you risk some scamp (or over enthusiastic colleague) wiping them off the board.

How about a blackboard?

This is sticky back blackboard vinyl that you can get very cheaply from places like ‘The Works’ or Amazon. You can cut it to size and put it on any flat surface. I’ve put it on the back of my desk and used chalk pens. Once they dry they take some effort to remove.

Students have already noticed it and have said they like having a big picture of what’s going on next term.

346. Area & Volume conversion

This is a quick post on how I teach metric unit conversion for area and volume. All you need is a big whiteboard and coloured board pens.

Start by stressing that all diagrams are not to scale/accurate.

Two colours

  1. Draw a square on the board
  2. Pen colour 1: Label it as 1cm
  3. What is the area? Show the calculation
  4. What is 1cm in mm?
  5. Pen colour 2: Label it as 10mm
  6. What is the area in mm? Show the calculation
  7. What is the scale factor between the sides? the area? why?


Three colours

  1. Draw a square on the board
  2. Pen colour 3: Label it as 1m
  3. What is the area? Show the calculation
  4. What is 1m in cm?
  5. Pen colour 2: Label it as 100cm
  6. What is the area in cm? Show the calculation
  7. What is the scale factor between the sides? the area? why?
  8. Repeat in pen colour 1 for mm

Four colours

Well not actually four colours – pens 2,3 & 4 only. Repeat the process for kilometres to metres and centimetres.

Volume – same process, just three dimensions

Why all the colours?

By coding each unit of measurement with a colour students can see the progression of the calculations and the links between area/volume and scale factor. After all, an okay mathematician can reproduce memorised facts, but a great mathematician doesn’t need to memorise – they understand where the calculations came from.

343. Butterflies, dreams and stories: How to say goodbye

It’s finally here. My Y11 form group are going on study leave next week. I’ve been their tutor since the summer of Y8. They really are a lovely bunch of students. I’ve been planning their goodbye for some time.

Dreams

Since Year 9 I’ve periodically given out “100 things I want to do with my life” sheets. I found the image on Pinterest. They’ve added their aspirations over the years. Some are more detailed than others, depending how seriously they took it.

Butterflies

Inspired by the origami of Clarissa Grandi and her amazing website, at the start of Year 10 each student made a butterfly. Each student wrote a hope or dream or positive message on a coloured luggage tag. They attached the luggage tag to their butterfly and I put them up on the wall. They’ve been there ever since.

Stories

I wrote a silly story with every students’ name included. Some are obvious, some are sneaky.

Finally

I put each ‘bucket list’ back to back with the story, then laminated them (if students want to add to their lists they can just use a permanent markers). Each laminated sheet was rolled up and secured with a cheap hair elastic. I then slipped the luggage tag under the band. They look like graduation scrolls.

All these things could be done in a much shorter period of time. I think they will be a personalised memory of their time at school.

342. Revision jotters

With the exams looming large, I thought I’d share how my class have been revising. To give you some context roughly a third of the class are doing Foundation GCSE, aiming for at least a Grade 4. The rest are doing Higher and aiming for a Grade 5 or better. We have three, one hour, lessons a week. I’m rotating between doing an exam paper, a whole class revision activity (eg a revision clock) and tiered revision.

I know if I tell the students to revise independently the results are going to be mixed. Some will be brilliant, some will be more laid back. To resolve this I pick a topic (or two) from each tier that I know they need to improve on from or that they have requested. It’s helpful if there is a theme to the work. I’ve recently done things like y=mx+c (F) with plotting inequalities (H).

Now the genius part: PixiMaths revision jotters

How to run the session

Photocopy a big stack of revision jotters. If you are doing black and white copying, use the b&w version. We requested the b&w version and, because PixiMaths is awesome, it is now on the website.

Clearly put on the board which topic each tier is revising

Eg Foundation: exact trig values, Higher: trig graphs

Give students 5-10 minutes to fill their revision jotters with everything they know. Have textbooks or maths dictionaries available to fill in the gaps. You may find that Higher students want to do the Foundation topic too – no problem, just make sure they have two jotters. Due to the complexity of the Higher topic, they will need more time to make initial notes.

My students are allowed headphones in revision sessions. At this point it’s headphones in for Higher and out for Foundation.

Do a skills recap on the board (exact trig values), with maybe an exam question too. Students can ask questions on the topic and add to their jotter. Then have a worksheet for students to do eg Corbett Maths or KeshMaths GCSE exam questions booklets. They can refer to their revision jotter or scan the Corbett Maths QR code for extra help.

Swap over. Headphones in for Foundation and out for Higher.

Repeat the process for Higher, with drawing trigonometric graphs. Issue an appropriate worksheet.

Once you’re done, make a judgement call. Are there students who could push it further? Maybe transform a trig graph or problem solve? Go for it. Foundation are busy, Higher are busy, spend some time stretching your most able. Every mark counts.

A huge thank you to PixiMaths for the revision jotters (and everything else).

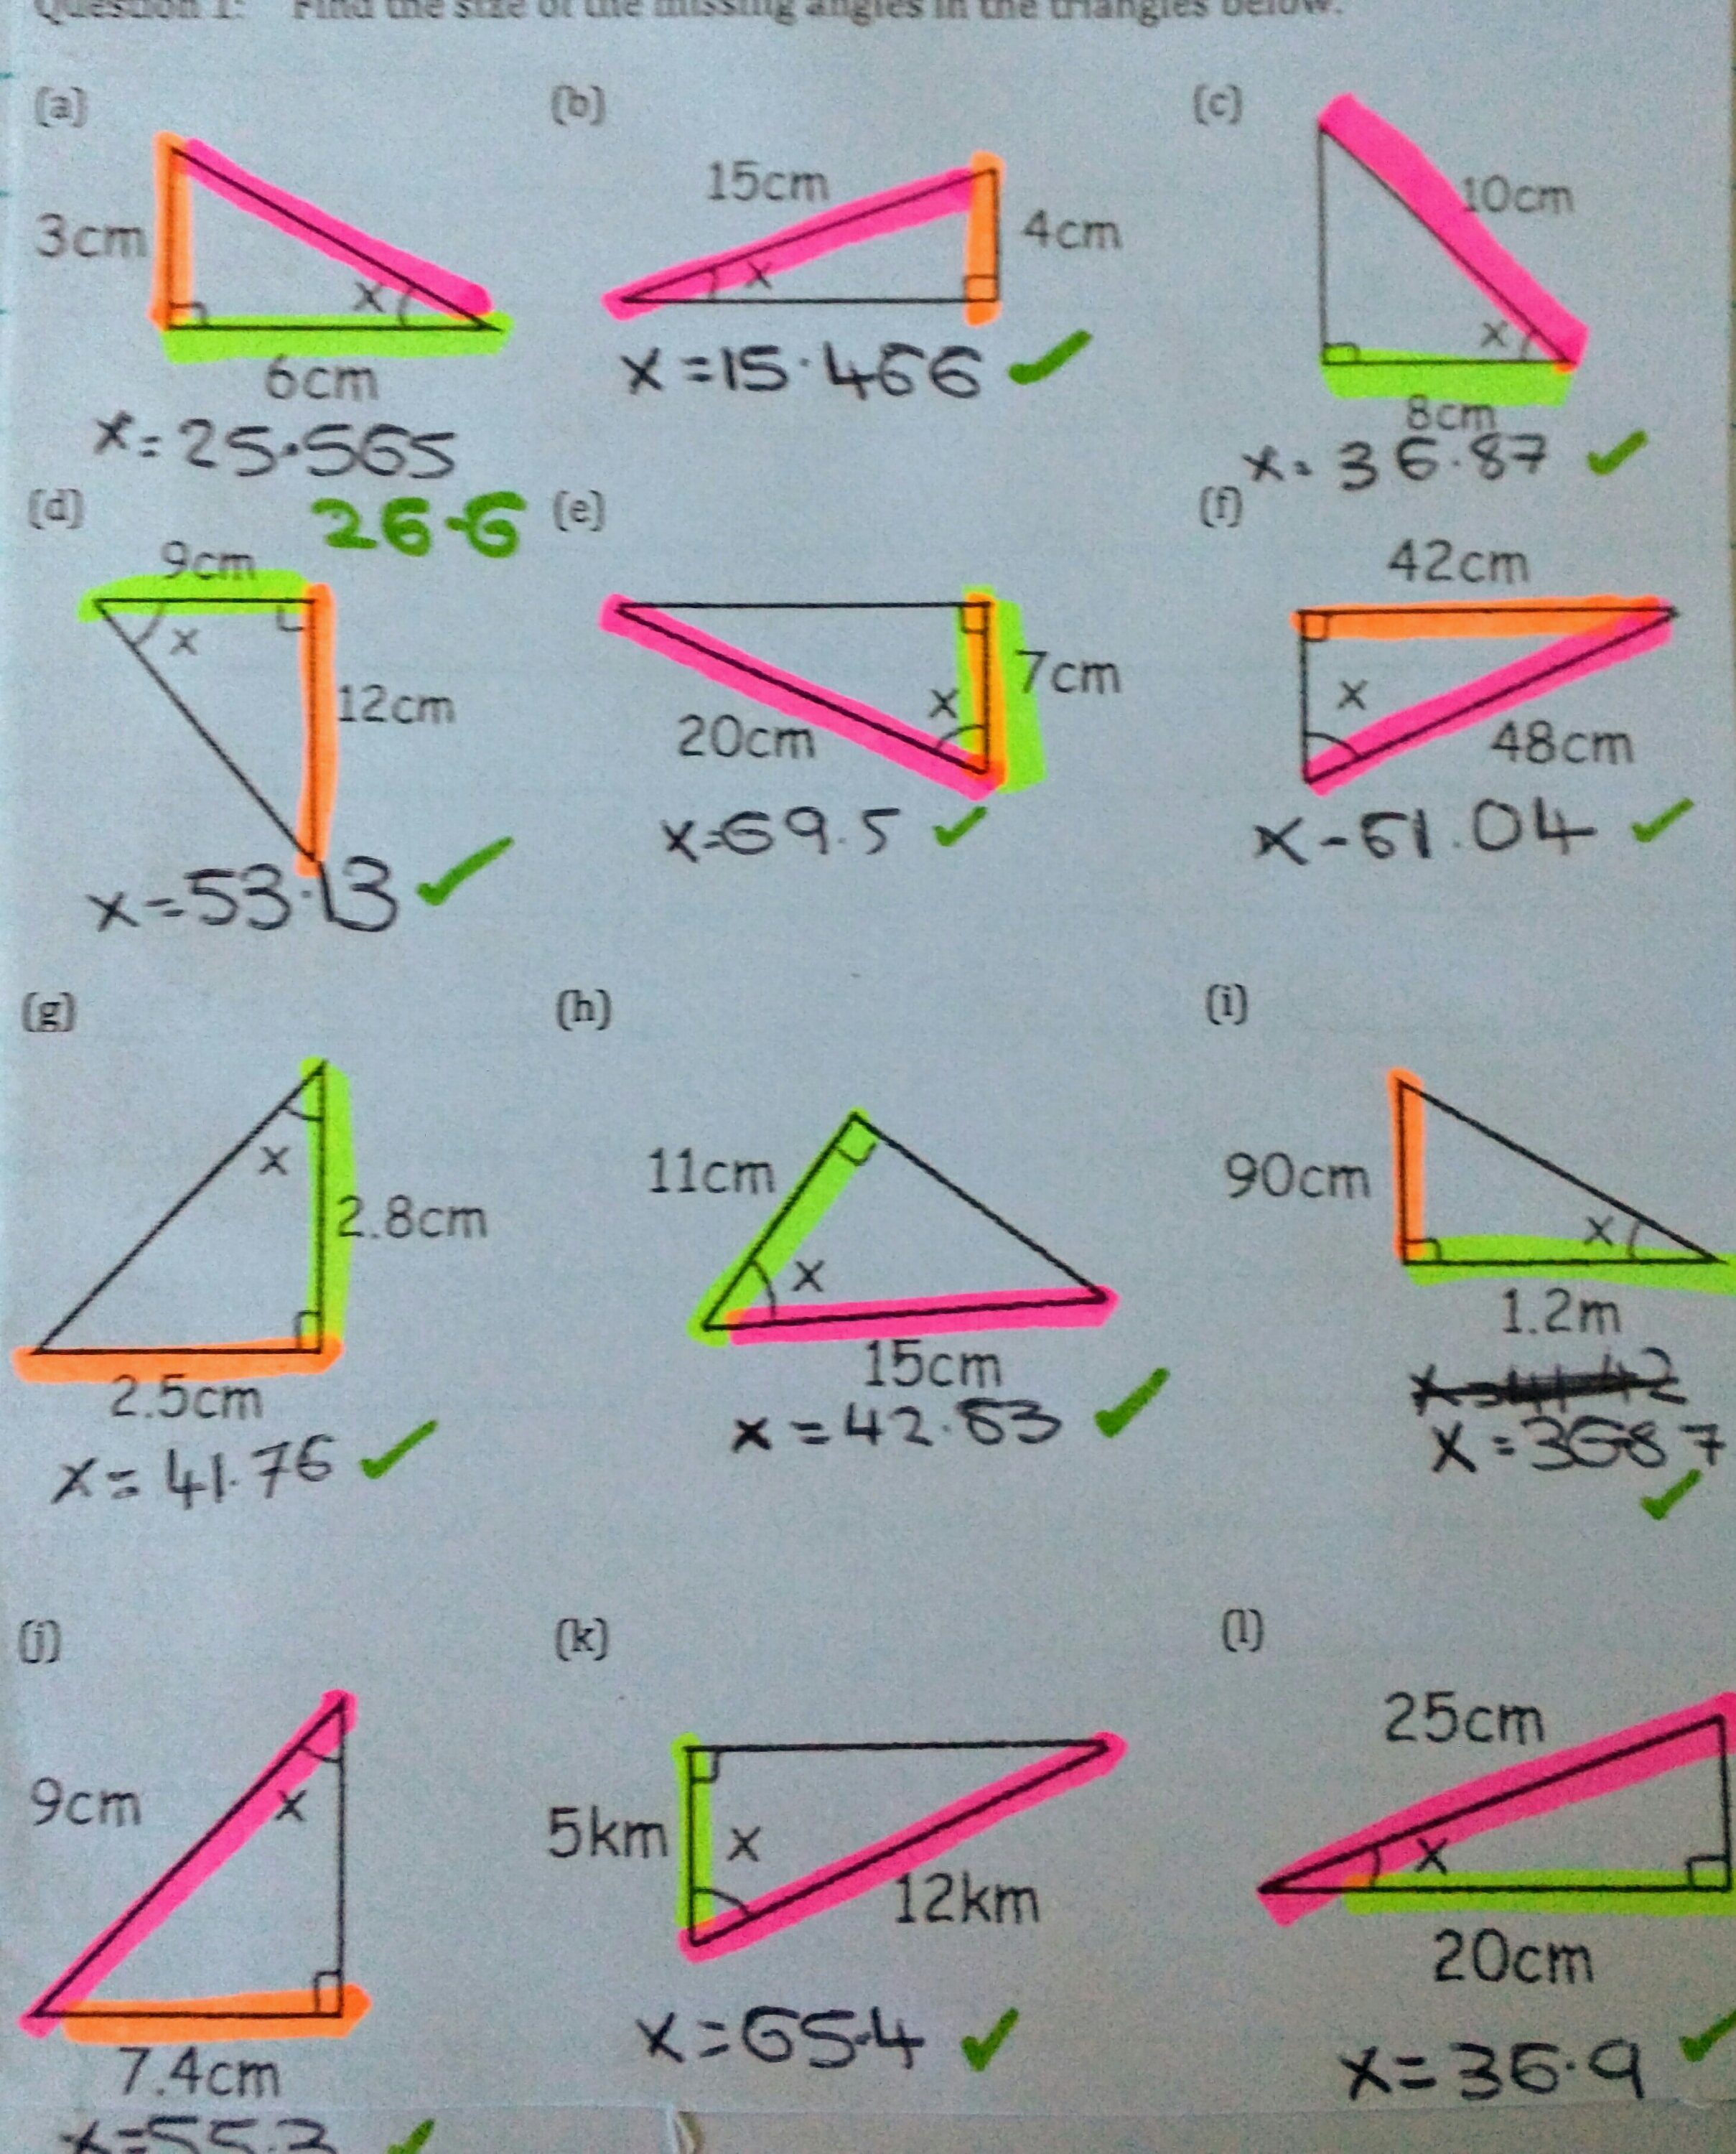
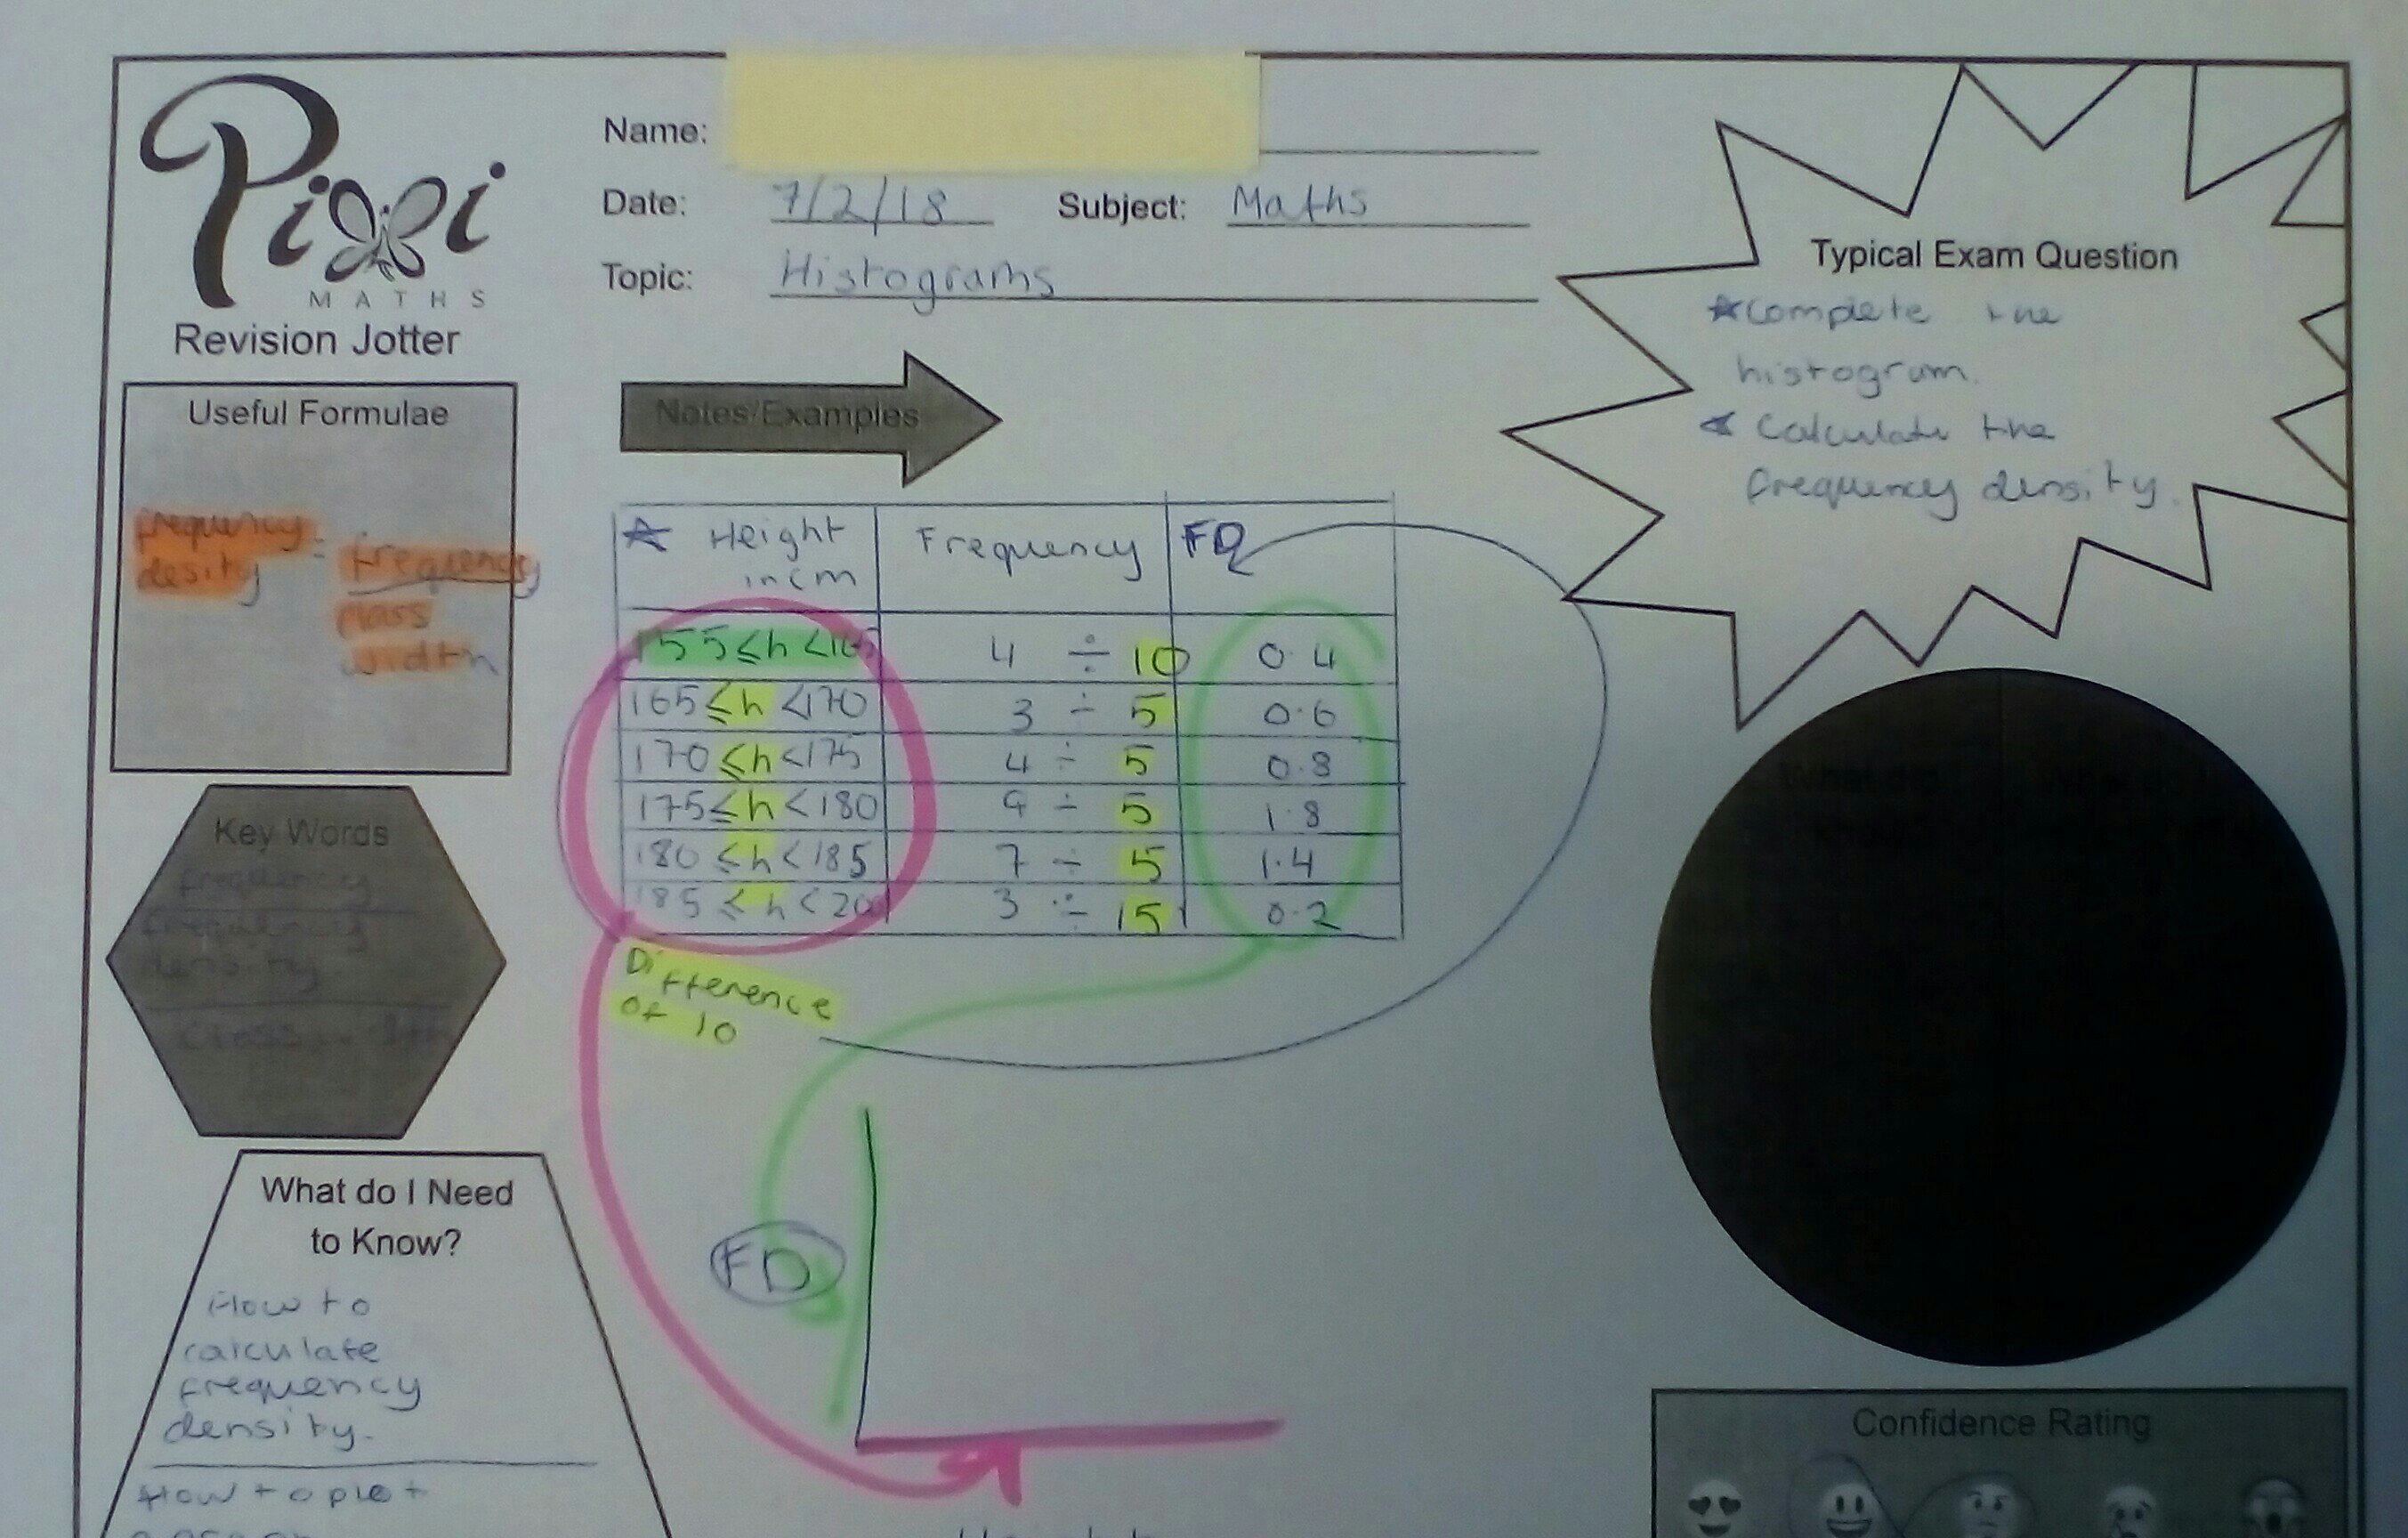
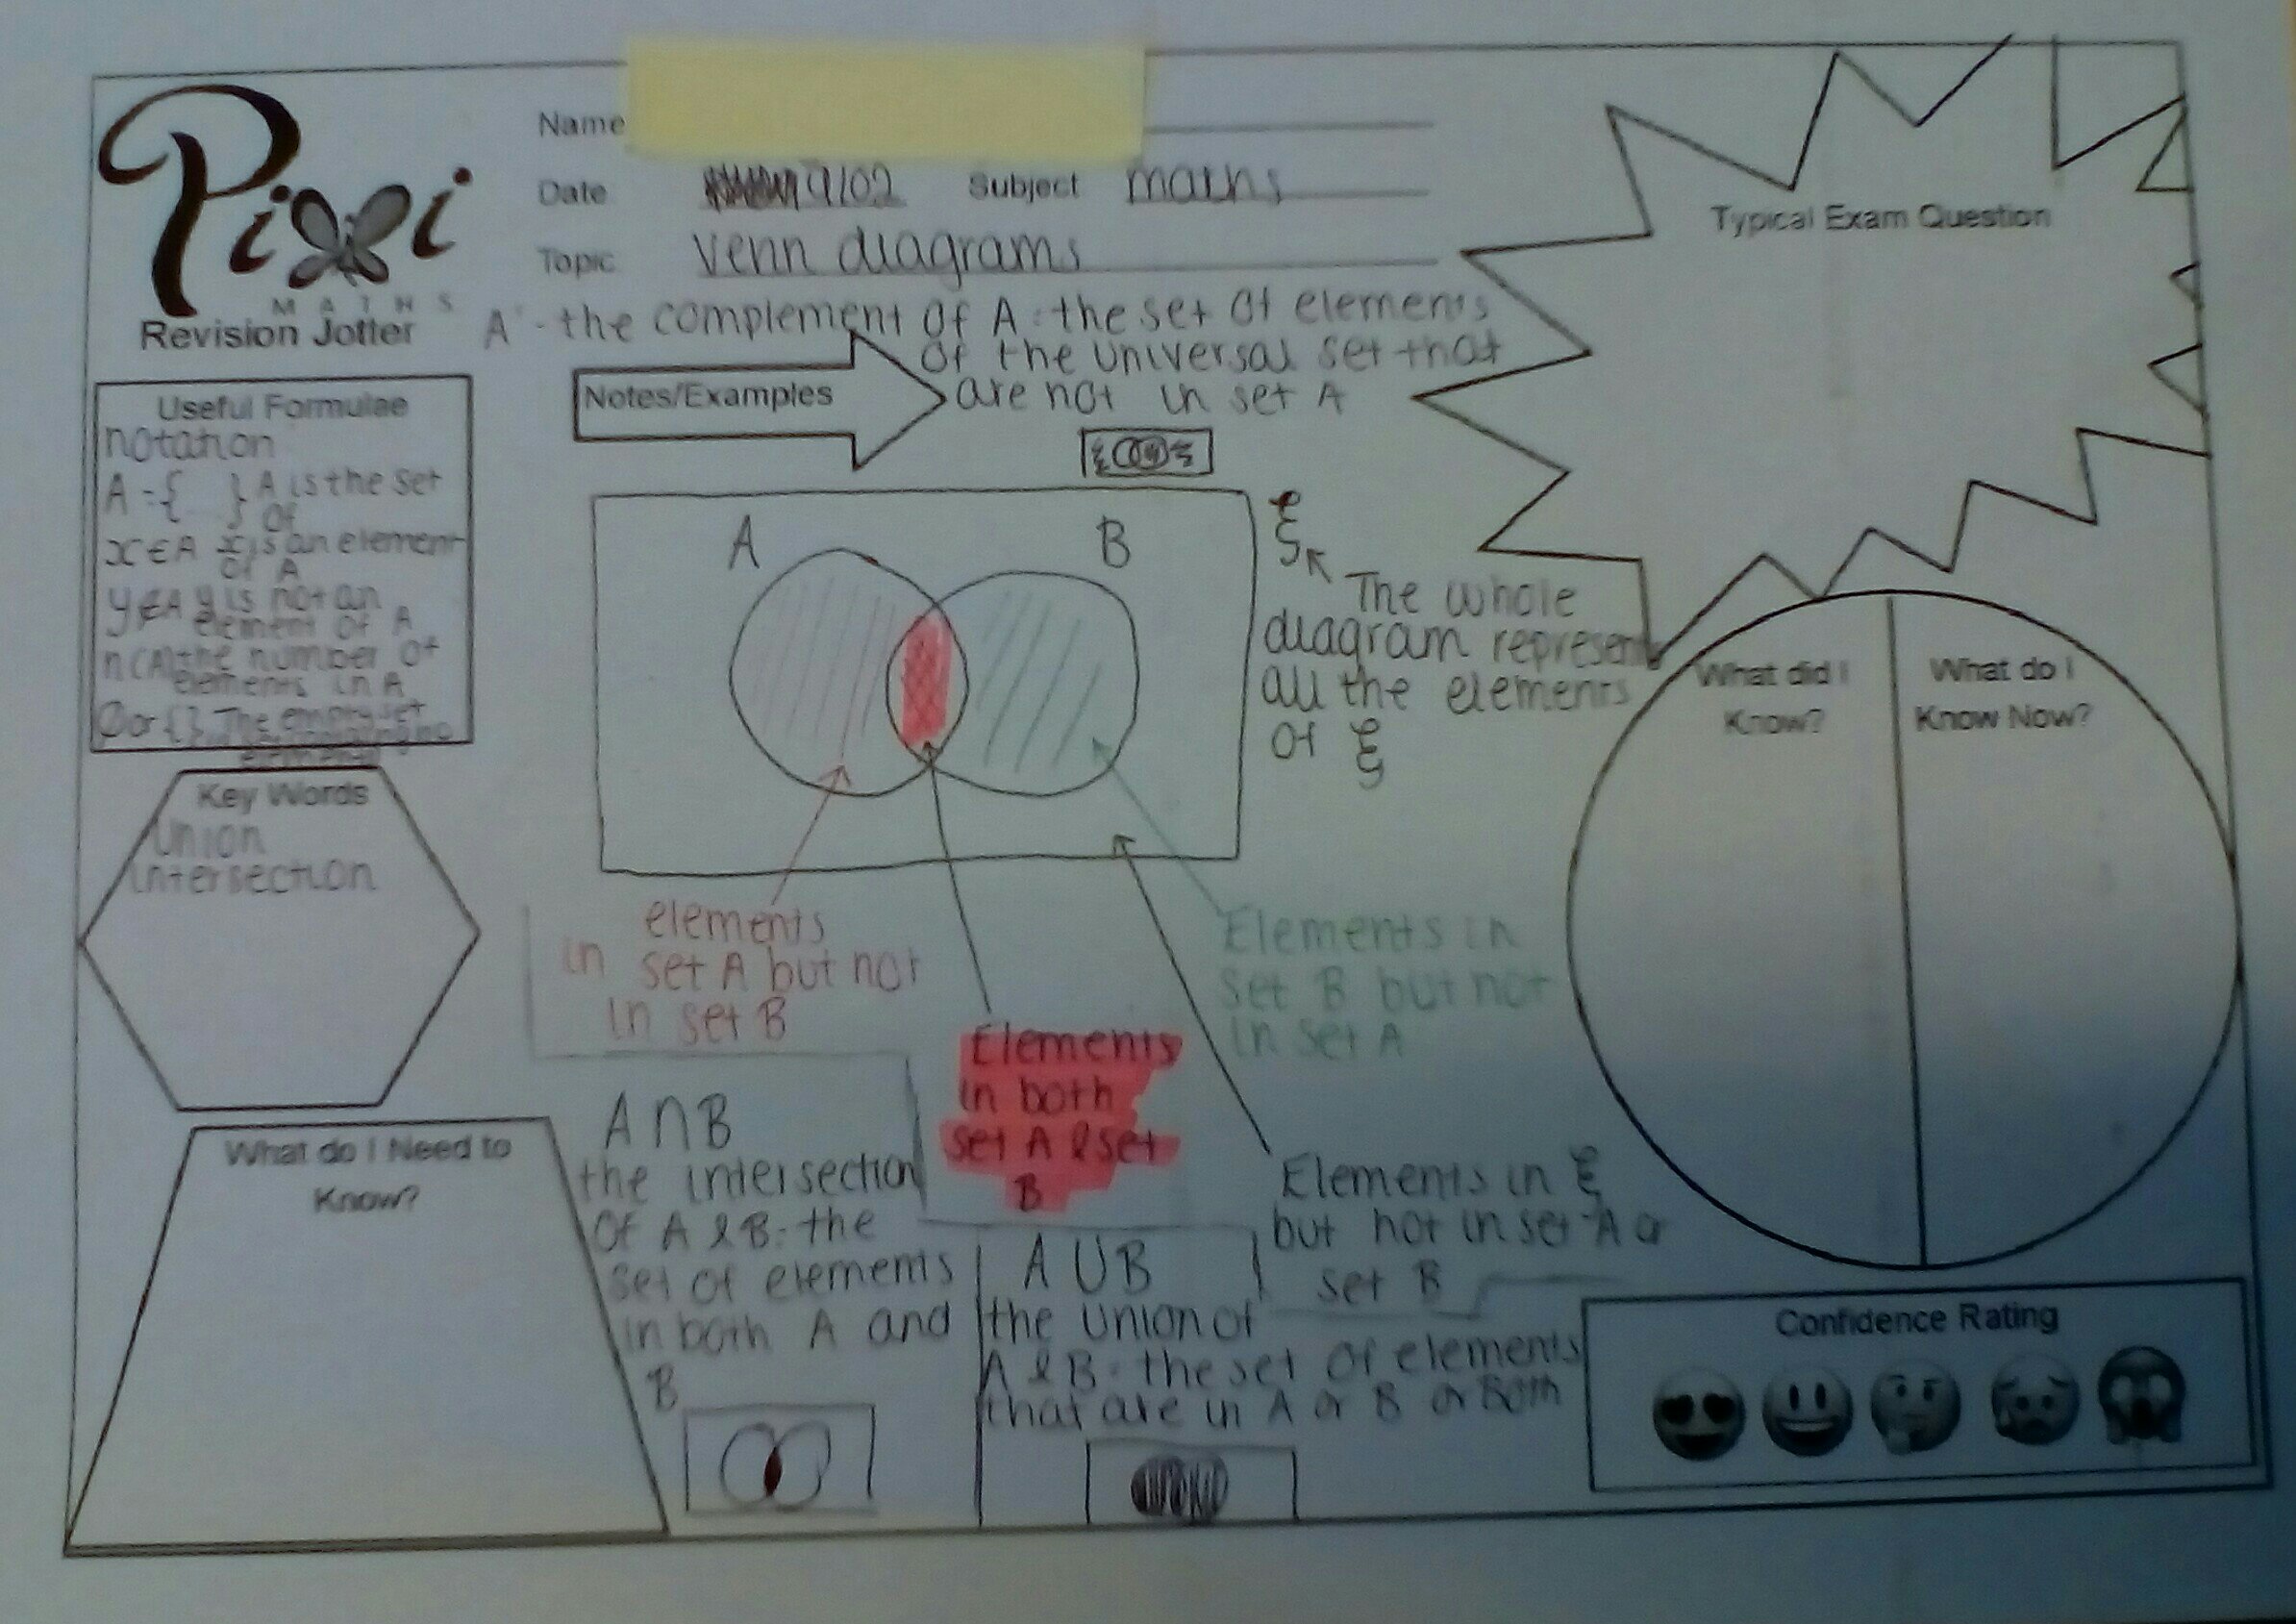
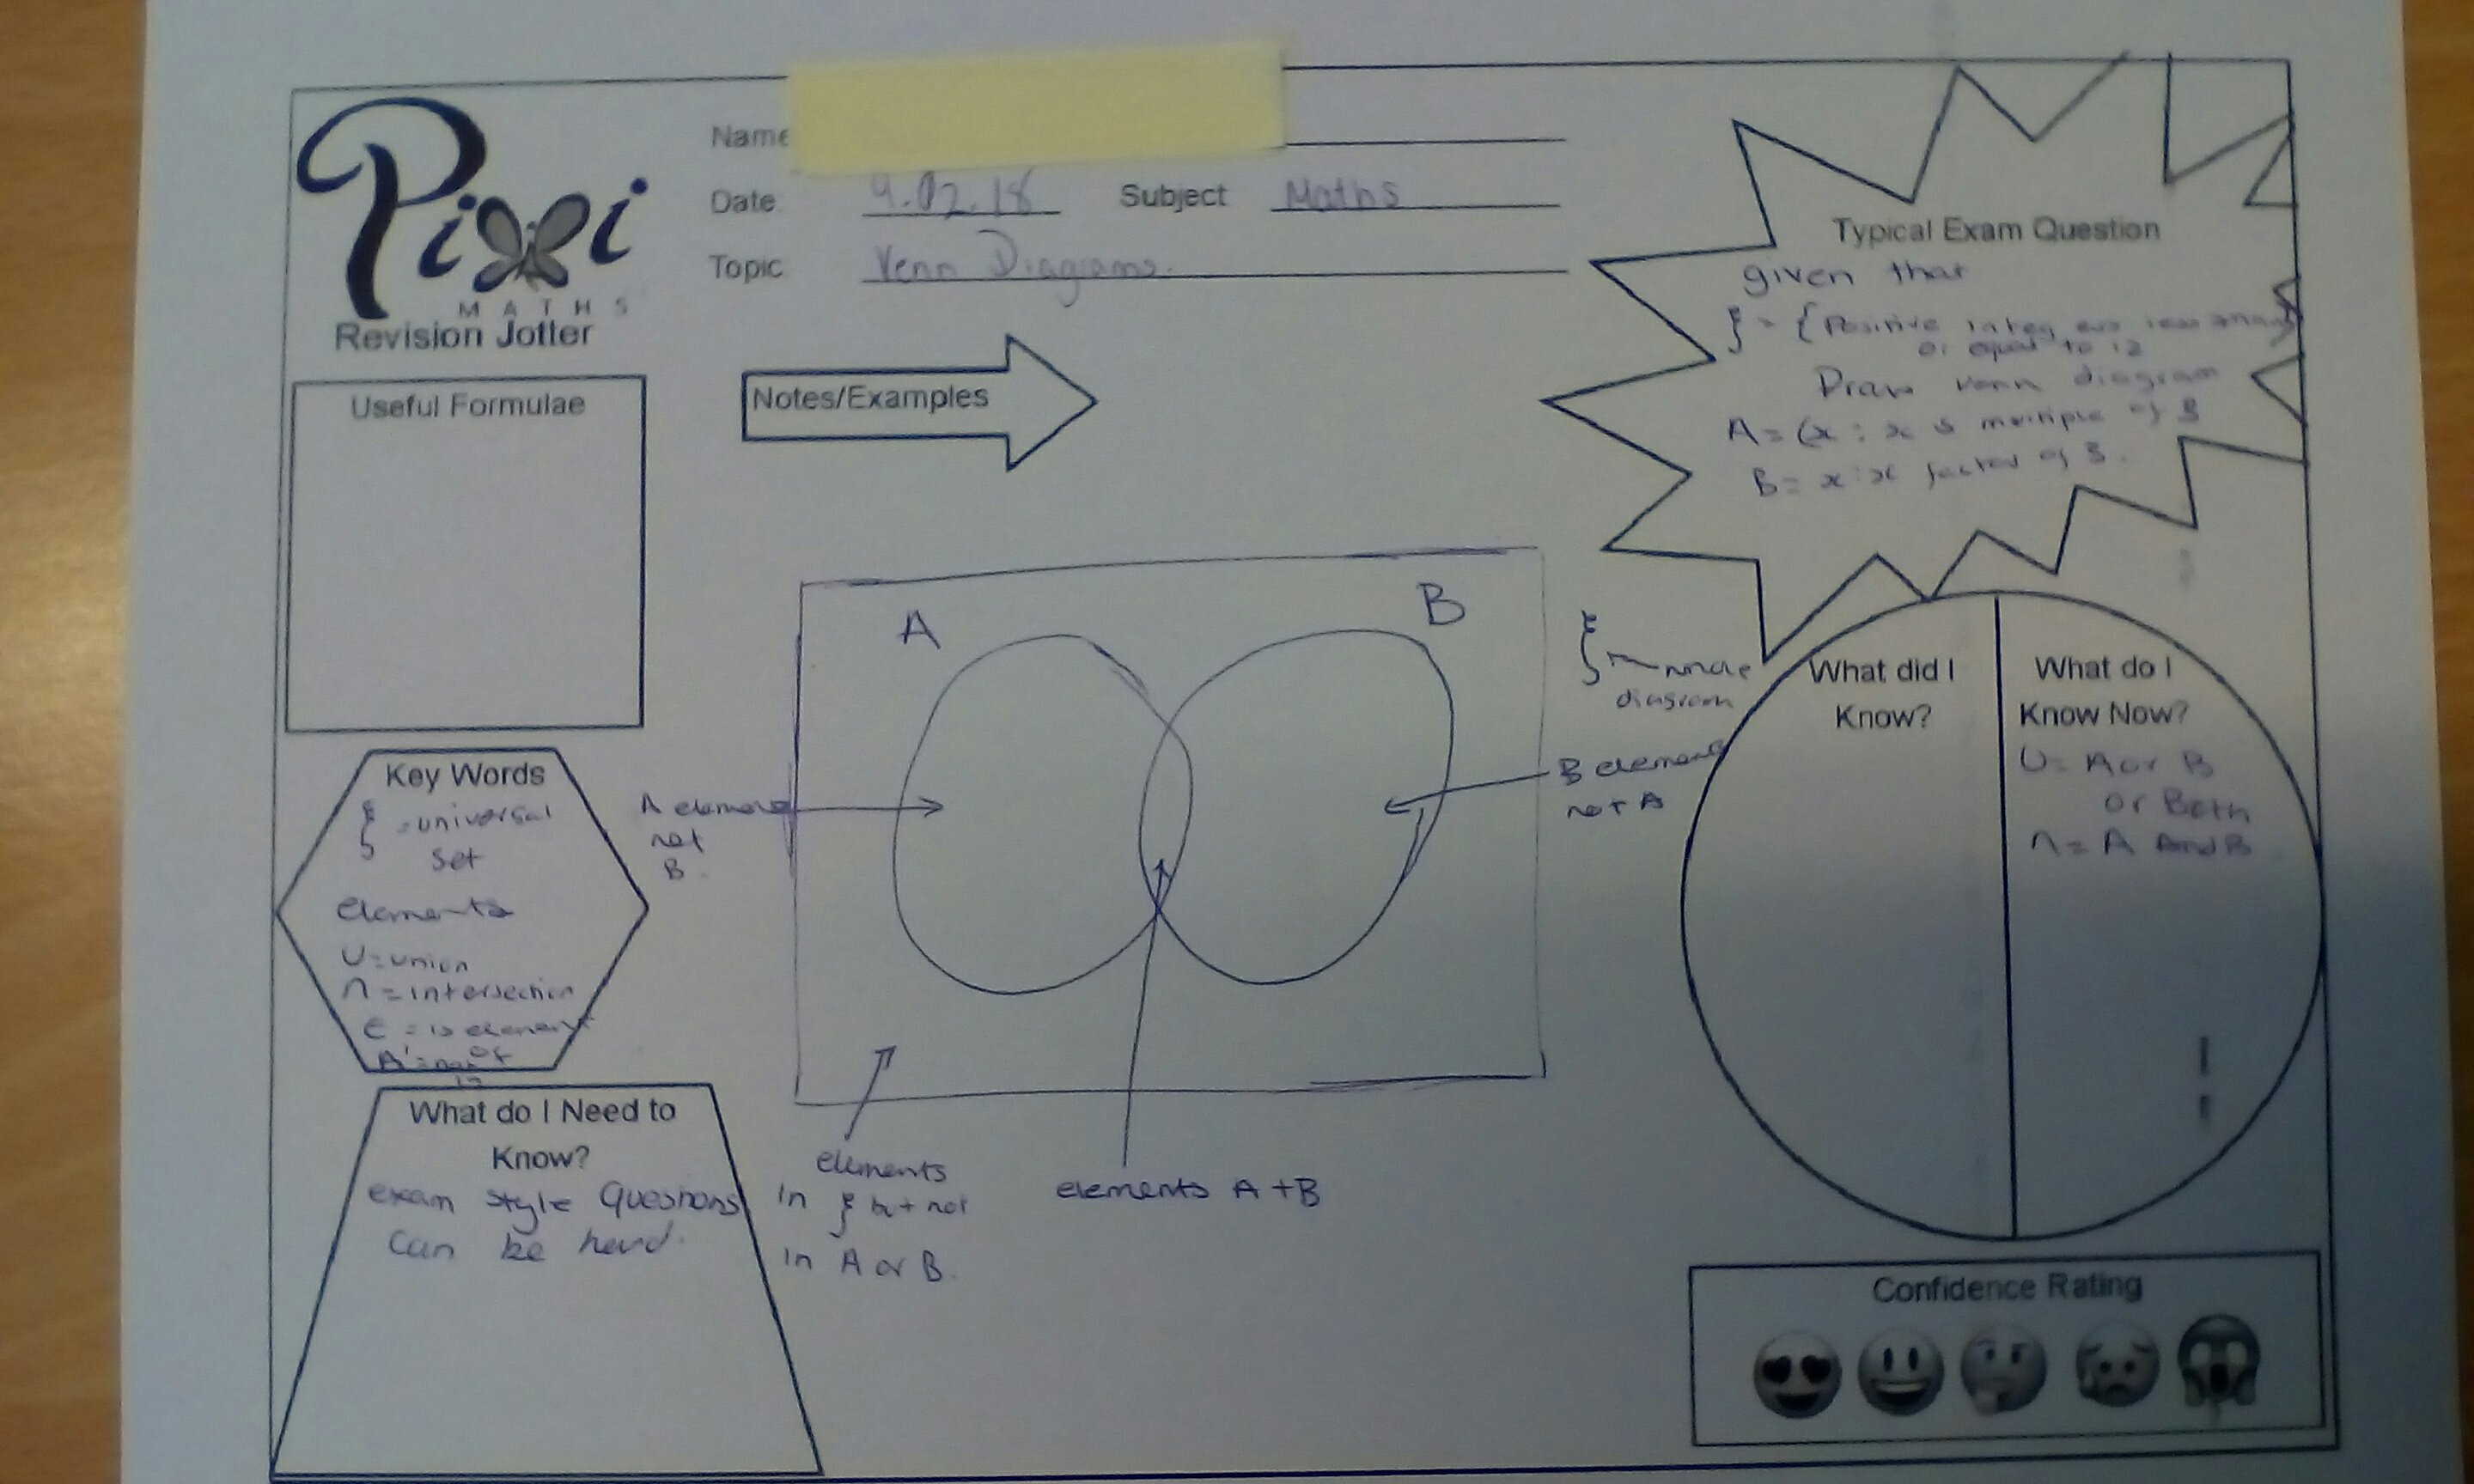
Examples of students’ work

Shared with permission of students. You can see that they have personalised them to meet their needs and some are a work in progress. Also, the b&w jotter photocopies so nicely.

341. Dragon Bridge

Here is a little starter picture for you:

This is the ‘Pont y Ddraig’ at the marina in Rhyl, in North Wales. What mathematical questions could be inspired by this?

‘Pont y Ddraig’ means Dragon Bridge. Find out more about the bridge here