Tag Archives: fractions

296. Jellybean Trees

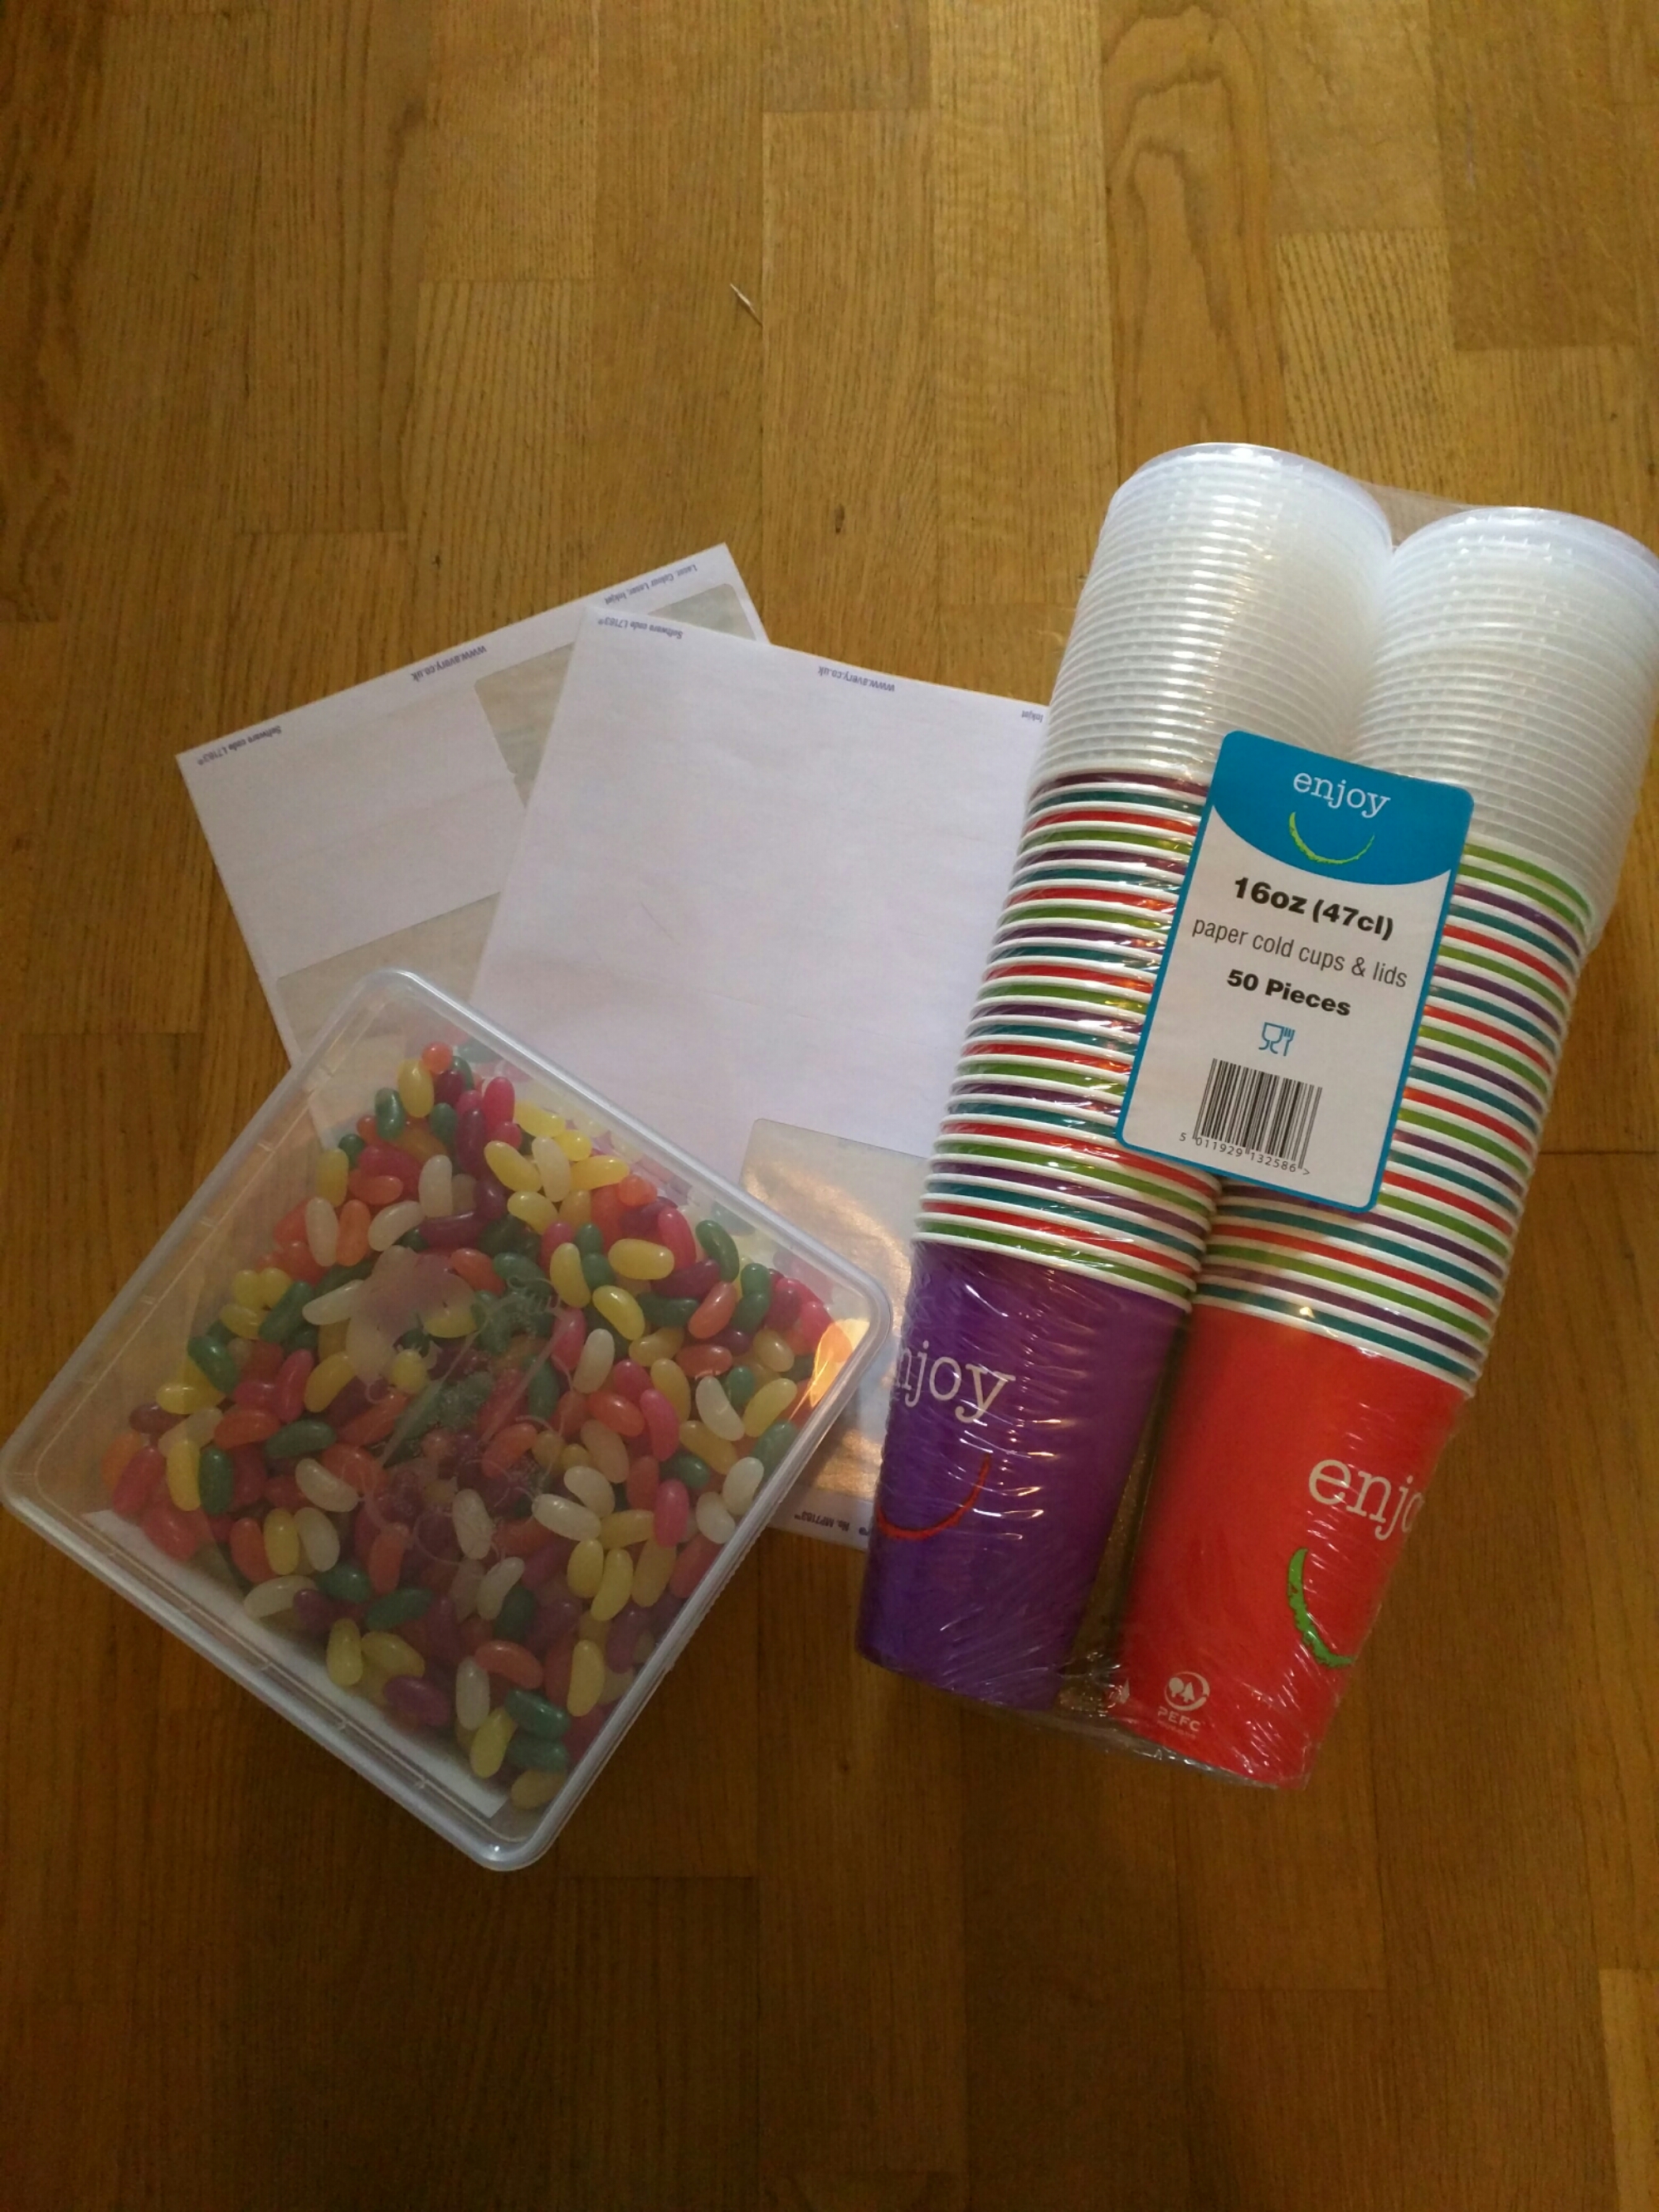
How on earth can you create a maths lesson using these items?

image

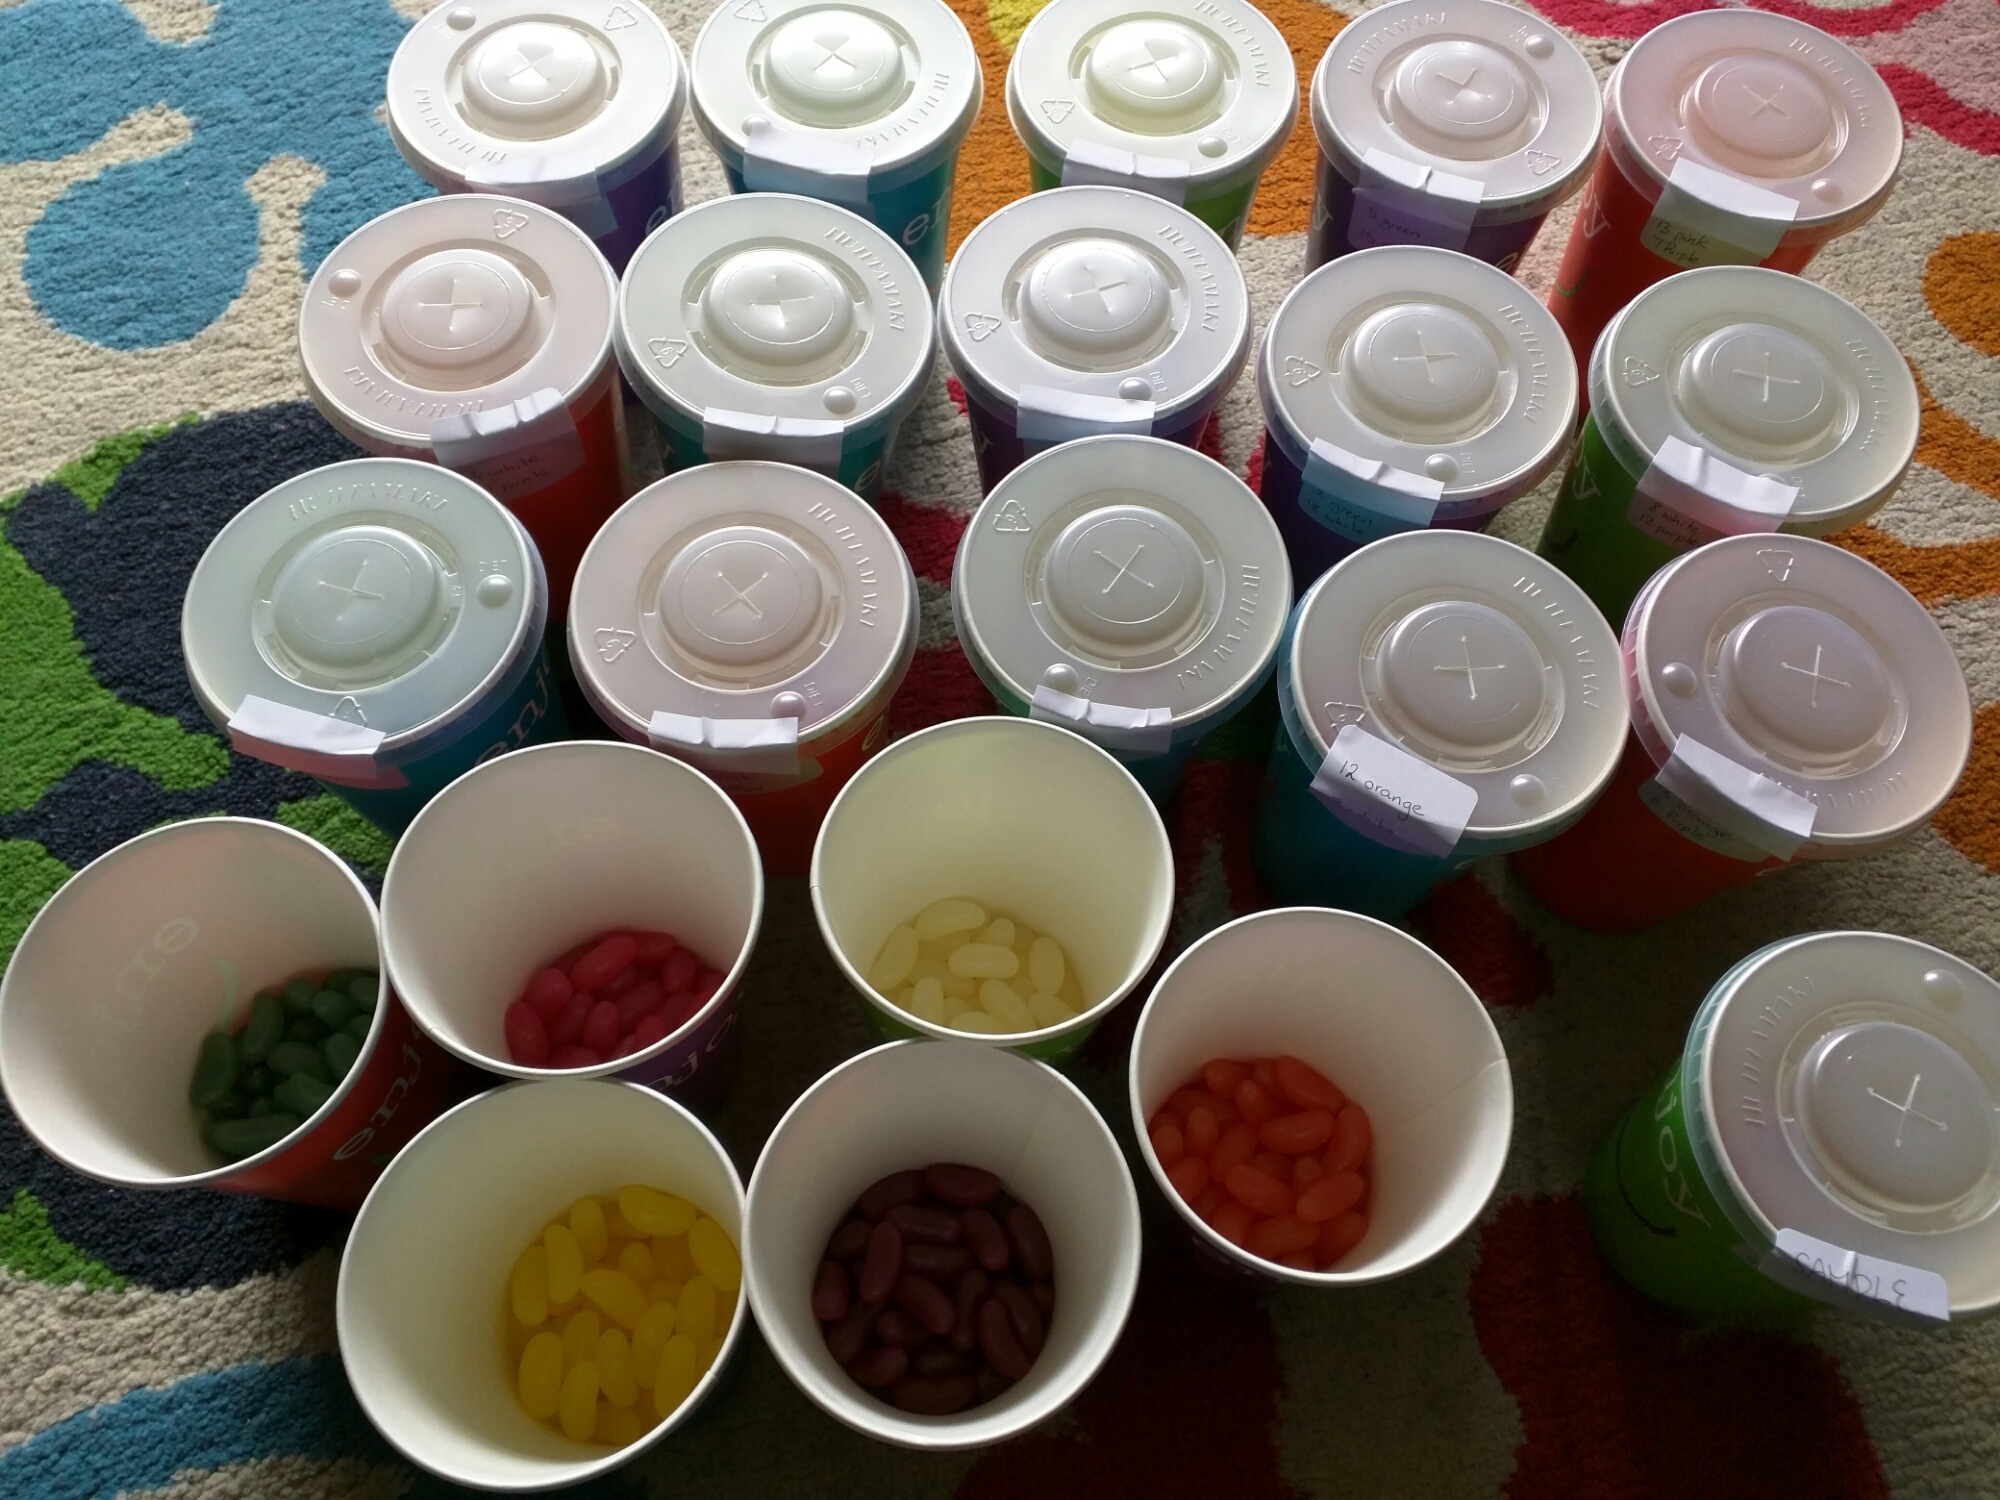
Well, first sort them into colours, then put twenty jelly beans into each cup. Make sure there are only two colours in each cup, write the contents on a sticky label and use that to seal the cup. Each cup should have slightly different numbers or colours – it prevents copying.

Note: Eat all the orange jelly beans – you’ll be doing your dignity a favour!

image

Have you figured it out yet? No? We’re doing probability tree diagrams without replacement. Now I know you could do this with one experiment at the front of the class, but getting everyone involved means it’s more hands-on and memorable.

The Experiment
I did a demonstration of this on the board first, before handing out the cups and worksheets. I told the class what was in my cup and picked out a jellybean. It was orange. I drew the first stage of the worksheet (see below) on the board: What was the experiment? How many of each colour do we have? What is the probability of each colour? Then we filled in the first stage of the tree diagram.

I ate the jellybean.

But you can’t do that – it messes up the experiment! I asked what would be the probabilities for a second jellybean now. They figured out the slight change to the probabilities. Then we went back and thought about what would have happened if my first jellybean had been lemon.

I always encourage students to work out all the possible outcomes before they even look at the rest of the questions. And this is why you need to eat all the orange – the list on the board was:

  • P(LL) =
  • P(LO) =
  • P(OL) =

Do I really need to put the last one?

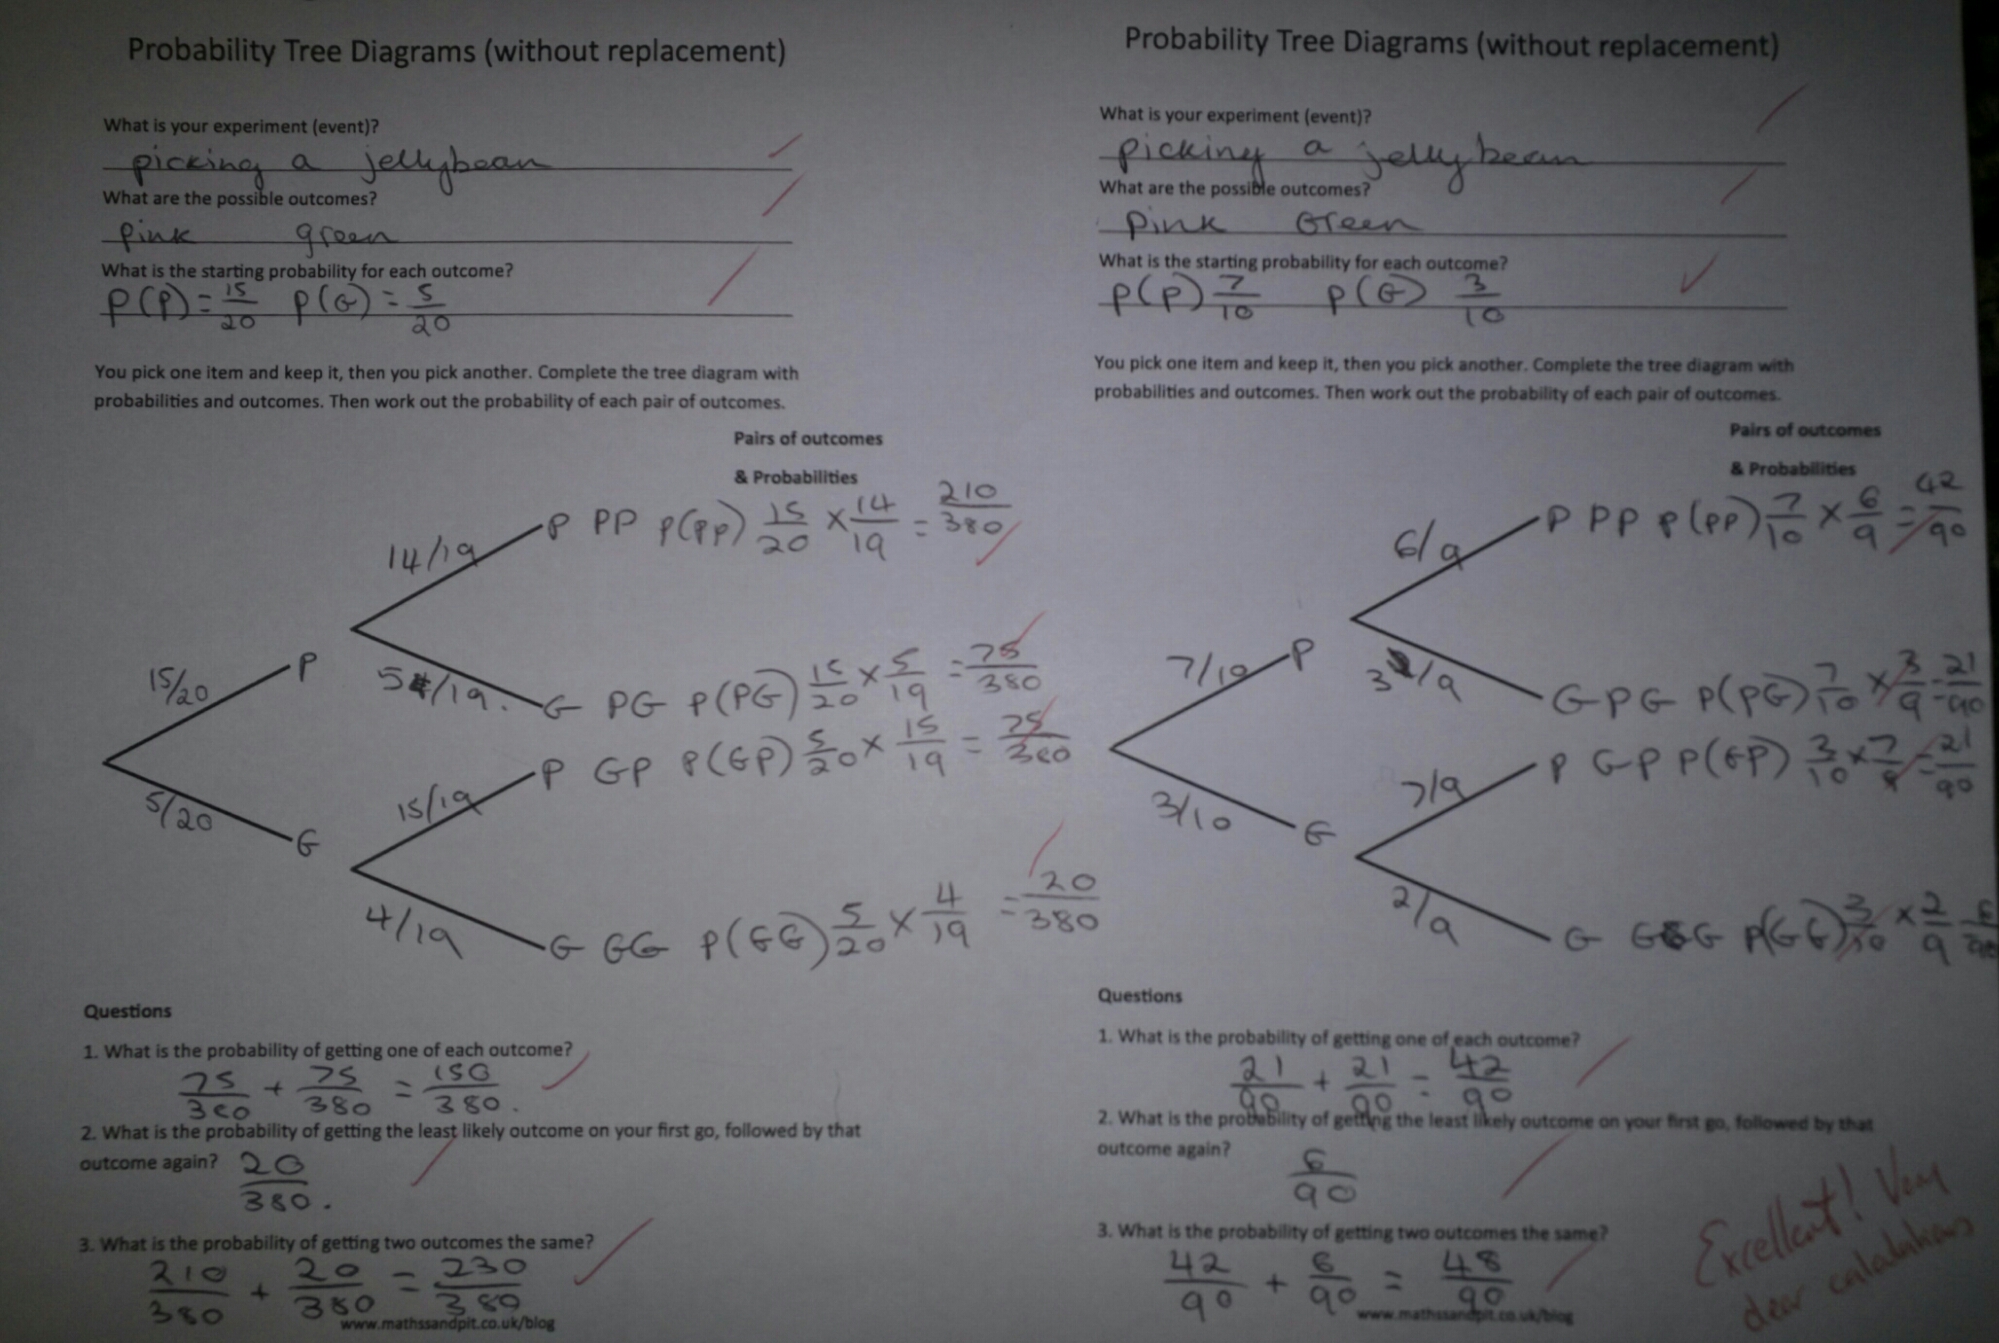
After much giggling, the class were let loose with their own cups. They did the experiment once with their standard cups and then had their work checked. They could then alter (eat) the contents of their cup so that a minimum of five beans of two colours remained. You can see an example of a student’s work here:

image

I summarised the lesson by looking at different types of probability problem where items are not replaced. I now have a nice ‘hook’ to refer to when discussing probability tree diagrams without replacement.

Download the worksheet here:
Tree diagram without replacement (pdf)
I printed out two per page as it fitted nicely in their books. The descriptions are deliberately vague to allow it to be used in different experiments.

(The usual warning regarding food allergies and beliefs stands. Some jellybeans have animal derivative gelatine – please check, you don’t want to accidentally upset a student)

237. Quick Starter

Don’t you just hate it when students forget basic key skills? Especially those at the higher end of Year 11 or studying A-Level, who should have a better core knowledge. What if there was a magic tool which began to address this issue?

Skills required

  • Comparing fractions
  • Trigonometric ratios
  • Simplifying surds
  • Rationalising surds
  • Pythagoras

Equipment

You will not need:

  • Worksheet
  • Powerpoint
  • Printer
  • Laminator
  • Calculator

Magic Tool

  • One board, with pen

Activity

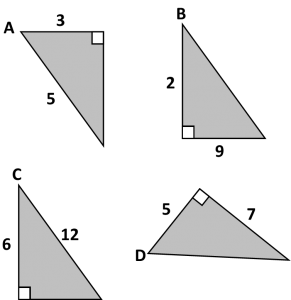
Quite simply draw the four diagrams below on the board and ask the following questions:

Triangle Problems

  1. Which has the largest sine ratio: A or B?
  2. Which has the largest cosine ratio: C or D?
  3. Which has the smallest tangent ratio: A, B, C or D?
  4. Extension: Calculate the missing angles and areas (Calculator allowed)

It takes moments to draw the questions on the board, but the discussion can take some time and addresses several basic skills. You can change the numbers to adjust the level of challenge.

142. Here’s the answer

I’ve become increasingly interested in an inquiry based approach to learning maths after completing the ‘How to Learn Maths’ course.

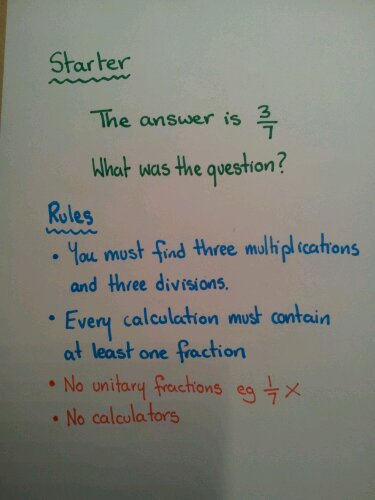
Today I tried out a more problem-based approach with a Year 9 class. Last lesson we had recapped prior learning of equivalent fractions, simplifying and multiplying fractions. We had looked at using reciprocals in division. The starter today could easily have been 5 minutes with mini-whiteboards, but instead I gave them to following problem:

image

There is no ‘one correct answer’. The only limit was their mathematical imagination. After about twenty minutes we discussed each other’s answers on the board. If an answer was wrong, it was considered and corrected – rather than being dismissed or ignored. Walking around the room I was amazed – the level of engagement had increased and pupils were explaining their ideas. I could get a feel for who understood and who just followed procedures (and came unstuck when asked to do something different).

Of course, some pupils said ‘I can’t do it!’. They were met with the sympathetic response of ‘Can’t do it, doesn’t work anymore. Challenge is good for you’. Surprisingly, they either got on with it, started working with a friend or asked for pointers on how to start the problem.

I was really impressed with the students’ reaction to the task and by what I learnt about their understanding. Why not try it yourself on your next topic?

106. Musical Fractions

Some unbelievers dispute it, but the truth is out there: Mathematics is everywhere!

The link between fractions and music is inescapable. If your notes don’t add up correctly, the music just doesn’t sound right. Crotchets, quavers, semi-breves, time signatures – it’s all maths.

Musical Fractions
I really like doing this activity with Year 7. Please make sure there are no tests or exams going on nearby.

Equipment
Mini-whiteboards
Percussion instruments (or clapping)
Earplugs (optional)

Aim
To introduce and practice adding simple unitary fractions.

Activity
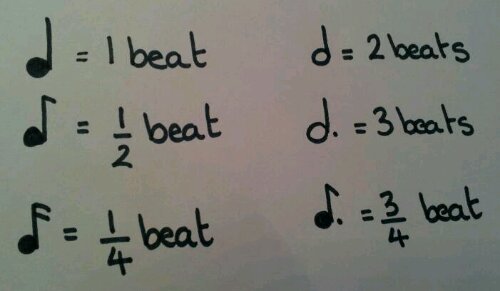
Each type of musical note lasts for a specific amount of time. For example a crotchet lasts one beat. The picture below shows different notes and values:

image

A dotted note lasts 50% longer than it normally would.

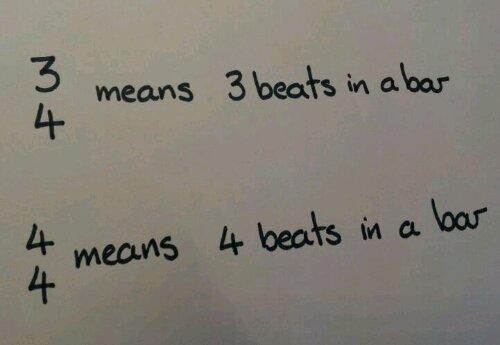
Time signatures tell you how many beats are in each bar of music (very simplified explanation). So:
image

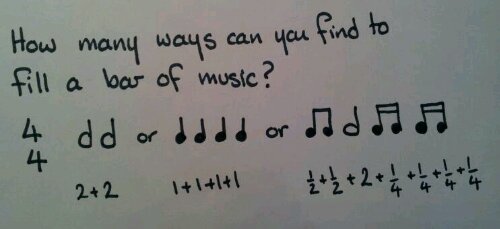
To make this into a lesson, ask students to create their own rhythms adding up to 3 or 4 beats.

image

Start by doing 4 single beats by clapping or using instruments. This sounds like ‘tah, tah, tah, tah’ when you say it.

Then try some half notes – one, one, half, half, one. This sounds like ‘tah, tah, ta-te, tah’.

Throw in some quarter notes – one, half, half, quarter, quarter, quarter, quarter, one. This sounds like ‘tah, ta-te, tafi-tifi, tah’.

Now you can let the pupils loose to create their own rhythms using unitary fractions. You can get the pupils to write the fraction additions on their whiteboards. Each group can demonstrate their rhythm and teach it to the rest of the class.

I hope the ringing in your ears fades by the end of the day.