When you move from 2D vector equations to 3D vector equations the biggest challenge is skewness. On plain old 2D graphs if two lines aren’t parallel, they intersect and vice versa. Not so easy in three dimensions … how to explain skewness? Got some string and duct tape? Then let me explain …
Equipment
String
Scissors
Duct tape
A low ceiling
A chair/stepladder/tall student
Step 1
Tape a piece of string from the ceiling to the floor at an angle. Attach a second piece to the ceiling and ask students to position it so it is parallel with the first string. This isn’t as easy as it seems once they realise it must look correct from every angle. Secure the string to the floor with duct tape.
Step 2
Attach a third piece of string to the ceiling. Instruct students to position it so it intersects one of the strings. Secure the end.
Step 3
Attach a fourth piece of string to the wall. Ask them to position it so that it is not parallel to or intersecting any existing string.
(My ingenious bunch took the string out of the door and fastened it to the bannister, just in time for management to thankfully not be garroted)
Step 4
Give the students a fifth string and instruct students to make it parallel to an earlier string and intersect the fourth string. They choose both end points.
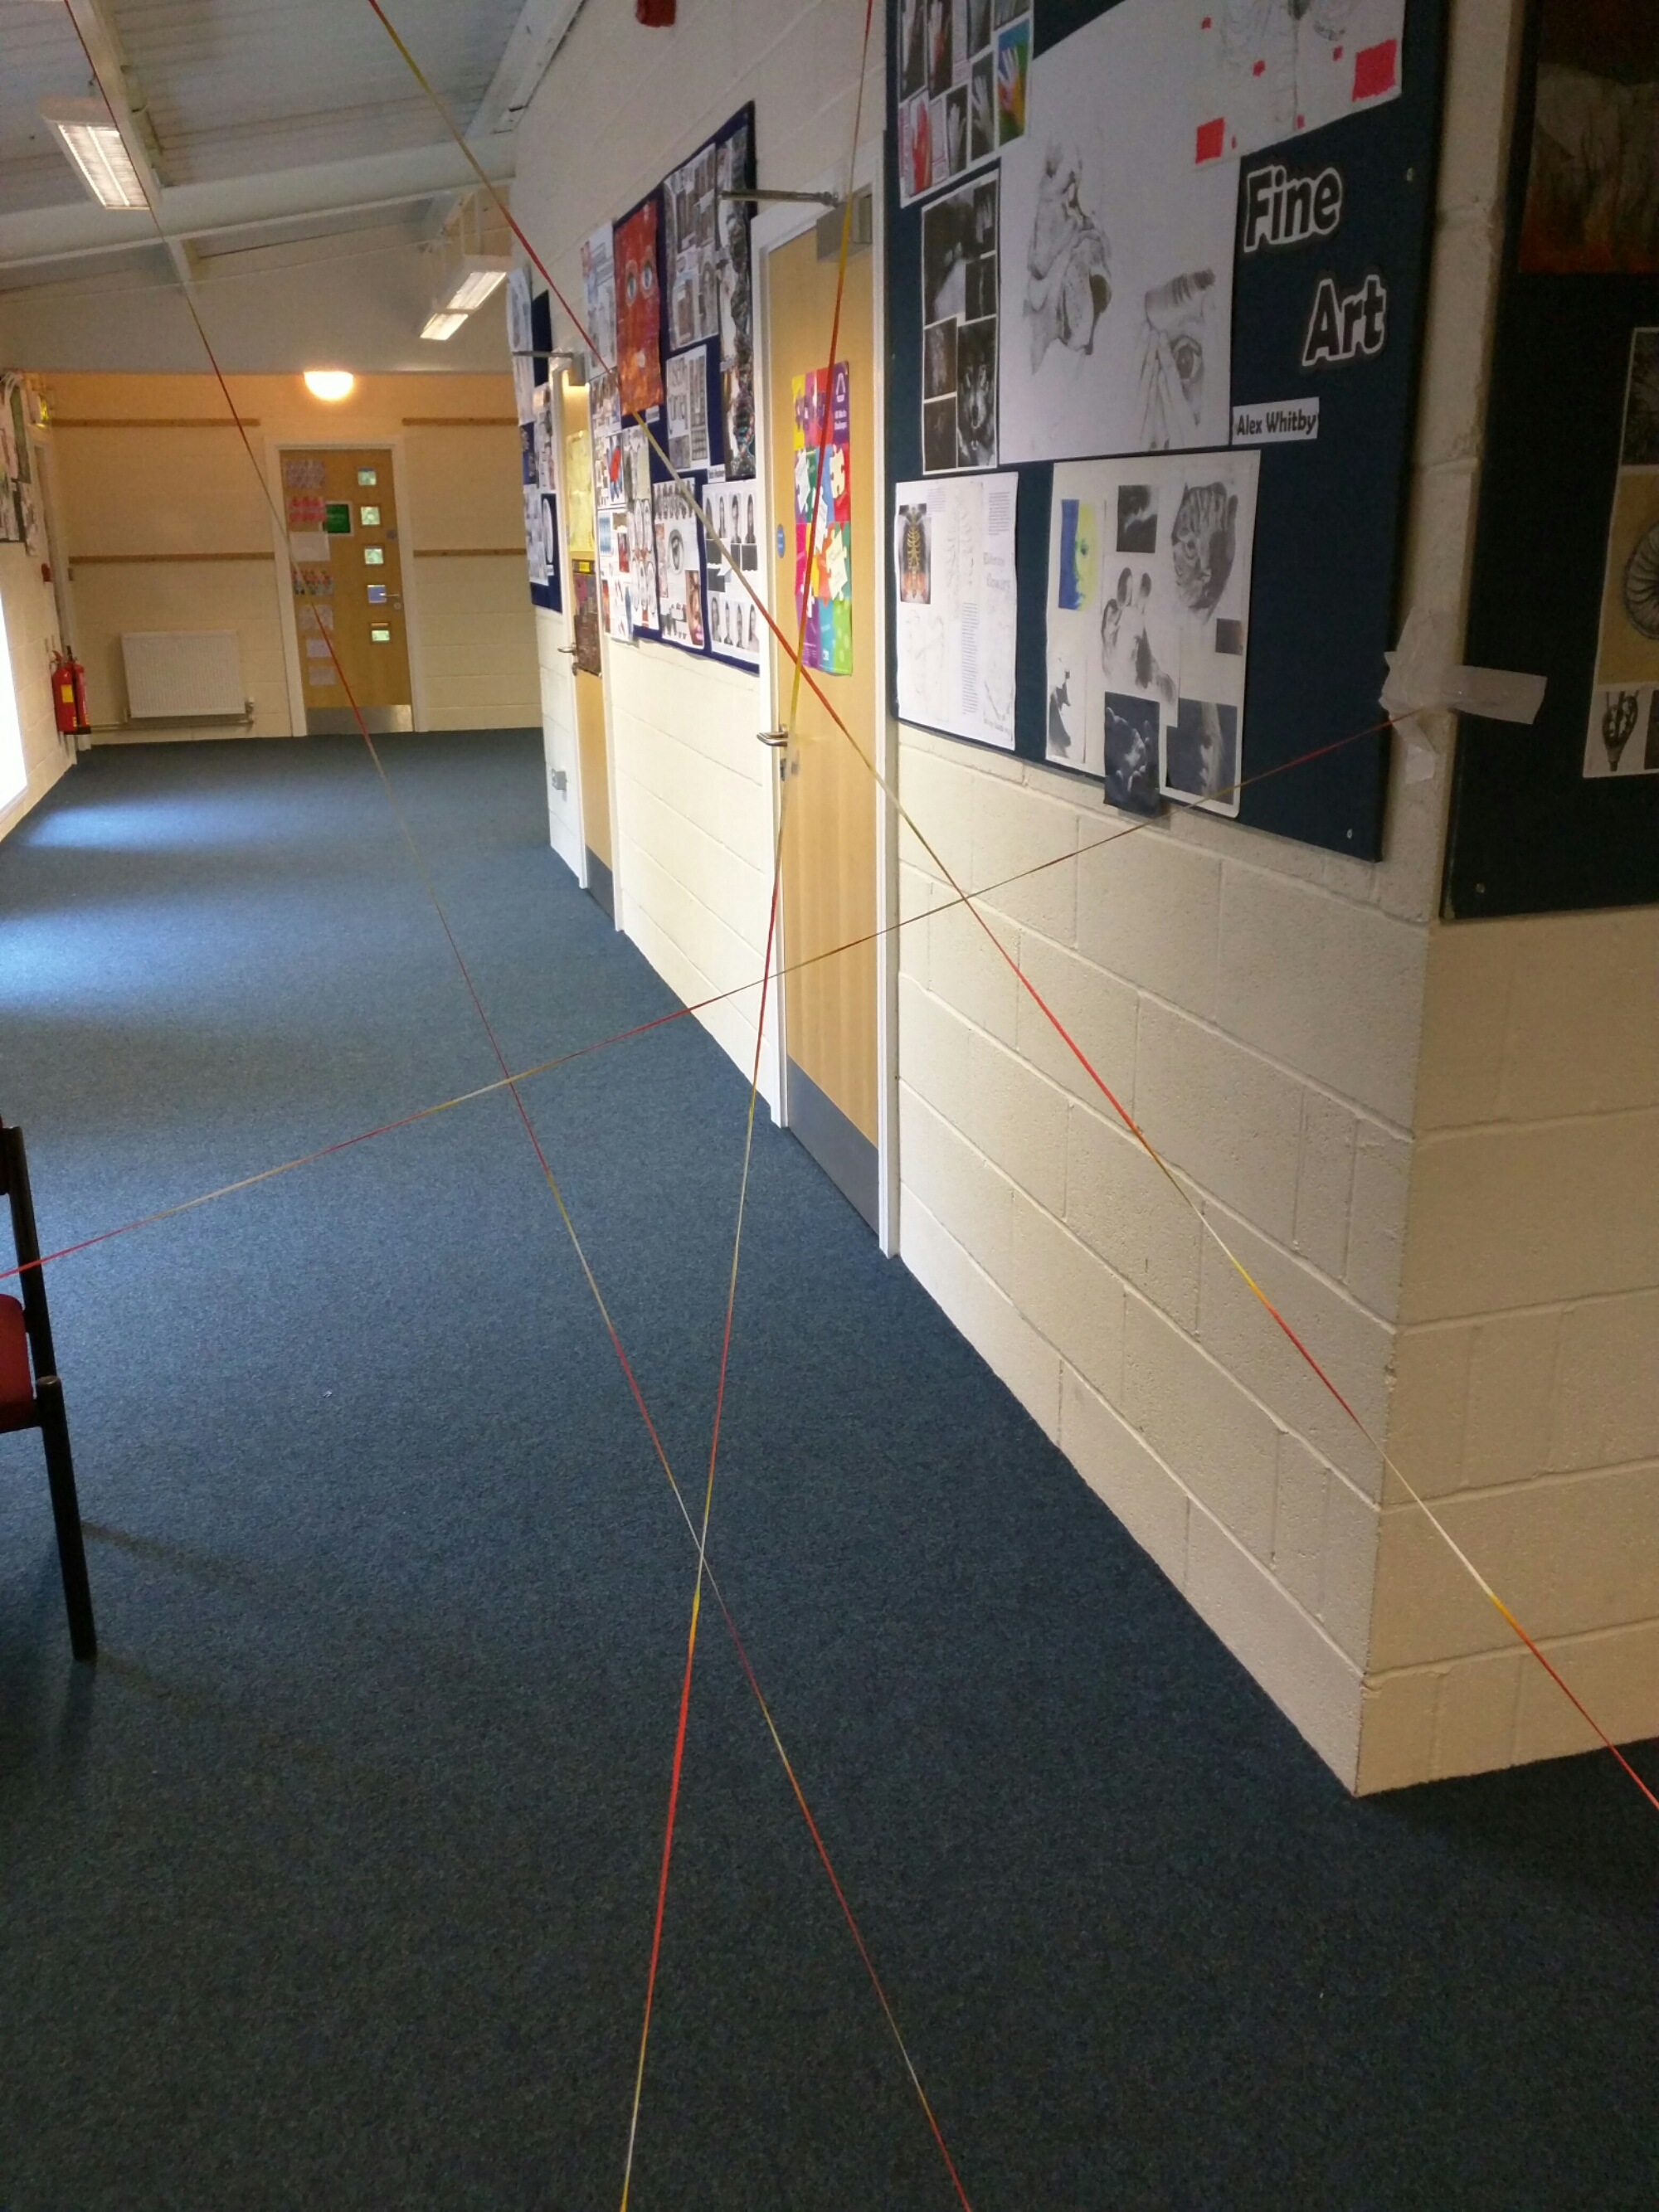
If all goes well, you’ll get something like this:
You can then explain the differences between parallel, intersecting and skew lines without resorting to iffy diagrams on a whiteboard or complicated geometry software. Students can walk through them and really get a feel for the geometry of the situation.
(When it comes to taking it down, I hope your students are slightly more sane than mine – one of them shouted ‘Argh, it’s a spider web’ and ran through it. Actually quite an efficient way to tidy up!)
Resources
You can download five large print 3D vectors here:
3d vector cards (pdf)
3d vector cards (docx)
The challenge is to find the parallel lines (3 lines), the skew lines and the intersecting lines (2 pairs).
There are more ideas on 3D vector equations here:
211. Hidden Rectangle Problem

