Category Archives: Shape, Space & Measures

261. Revision Egg Hunt

It’s beginning to look a lot like Easter … scrawny plastic chicks and over-priced chocolate eggs everywhere! This little ‘egg’ of an idea was totally inspired by some lovely Tweeters who mentioned ways to use empty plastic eggs.

image

Equipment
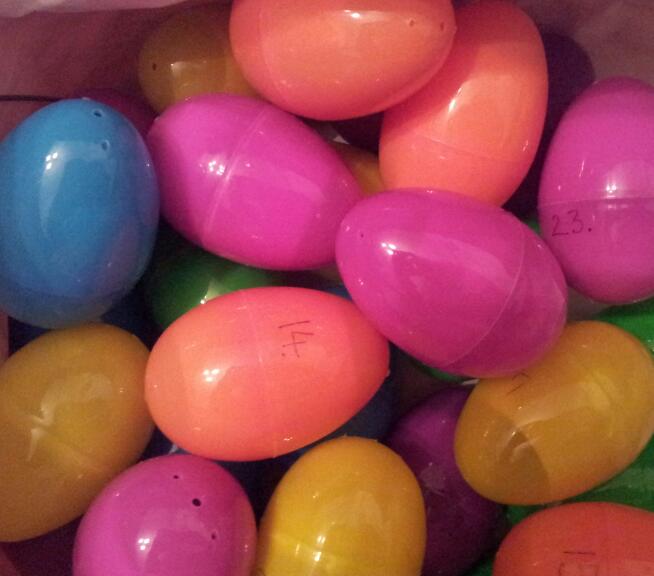
I bought these two-part plastic eggs from a local craft shop. They are available from lots of places on the high street and online. My pack has 30 eggs in six different colours. You may be able to see that I’ve numbered the top and bottom of each shell – just to avoid arguments.

Activity
Now, I used these eggs for revision with my GCSE class. Each colour represents a different topic. There are 30 questions and the answers are the numbers 1 to 30. I hid the eggs in our main hall due to the unpredictable nature of the British weather. You could hide them inside or outside the classroom and give a prize to the person/group who correctly completes the most questions. Points could be deducted for trying to sabotage other groups. If you don’t feel that adventurous or it’s impossible to go outside, you could copy the questions and do this as a desktop activity.

Topics
Sometimes we get tunnel-vision on the focus for passing exams. We keep the ‘fun’ stuff for younger pupils. This revision activity is a treat for my hard-working students in KS4. They aren’t the easiest of topics, but they are perfect for students working at GCSE grade C and above.

1-5 Expanding & factorising quadratics
6-10  Ratio & Proportion
11-15  Straight line graphs (y=mx+c)
16-20  Simultaneous Equations
21-25  Shape problems
26-30 Factors & Multiples

Resource
You can download the questions here: Easter revision 30Q
You can download the solution here: Easter revision 30Q Solutions

Feedback
I was surprised to get feedback from this activity from a form teacher, who said their students had arrived at registration bouncing and saying how much they had enjoyed the lesson!

260. Filter Maths

There is a moment of satisfaction to be had when the last drip of filter coffee drops into the jug: a lovely aroma of fresh coffee and the anticipation of a well-earned drink.

coffee-cup

Image Credit: http://vidacoffeeco.com/

Don’t worry, the ‘Sandpit’ hasn’t gone all hipster foodie overnight! The slow drip of coffee leading to a rewarding cup matches perfectly with the slow drip of revision, leading to a rewarding grade.

The exam season is fast approaching and the photocopiers are starting to crank out past papers. You start handing out papers and expect them to hand them in …

That’s the point it starts to go wrong:

  • They don’t hand them in.
  • They give up halfway through.
  • They skip pages and it takes you ages to find what they’ve done.
  • They lose confidence.
  • If you issue A5 size booklets they lose them.
  • If you issue A4 size booklets, they complain and the booklets get mangled.
  • You get frustrated – don’t they realise it’s for their own good!

This year, why not try out this idea instead:

  • Hand out the exam board formulae sheet.
  • Hand out the grade boundaries.
  • Hand out the first four pages reduced to A4, back to back.
  • Collect in the first sheet.
  • Repeat for the next four pages.
  • Collect in the second sheet.
  • Repeat until the questions start getting harder, then decrease it to two pages back to back.
  • Continue until the paper is finished.

This is time-consuming and it is best started well in advance of the main revision period, but it works. The individual sheets have a manageable amount of content and are less intimidating – they also weigh a lot less than 33 exam papers. As a teacher, you get a clear picture of which areas to revisit as the topic list is short. Each student keeps a running total of how they are doing on the paper. The grade boundaries sheet lets them keep track of their progress towards their target grade.

The consequence of doing this process with a couple of papers is that students feel more confident approaching papers. They will start to notice themes in the wording and topics. They will also realise that it’s important to ‘bank’ as many marks as they can in the first half of an exam paper.

My class responded well to this drip-feed of questions. After the first sheet they felt proud of themselves when they realised they’d achieved a grade D in just four pages of a Higher paper and were calculating how many marks they’d need for a C. The number of late homeworks dramatically dropped and the effort level went up.

This idea is simple and non-subject specific. It would work equally well with physics, chemistry, biology … in fact any paper which has a fair number of questions.

Good luck with the revision!


259. Squashed Tomatoes

If you taught in England while mathematical coursework still existed, this post may not be new to you. However those who did not may be pleasantly surprised by the simple complexity of ‘Squashed Tomatoes’!

Aim
To investigate a growth pattern, which follows a simple rule.

Equipment

  • Squared paper
  • Coloured pens/pencils
  • Ruler & pencil

Rules
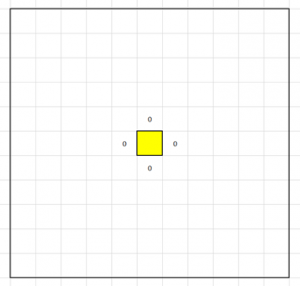
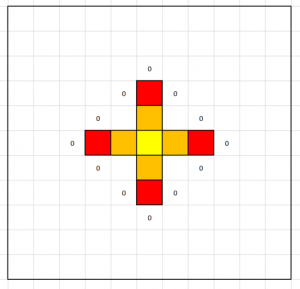
Imagine a warehouse full of crates of tomatoes. One crate in the middle goes rotten. After an hour it infects the neighbouring crates which share one whole crate side. This second generation of rot infects all boxes which share exactly one side. Once a box is rotten it can only infect for an hour, then ceases to affect others. This sounds complicated, but trust me … it’s simple!

Picture Rules

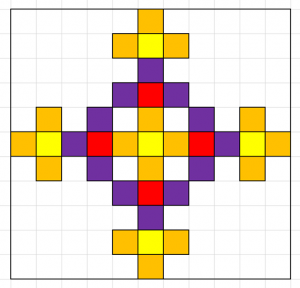
The first box goes rotten – colour in one square to represent the crate. The noughts represent the squares it will infect.

Tomato 1

The second set of crates becomes rotten – use a different colour. The noughts represent what will become rotten next:

tomato 2

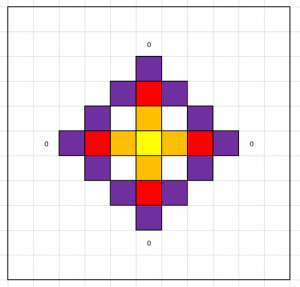
The third set of crates becomes rotten – change colour again. At this point it is useful to tell students to keep track of how many crates go rotten after each hour and how many are rotten in total:

tomato 3

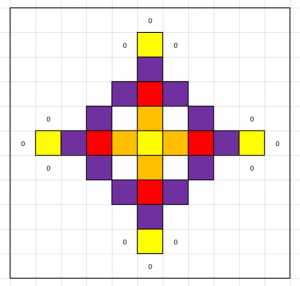
The fourth set of crates forms a square:

tomato 4The fifth hour returns the pattern to adding one to each corner:

tomato 5

The sixth hour adds three onto each corner:

tomato 6

Now you can continue this pattern on for as big as your paper is. Students can investigate the rate of growth of rot or the pattern of rot per hour. As the pattern grows, the counting can get tricky. This is when my students started spotting shortcuts. They counted how many new squares were added onto each ‘arm’ and multiplied by number of ‘arms’.


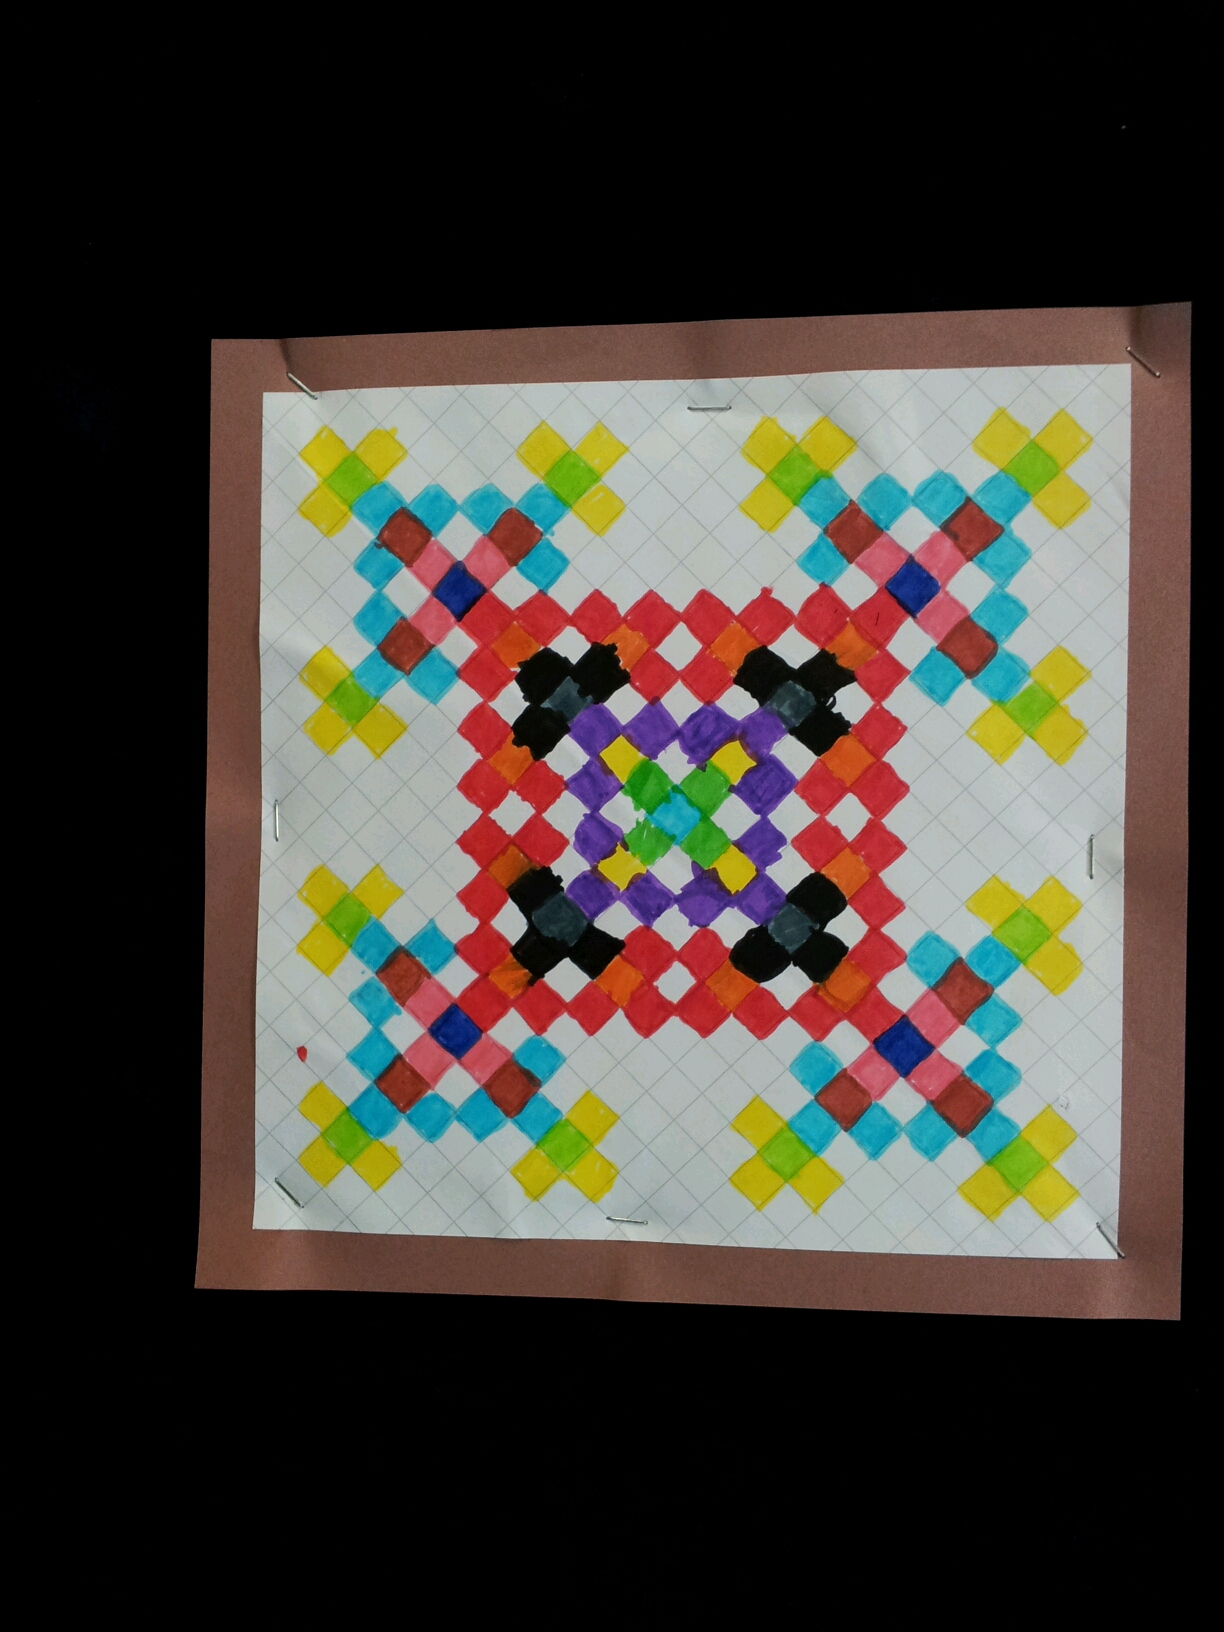
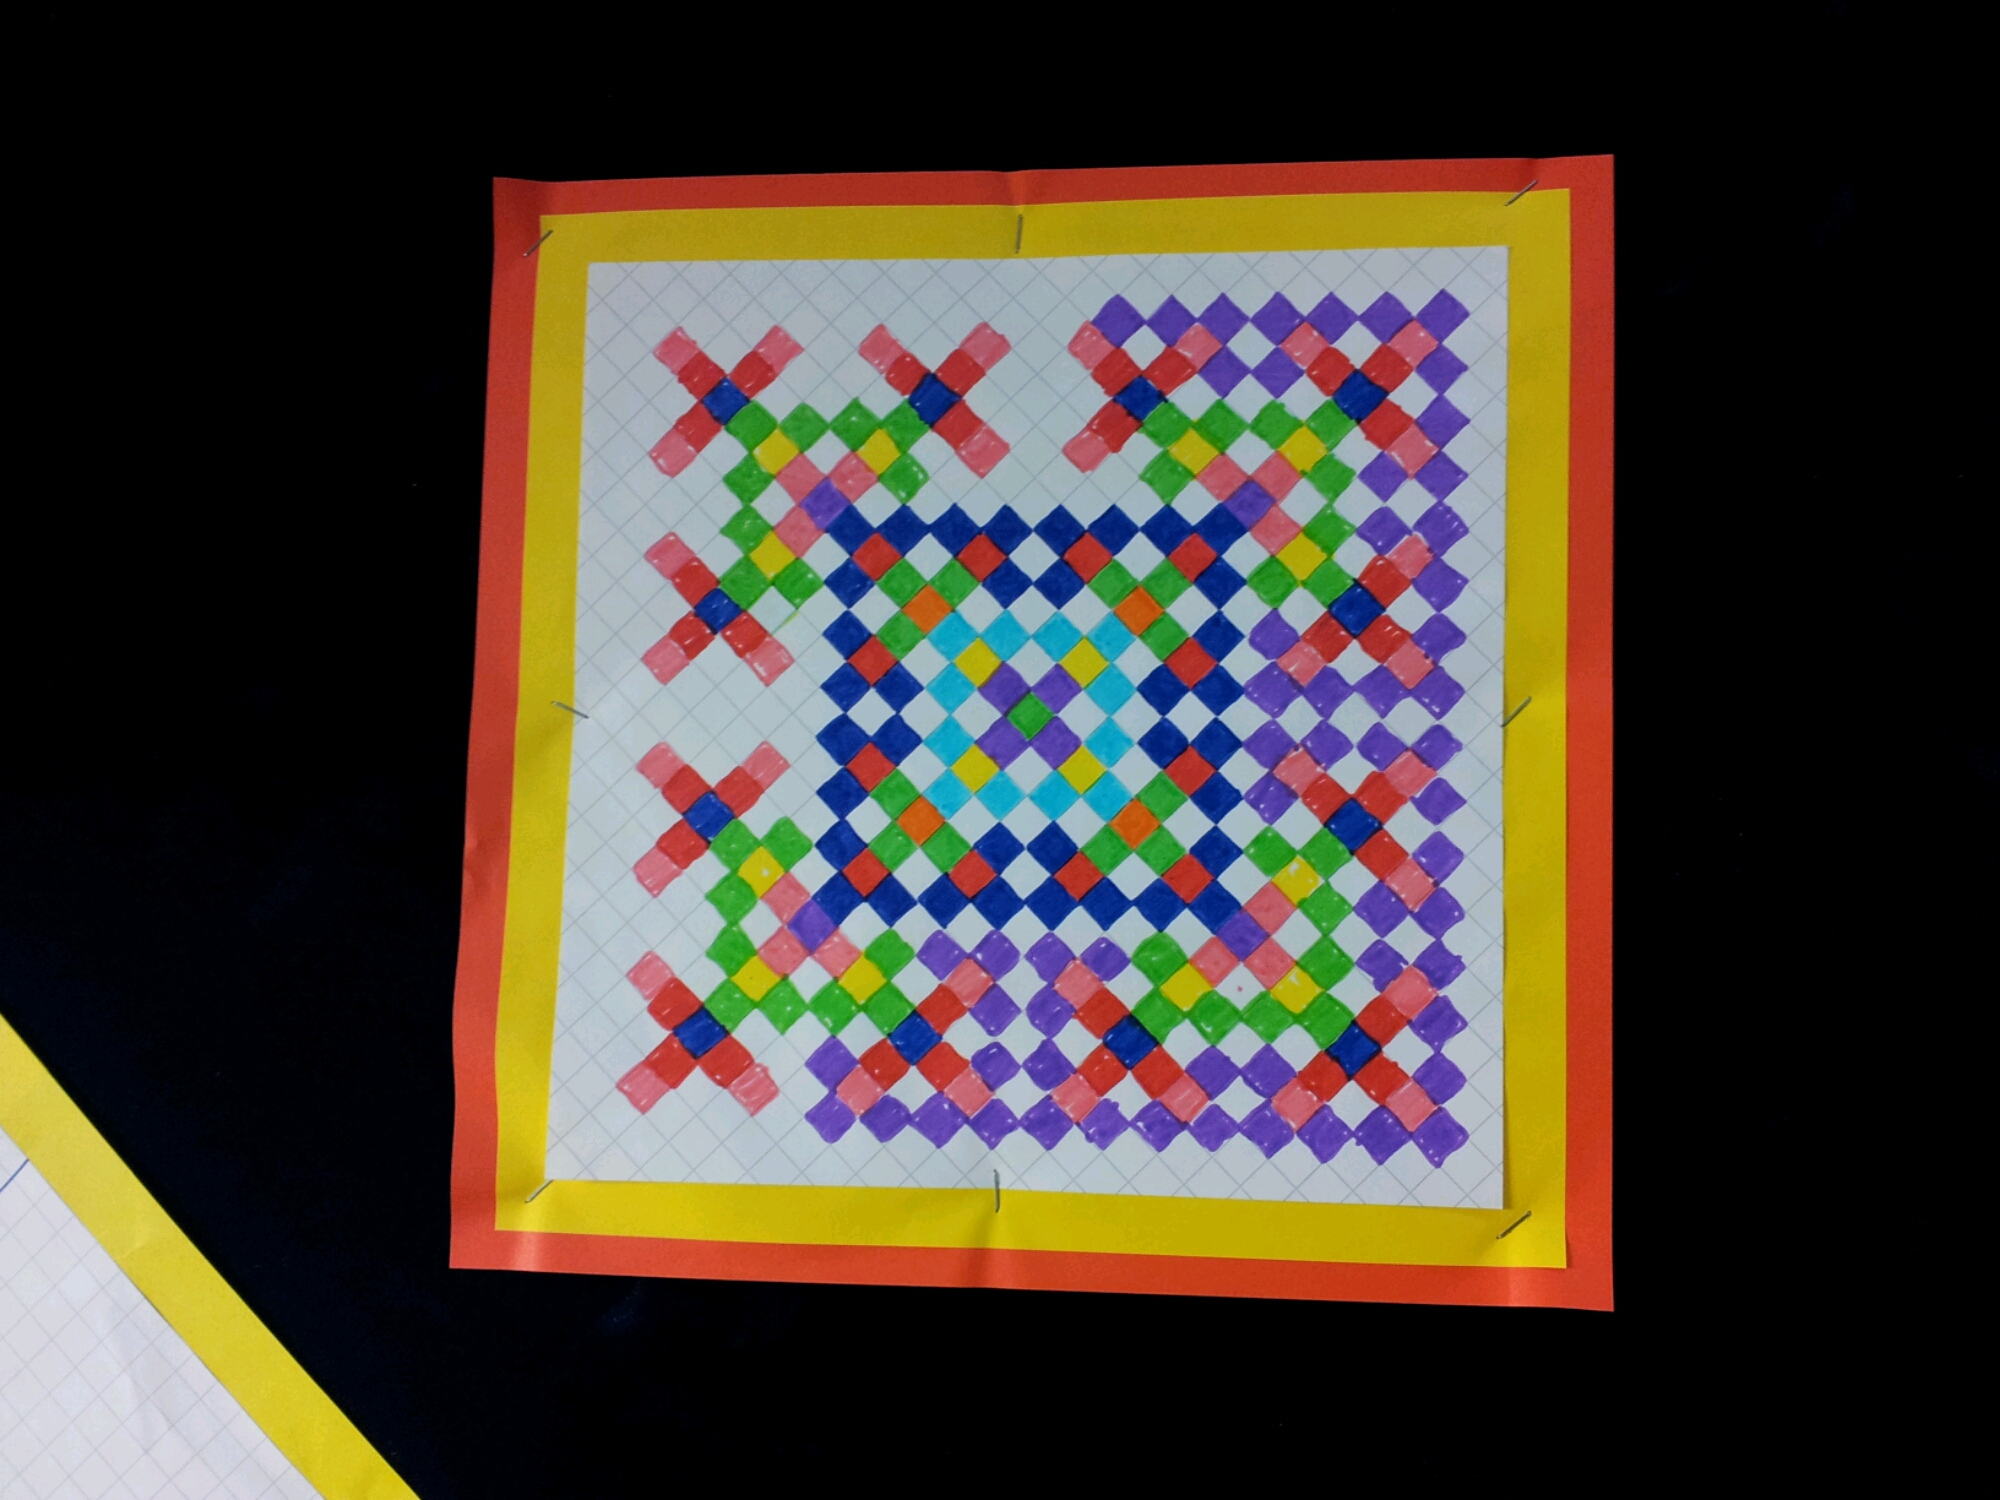
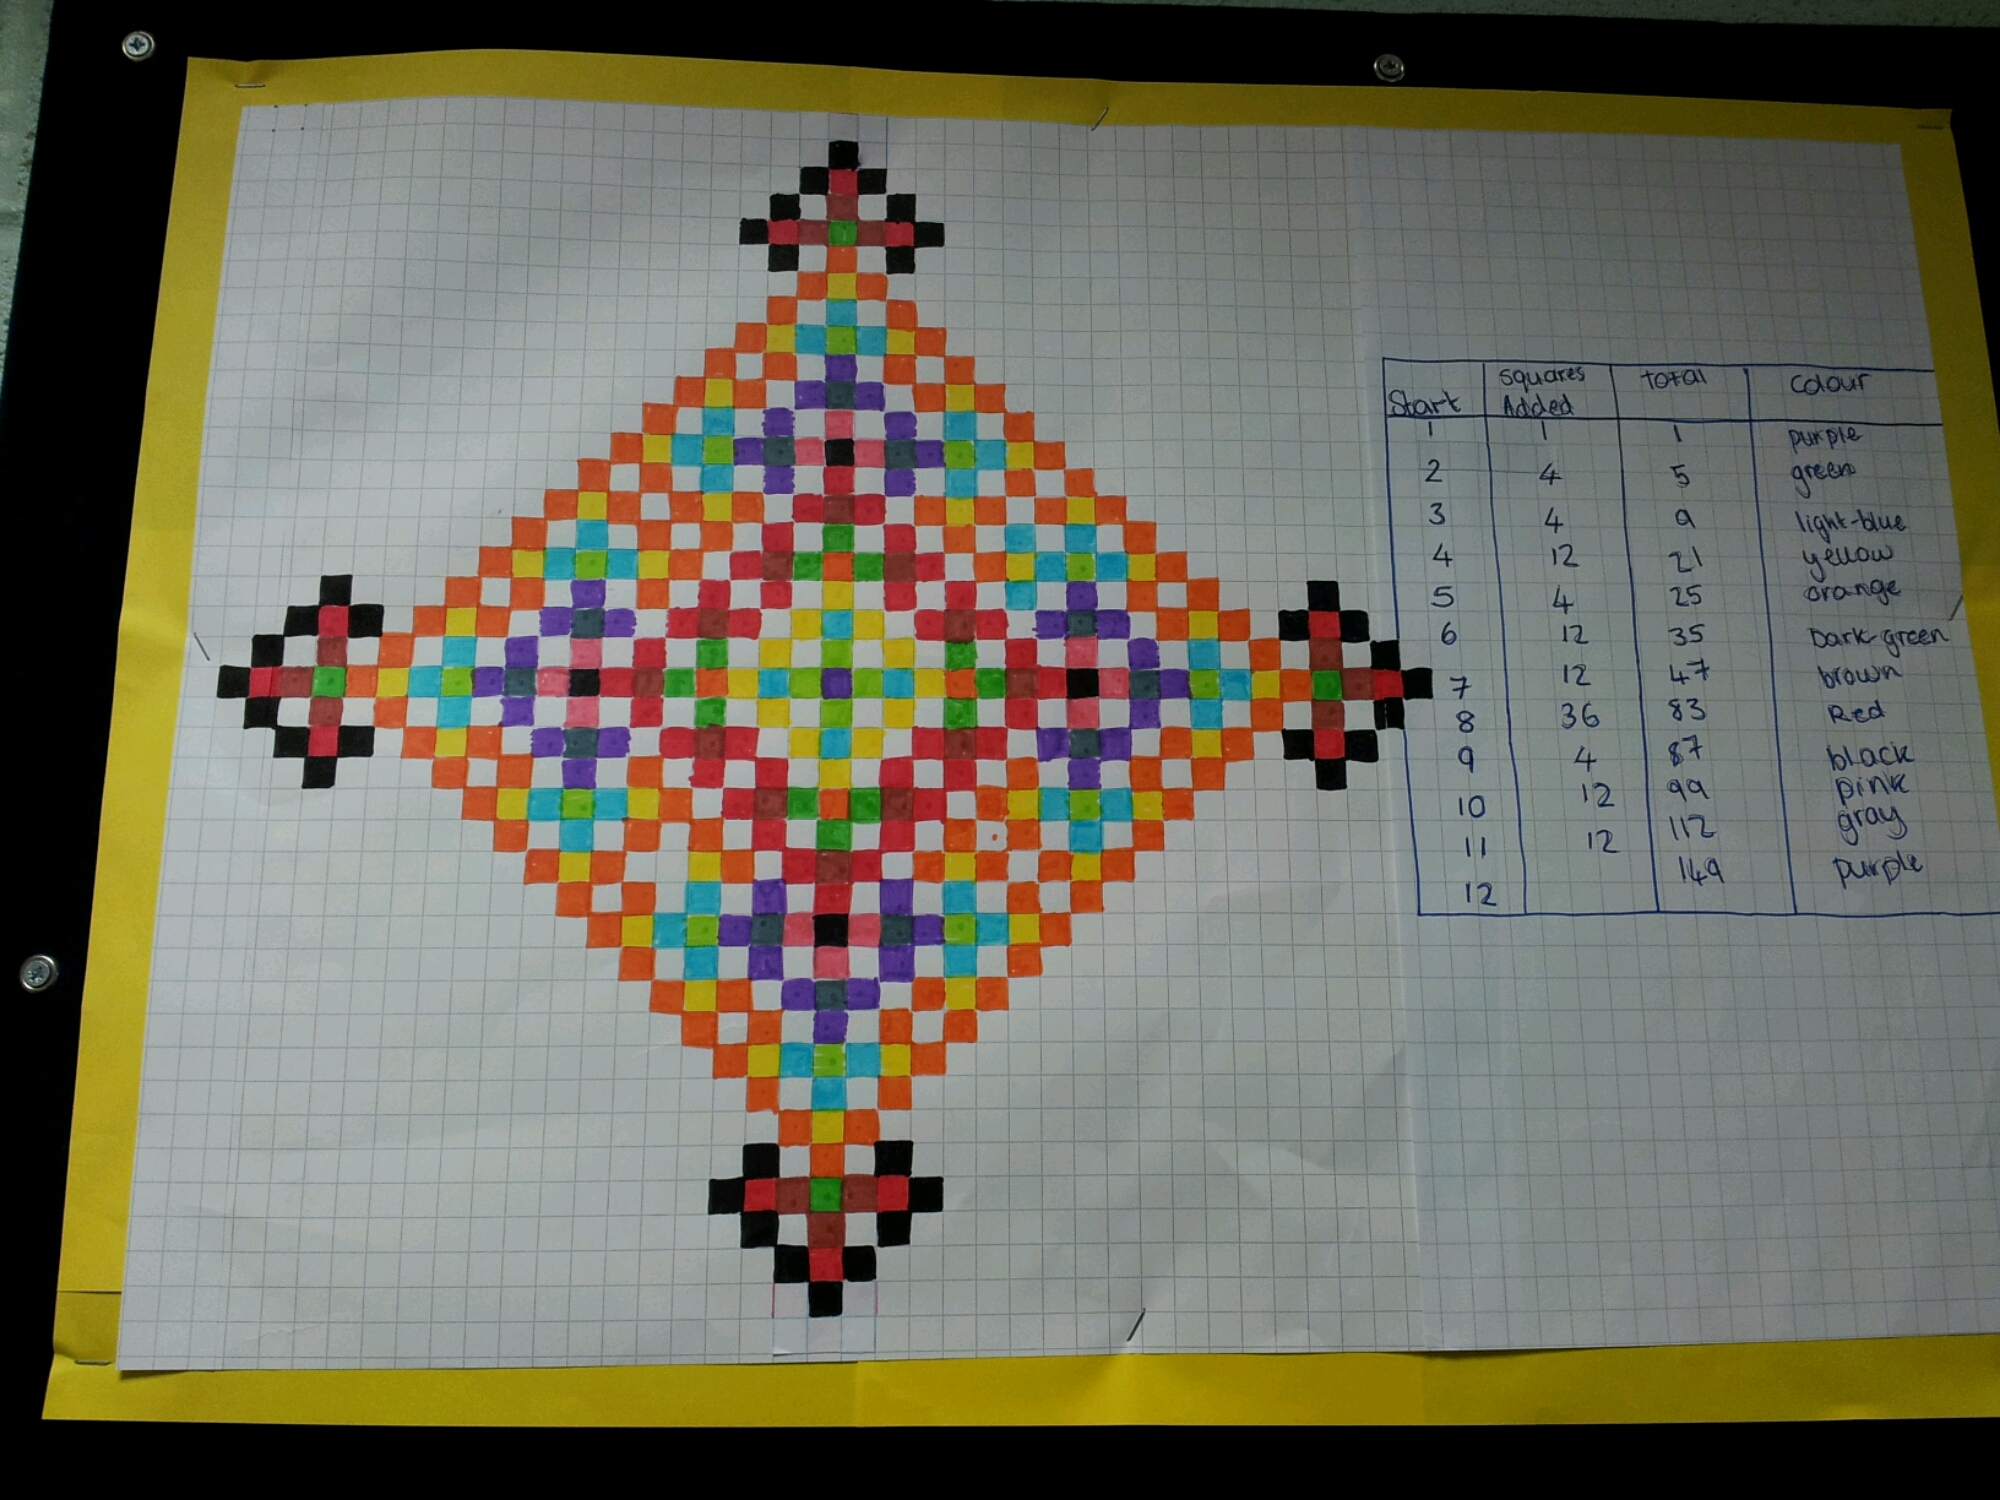
Here are some examples of my students work:

image

This is a lovely part-completed diagram:
image

This piece of work includes a table of calculations – you can see the pattern of 1s, 4s and multiples of 12.
image

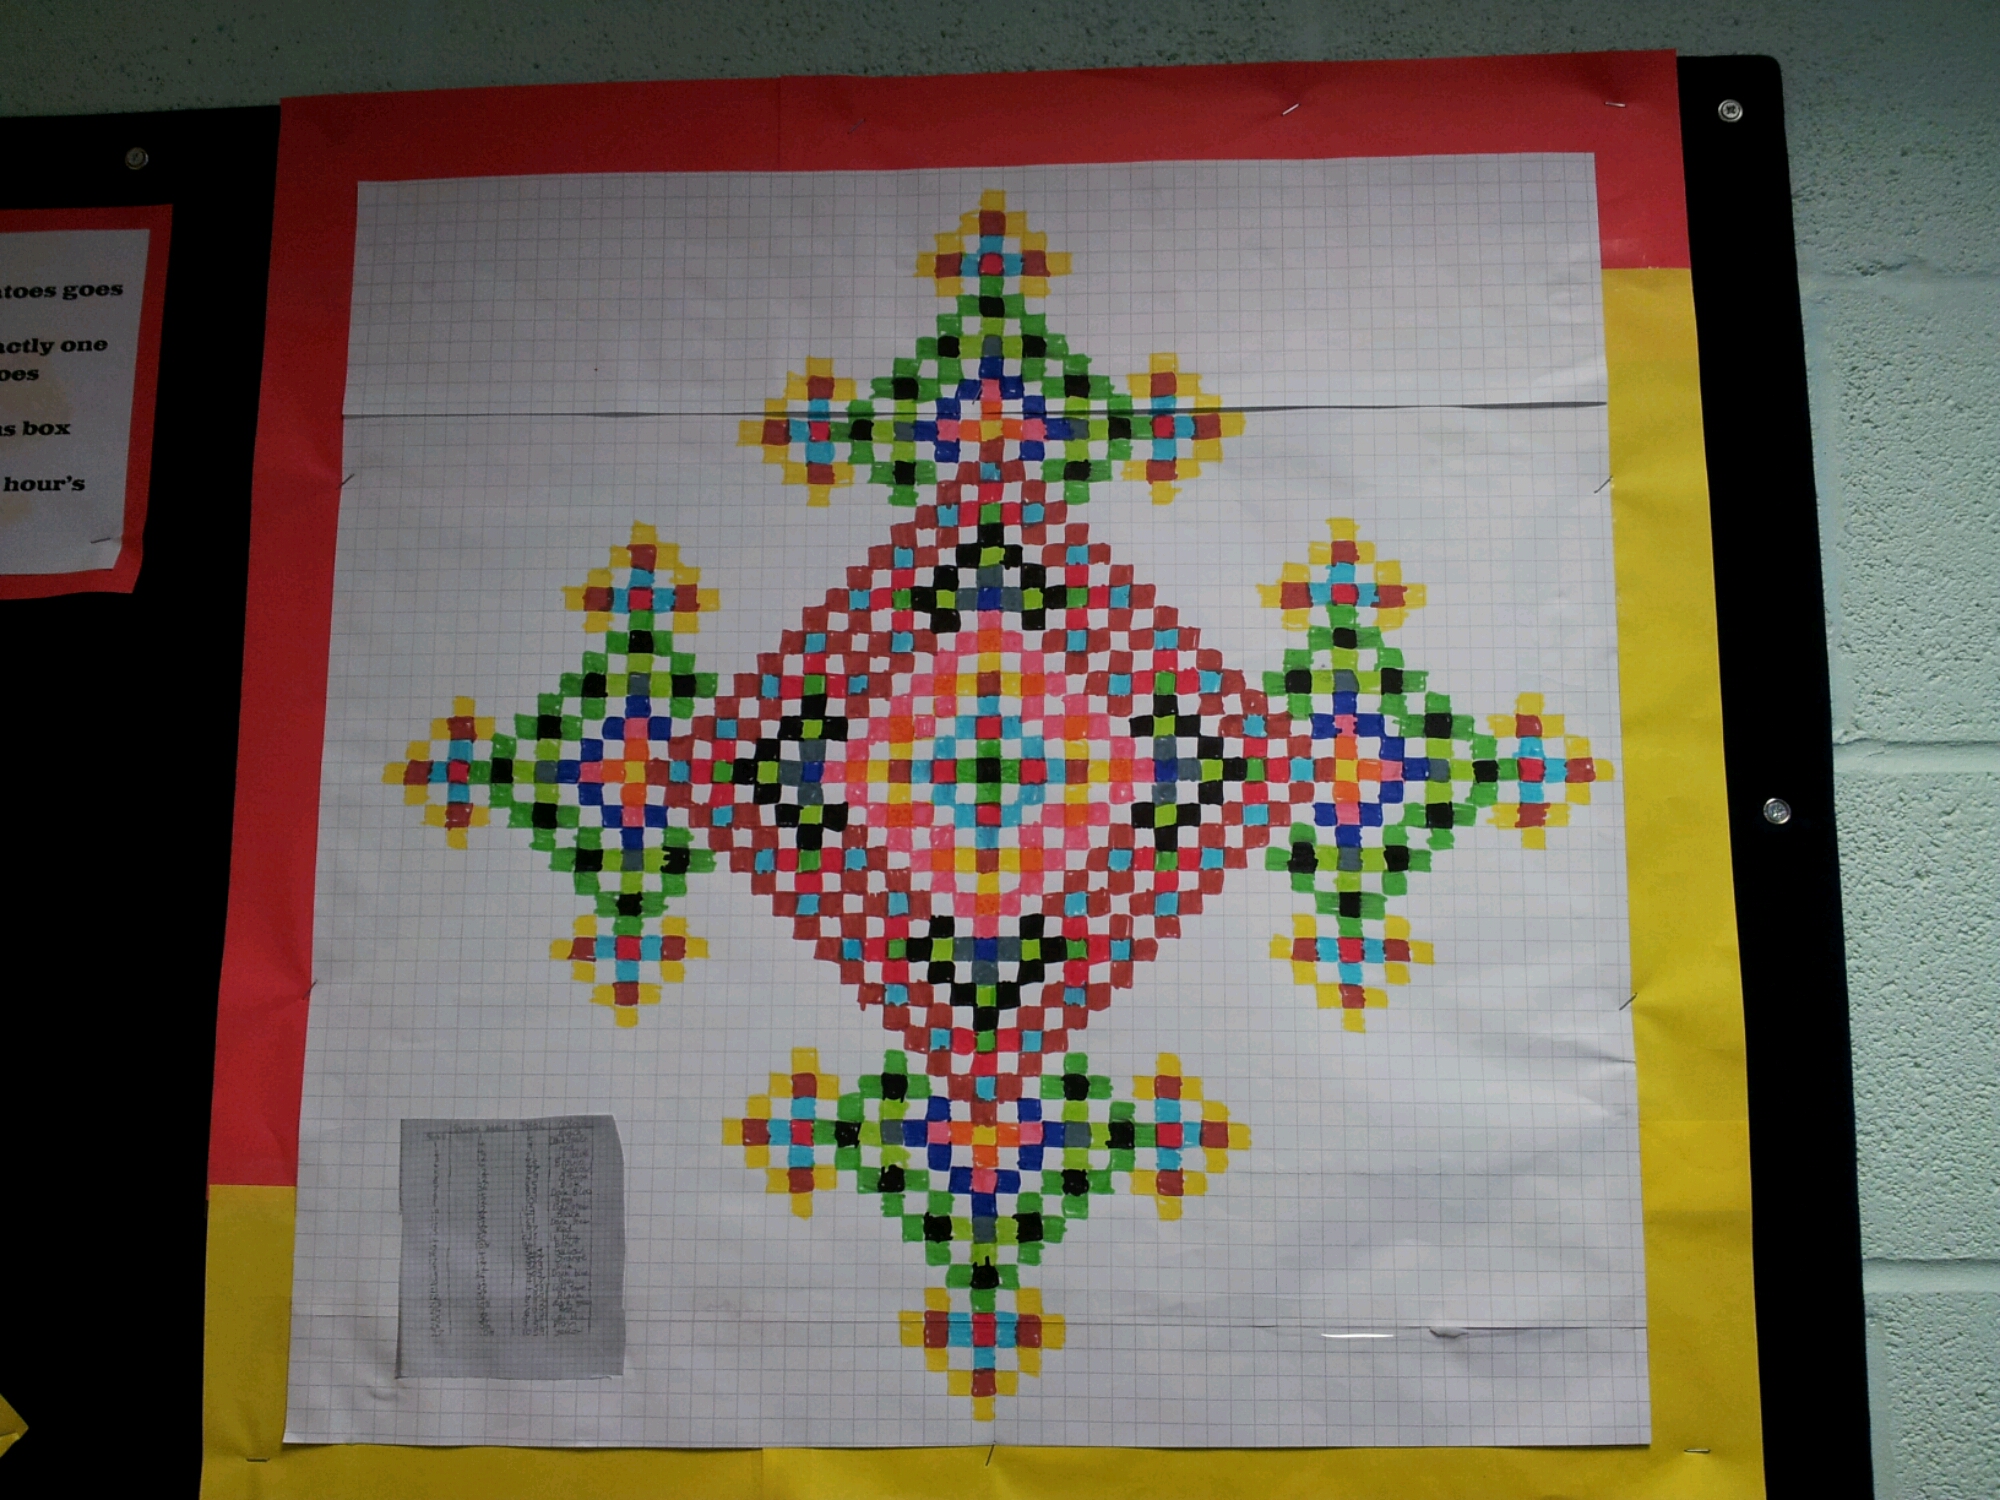
This is just amazing – you can see that alternate squares are coloured (except for the centre arms).
image

On this large scale you can see the fractal nature of this investigation.

Extension: Does this work for other types of paper? Isometric? Hexagonal?

255. Resource of the Week

I can’t wait to share the resource I stumbled across this week. I had planned a lesson on distance-time graphs, for my Foundation GCSE class, at home and went into school to print out my resources, only to discover the photocopier was broken!  I went to the TES website and found this brilliant set of resources on distance-time graphs. They required a small amount of printing, but engaged a ‘bouncy’ class very effectively!

Hare-and-The-Tortoise-Distance-time-graphs by lttmaths.

  • The PowerPoint presentation takes you through interpreting graphs. It also supports my teaching method of ‘every graph tells a story’.
  • The Disney cartoon (from 1934) entertained the class and introduced the idea that graphs are not just A to B in the fastest time. Although they were a little concerned about the age gap between the Hare and the schoolgirl bunnies he was flirting with.
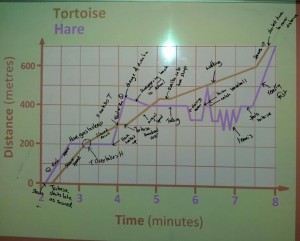
  • My usually less than enthusiastic class did an outstanding job explaining what the graphs showed, as shown by all these annotations:

distance time graphs

  • The activities and plenaries are a perfect fit.

Go and try out these resources next time you are working with distance-time graphs!

254. Laminated Feedback

I love tessellation! You get the chance to be a bit more artistic and creative. I’m a fan of this particular website too: http://www.tessellations.org/ The website has examples of fine art and student work, how to make different types of tessellations and even 3D tessellations.

Now I’m sure we all often use tessellation as a homework – the ‘Finish off your amazing classwork at home’ kind of thing. When collection time comes you get many different standards of work:

  • Beautiful felt pen designs
  • Beautiful coloured pencil designs
  • Designs that started well and went a touch wobbly when they were rushed
  • Beautiful, but slightly wrong designs
  • Beautiful to begin with, then got crushed in a bag designs
  • Didn’t do the homework designs

All, apart from the last case, can be enhanced and developed with the use of a laminator and a guillotine.

Why a guillotine?
To trim off rough edges and forgiveable errors where the student got muddled at the edge of the paper.

Why a laminator?
Laminating the work flattens out any crushed/folded bits. It also preserves decorative edgings when the work is on the wall.

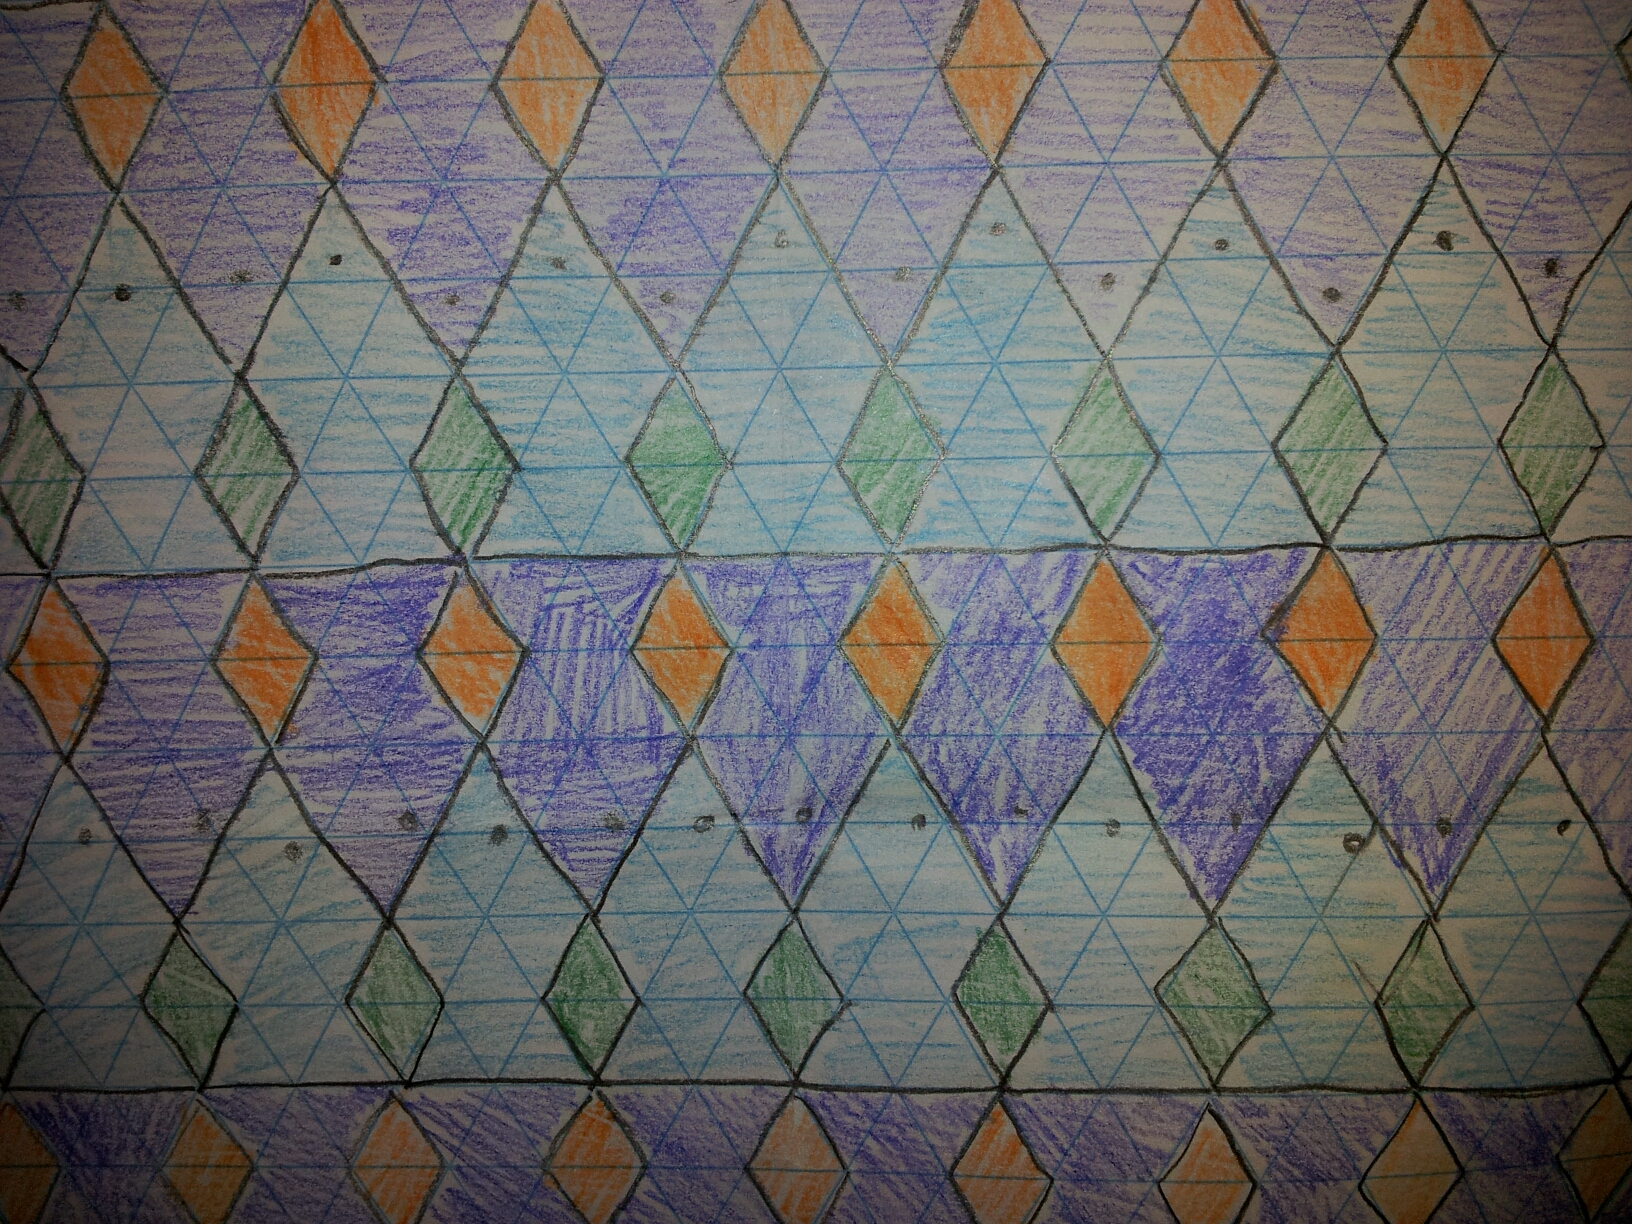
Students who spend ages with coloured pencil produce lovely work which just doesn’t stand out:

image

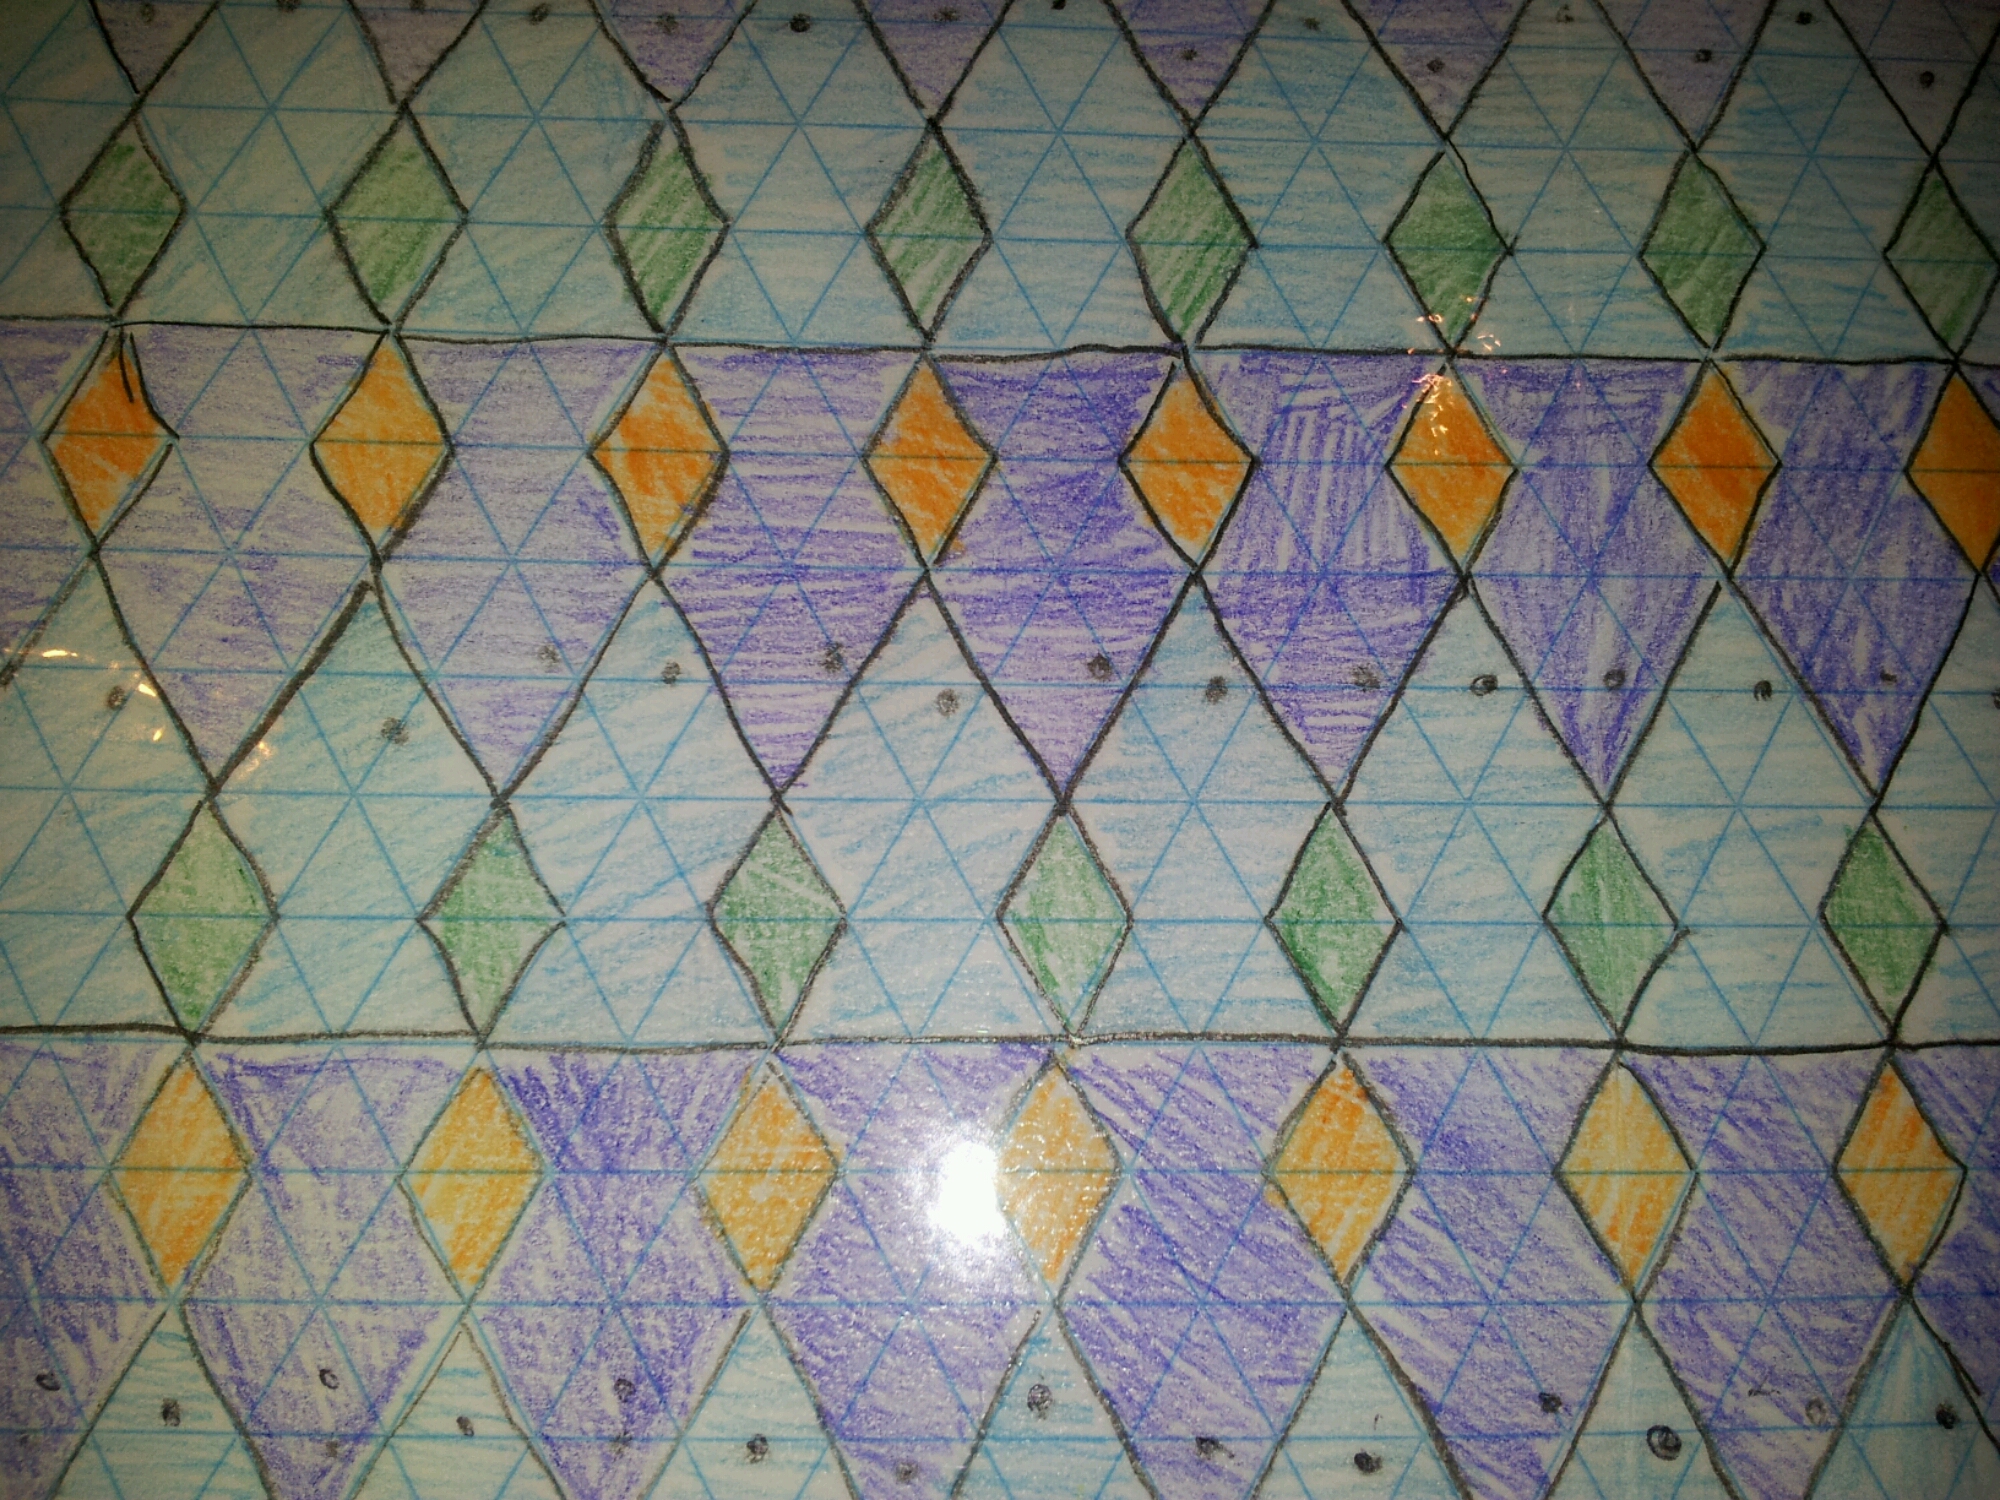
However, laminating it makes the colours more vibrant:

image

It’s hard to show the difference in a photograph, but take my word for it – it works!

You mentioned feedback?
It’s tricky to feedback on visual work without writing an essay or scrawling over the work. A simple solution is to use a marker pen to write on the laminate. Hand out the laminated work and board pens. Students can critique each other’s work by drawing around the individual tiles and annotating them, any errors can be highlighted and other comments made. The wipe-off pens make it less threatening and avoid permanent marks. The great thing is that the original work is not damaged and all comments can be removed with a damp cloth. Of course if you are using this for a wall display teachers may want a more permanent pen for feedback.

Final display

These works of art will be more hardwearing than your average display. You could hole-punch the corners and tie them together to make a wall hanging. You could laminate work back to back and hang them from the ceiling. You could even use the wall hanging as a temporary curtain if you have a rail in your room.

250. Crack the Circle

Here’s a quick resource for consolidating and revising the area and perimeter of circles and semi-circles.

Circles Crack the Safe (pdf)

Pupils complete the worksheet then work out the code. I personally like having a clear glass Kilner-style jar with a combination padlock at the front of the class … with a little treat for the class to aim for securely locked inside!

249. Reflection Worth doing

Happy New Year folks!

Just a quick post today. How to use footage from a classic 1960s show to demonstrate reflection for comedic purposes.

The classic sketch by Harry Worth. Just wait and see how many students try to copy this.