After the warm response the first takeaway homework received, I’ve written another! This time it is about Pythagoras and basic trigonometry – suitable for introductory or revision homework. This one hasn’t yet been trialled, so let me know how it goes.
Category Archives: Shape, Space & Measures
214. My first takeaway homework
If you have been on Twitter recently you may have seen educators sharing their ‘Takeaway’ homeworks. The idea is in Ross Morrison-McGill’s splendid book ‘100 Ideas for Secondary Teachers: Outstanding Lessons’ (@TeacherToolkit). Maths teachers have started embracing this concept and sharing their menus online.
Image credit: Bloomsbury Press
I’ve written a ‘Takeaway’ homework aimed at Year 9 Level 6/7 students on constructions, plans and elevations. Each task has a monetary value based on difficulty and every student must complete at least three tasks to complete the minimum £12 of homework. I personalised my in-school version to include the websites we subscribe to and books we use. I’m looking forward to seeing what my students hand in and I will update this post when they do.
213. Crack the code 2
If you liked the previous post 212. Crack the code 1, you’ll like this one.
Another Code sheet, but this time on Pythagoras’ theorem. The sheet covers Pythagoras (find hypotenuse and shorter side), Pythagorean triples, problem solving and rounding to 2dp.
Download it here: Pythagoras Crack the Safe
205. Percentages cubed
This neat little activity combines nets of cubes with non-calculator percentages. It doesn’t necessarily replace teaching basic percentages, but it is a good starting point.
Objectives
- To understand the link between different percentages.
- To construct a cube, using a 2D net.
- To calculate percentages.
Equipment
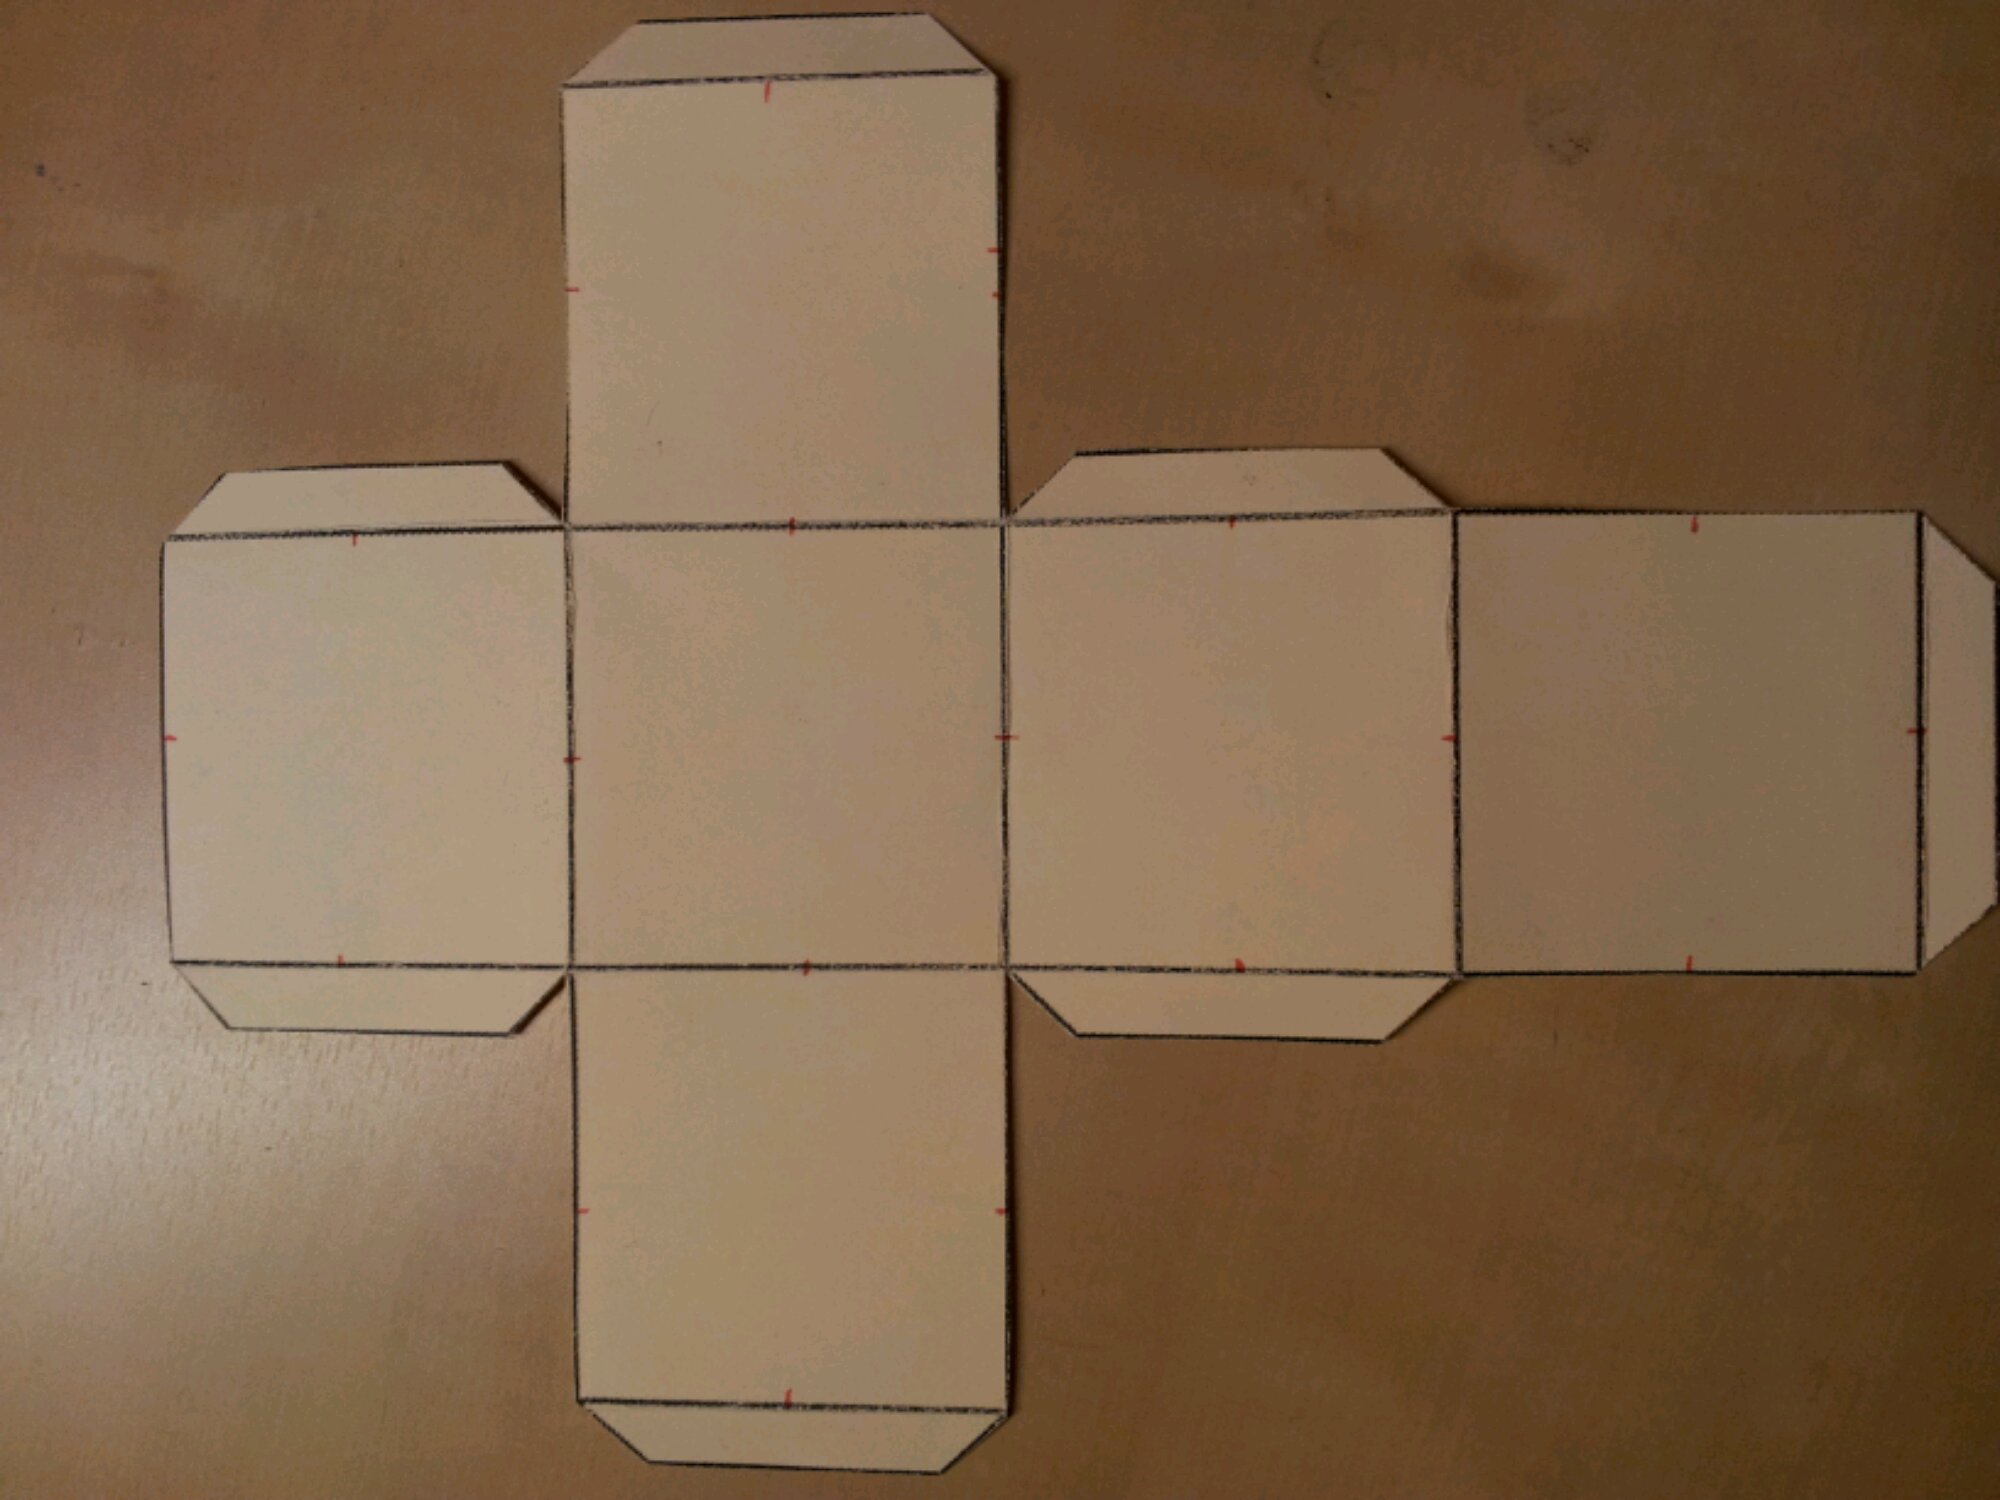
Pre-printed nets of cubes on card
Scissors
Glue
Felt-tip pens
Task 1
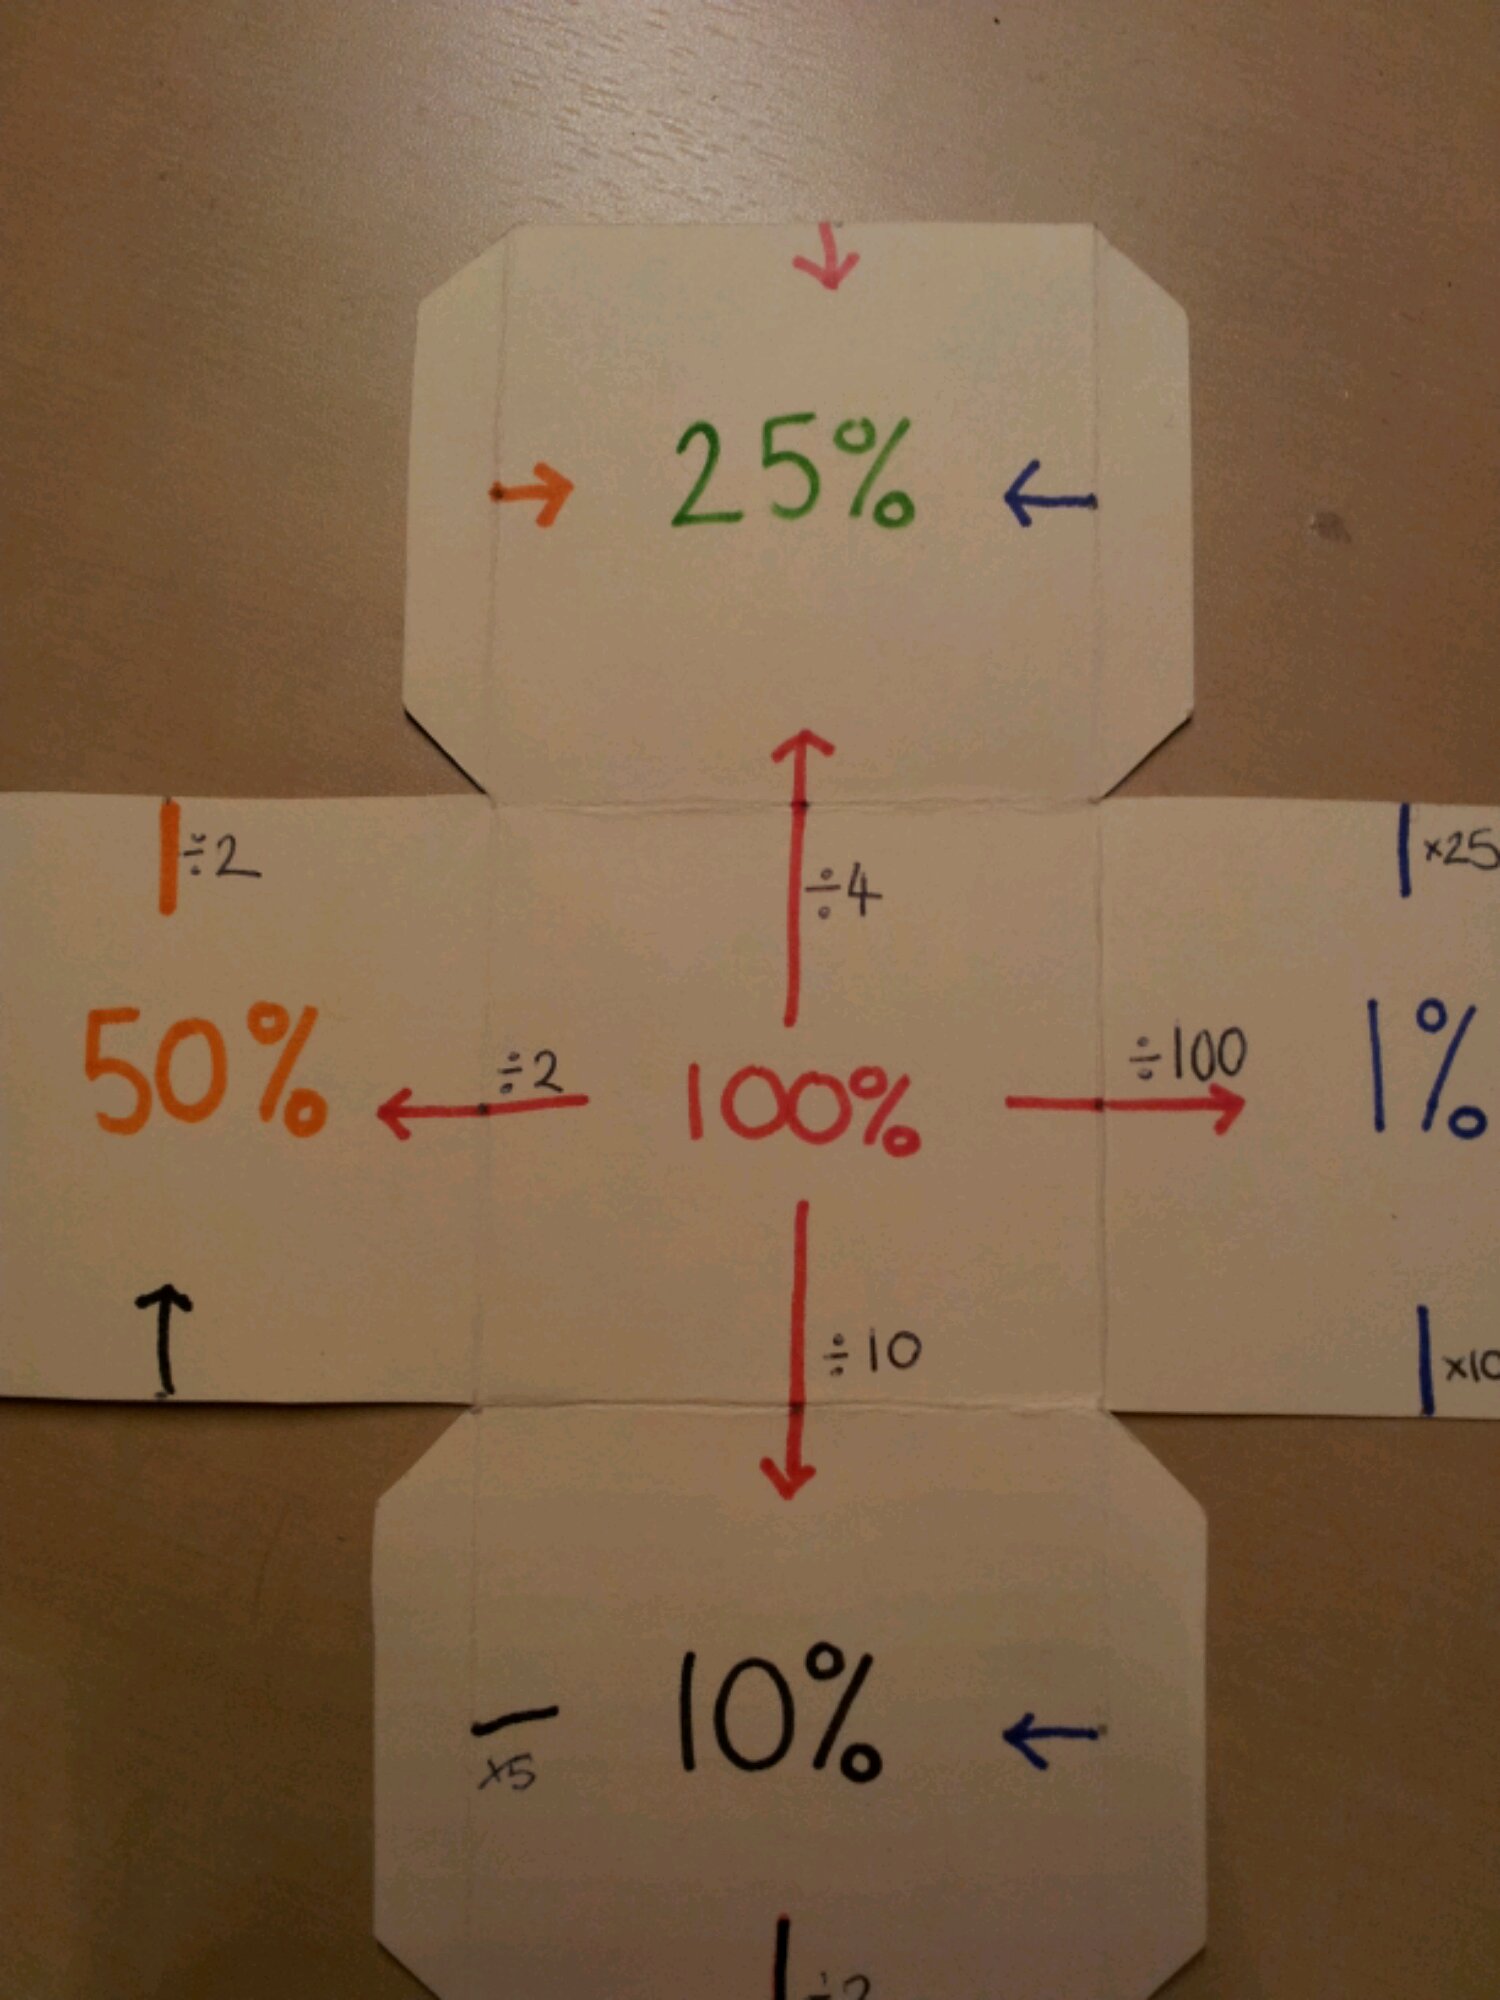
Cut out the net of the cube and mark the midpoint of each edge, ensuring matching points on the joins.
The matching points are important later on. Fold in both directions along each line.
Task 2
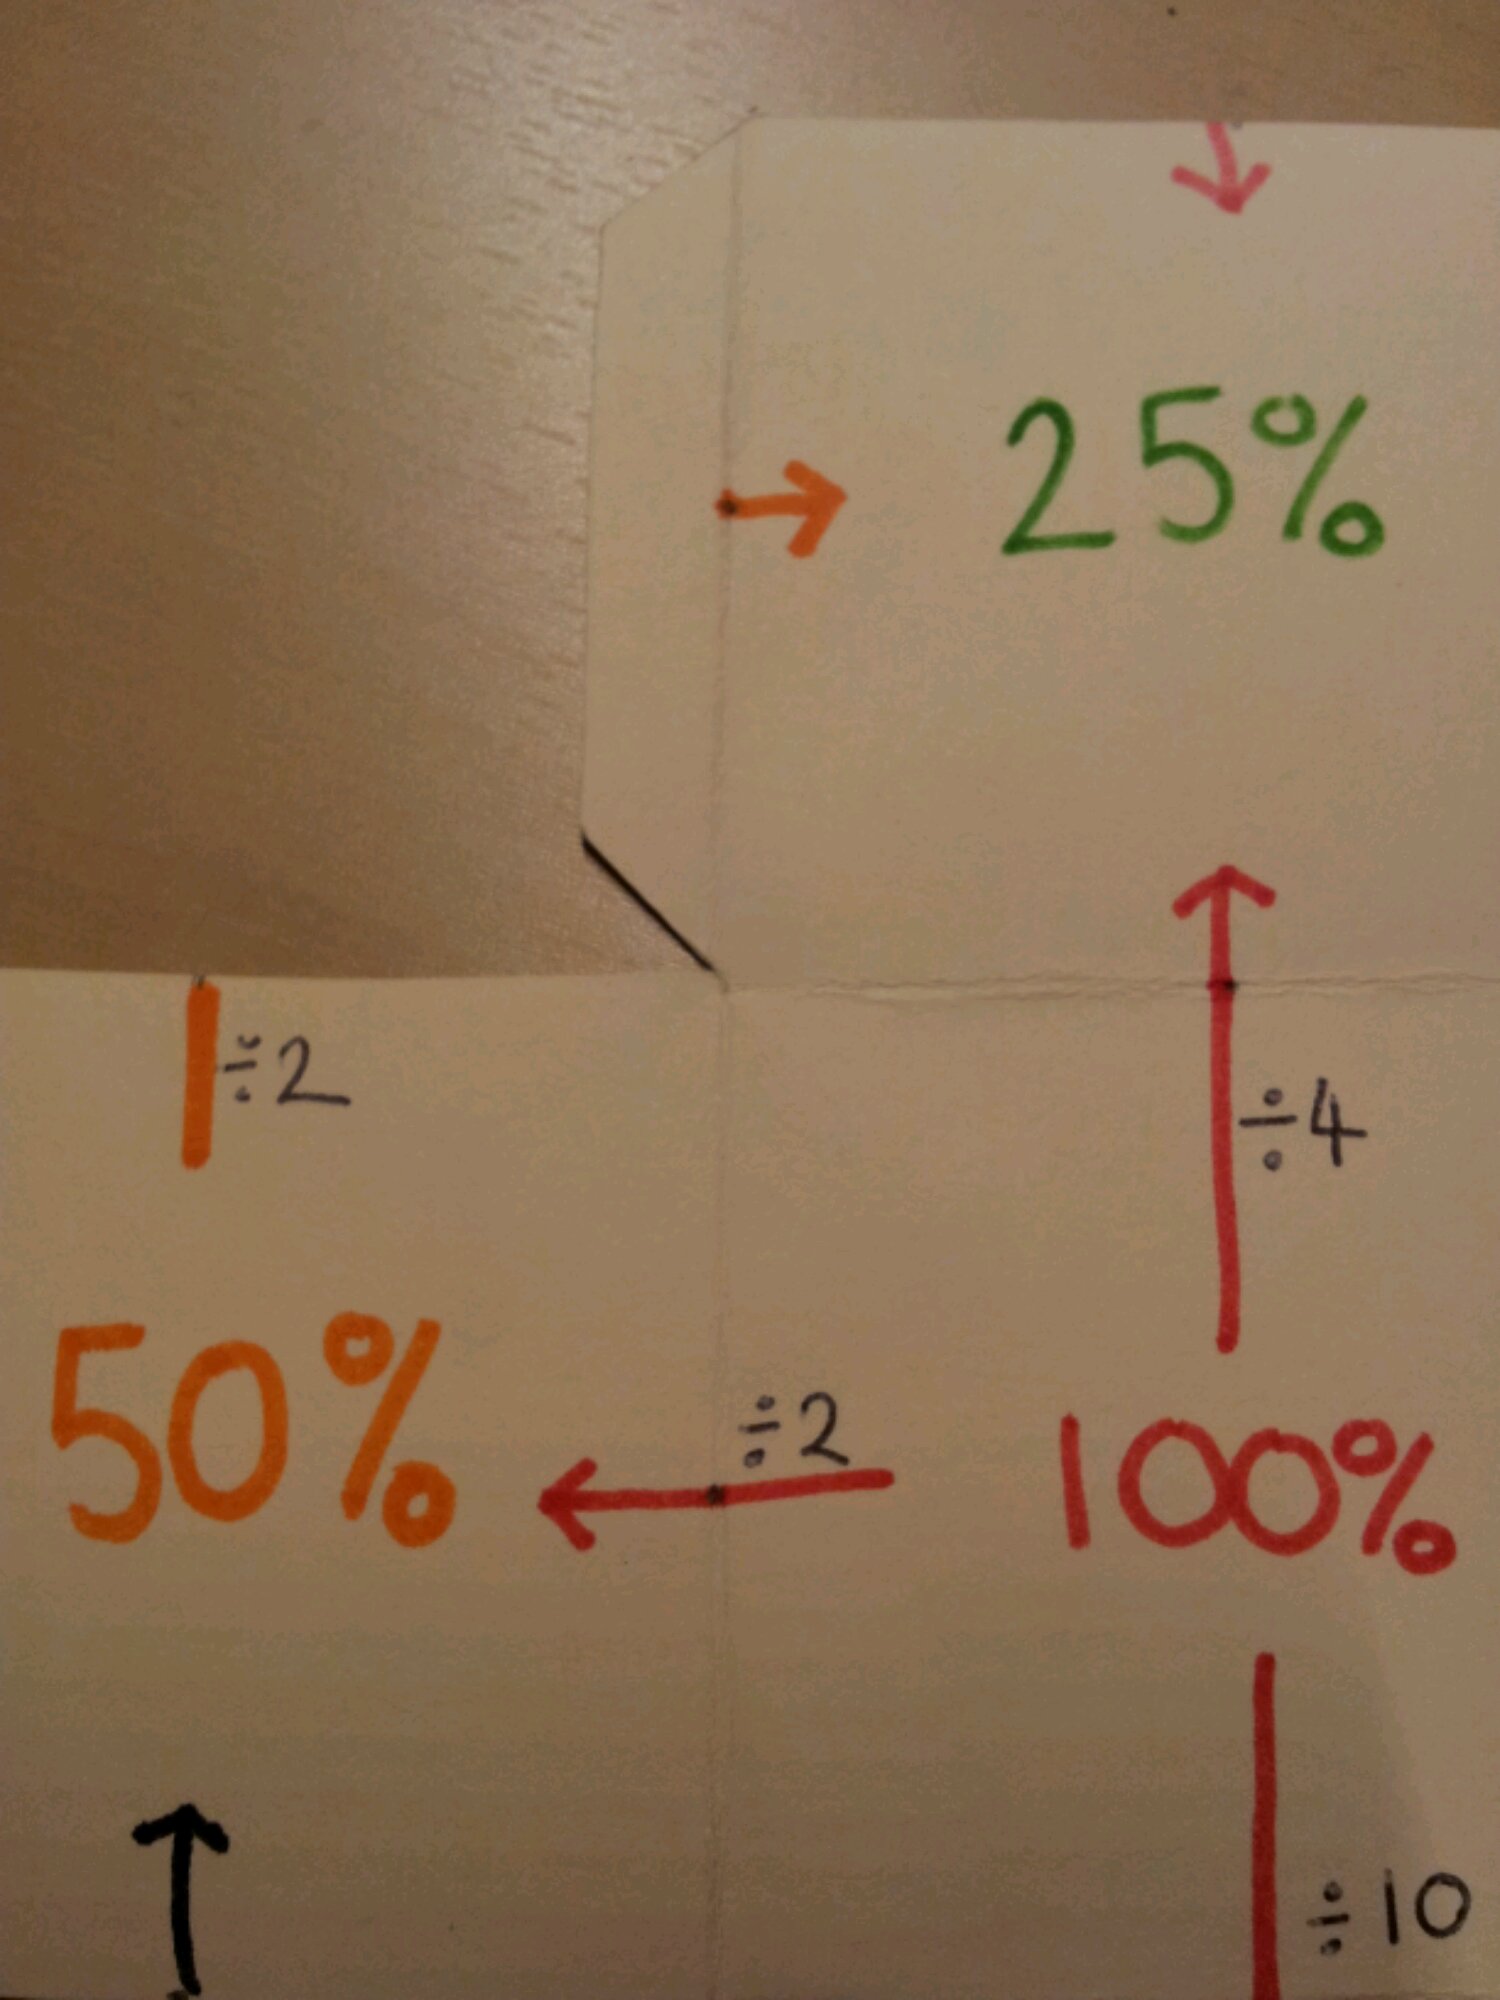
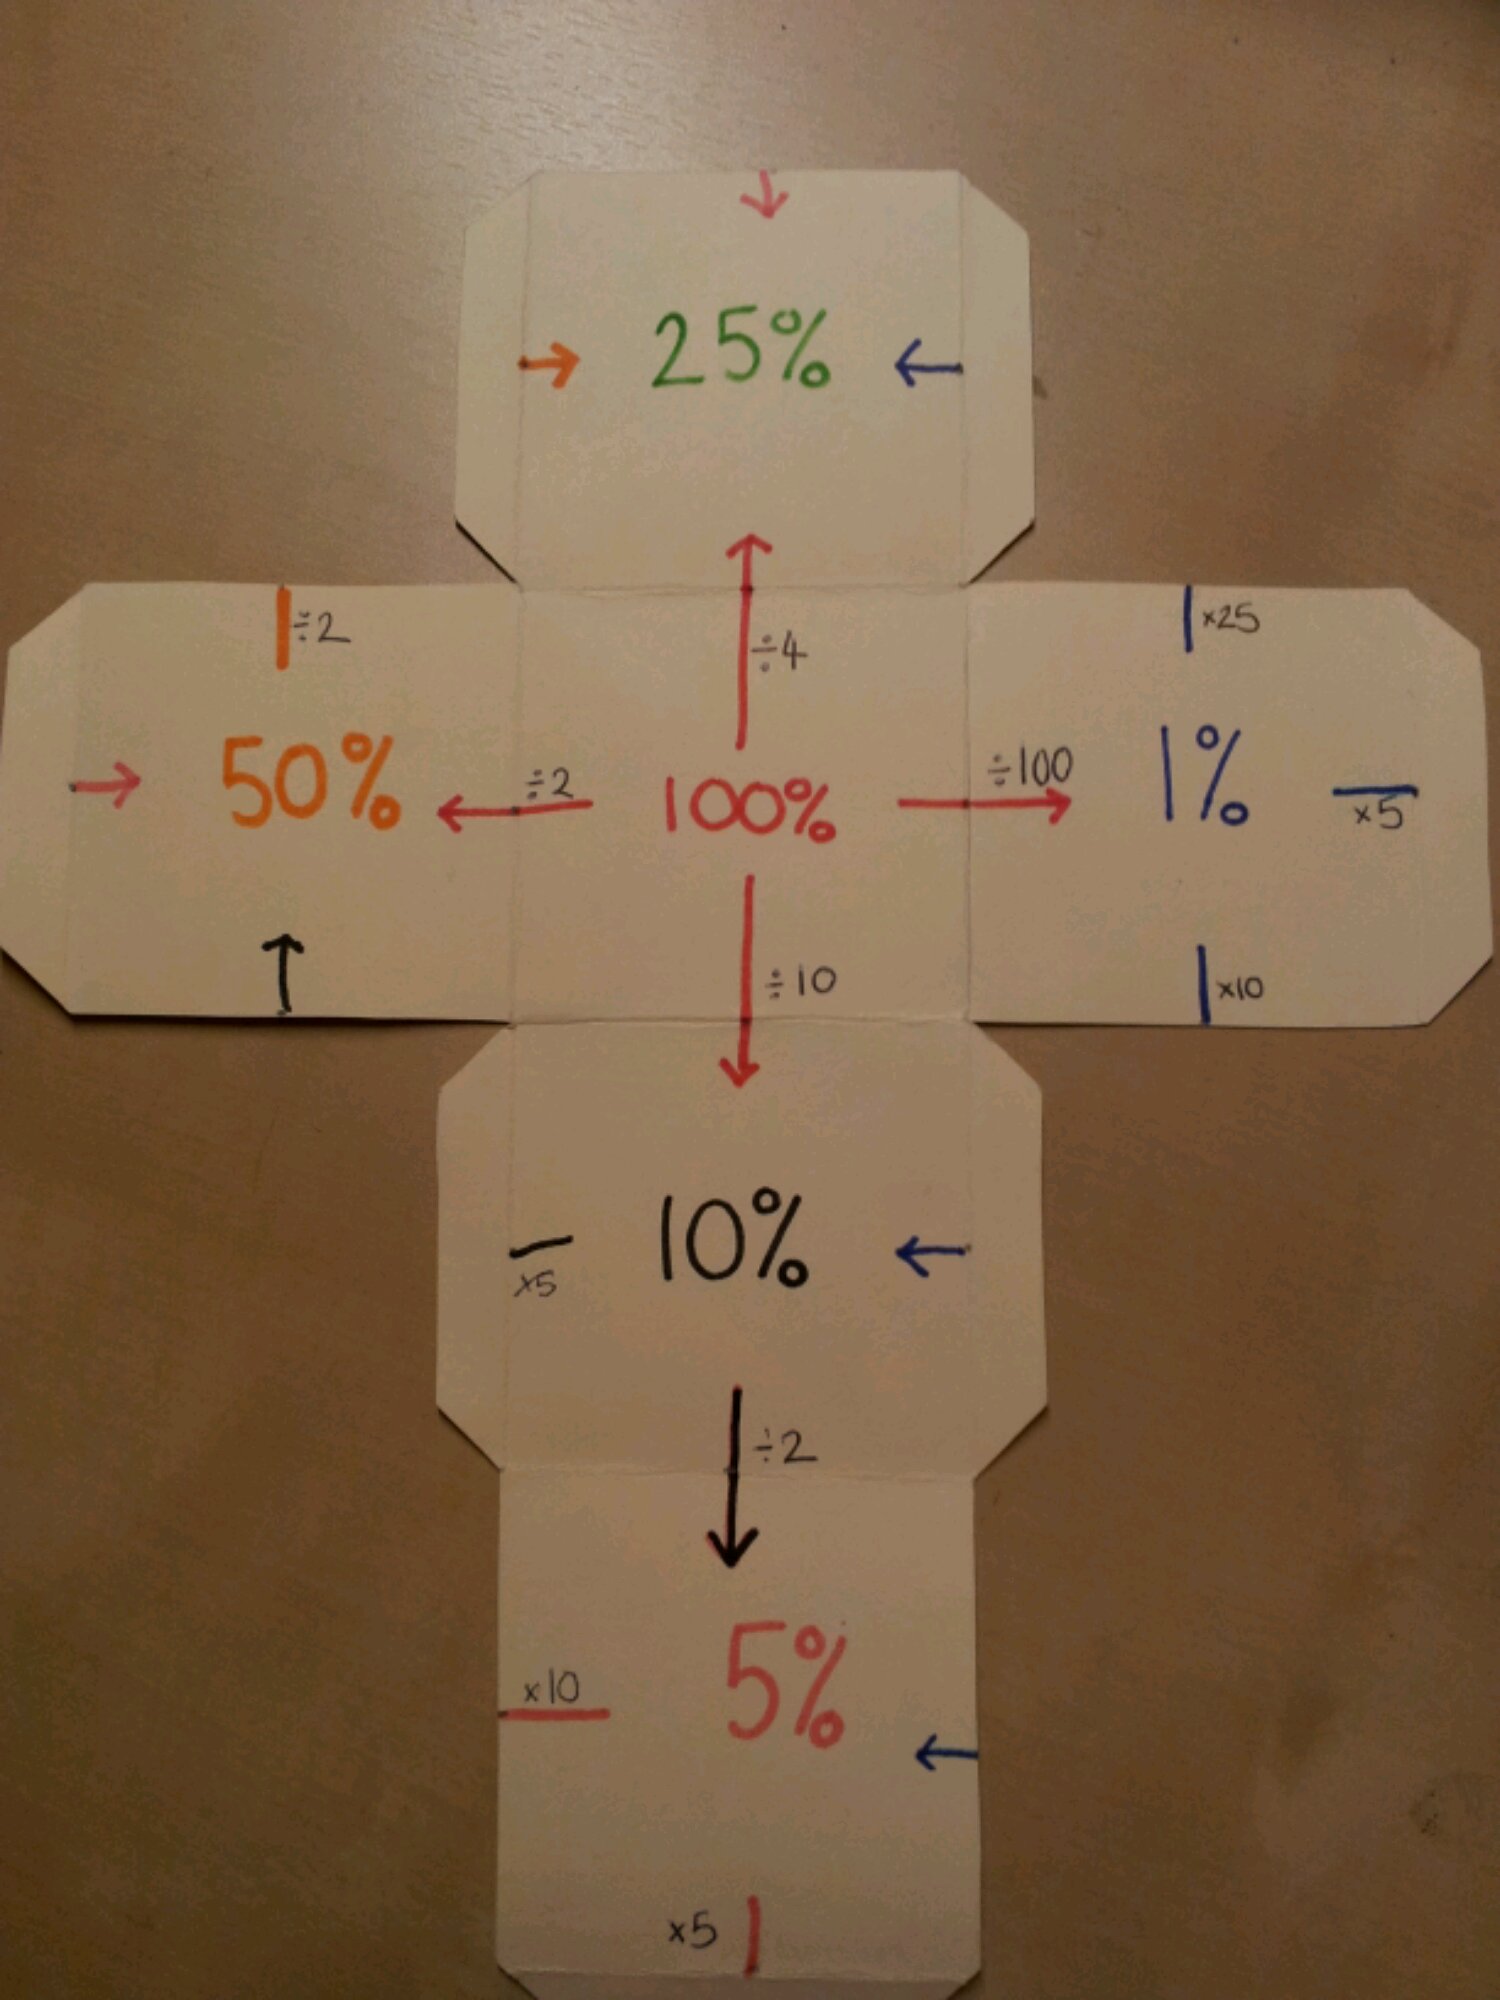
Label the middle square 100%.
Draw horizontal and vertical arrows going away from it with divide by 2, 4, 10 & 100. What percentages should go on these squares?
You will notice the arrows go through the midpoints.
Task 3
After your class have identified the squares as 50%, 25%, 10% & 1%, ask your class how these are linked.
This bit wowed my class.
Draw a vertical line up from 50%.
Label it divide by 2.
Draw an arrow coming in from the left of the 25%.
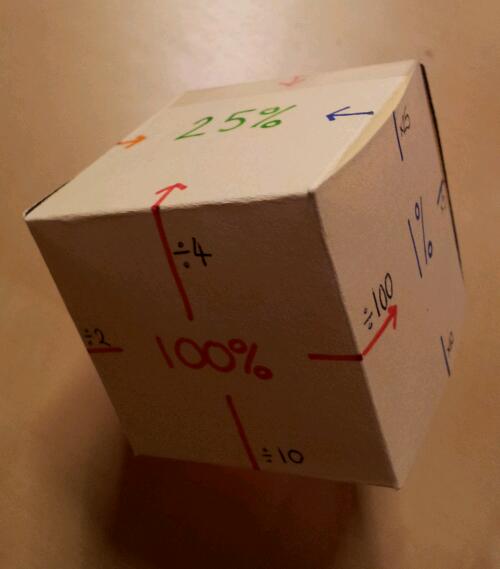
What happens if you fold the cube up?
The arrow joins up! This is why you need the midpoints.
Task 4
Ask your class to complete the labels linking the other percentages.
Task 5
You should have one empty square. Label this 5%.
Ask your pupils to complete their arrows. They can be completed with divide or multiply.
You will notice that mine is colour coded, based on the original percentage in each calculation.
Task 6
Glue the 5% square flap to the 25% square. This allows you to temporarily tuck in the other flaps, whilst allowing the cube to be folded flat to go in a book.
Task 7
Give pupils a starting number eg 360. This represents 100%.
By following the arrows on the cube, they can work out all these percentages quickly and efficiently.
200. Website/Resource of the week 4
Wow! This is proper blog post number 200. How should I mark this occasion? Why, by recommending another splendid site of course!
To quote the folks themselves: JustMaths is born from the passion and spirit of three full time teachers at the “most improved school in England” (January 2013).
The site has both free and subscription resources. The latest initiative is the ‘Bread & Butter’ worksheets. It consists of straight-forward starter worksheets to practice essential skills for students: Just Maths: Bread & Butter. My class use them every lesson and I’ve noticed a real improvement in their confidence and quality of solutions in just two weeks.
199. Video of the week: Constructing Pentagons
I came across this video whilst looking for 3D construction ideas for a 7 year olds homework. It is a very easy to follow video explaining how to construct a pentagon using a ruler, pencil anda pair of compasses. When I say easy, I mean it. The voiceover is in Spanish and all my knowledge of Spanish comes from watching ‘Dora the Explorer’ with the children – and I still understood how to do this.
Not only will it help pupils improve their fine motor skills using compasses, you could also ask more able students why it works. You could also ask Spanish speakers to translate!
198. You sunk my rectangle!
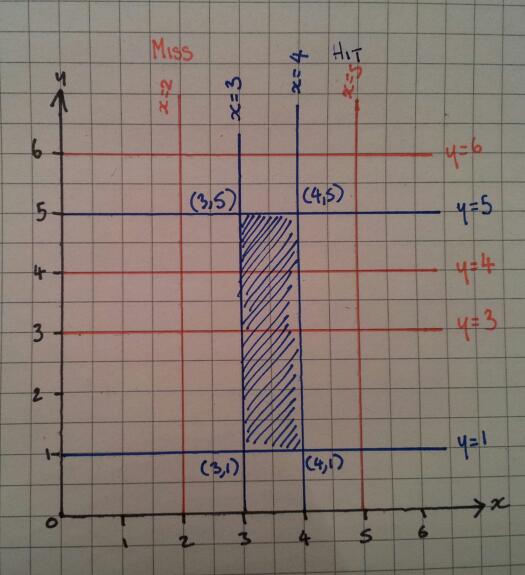
How about a game of ‘Battleships’ with a graphical twist? My Year 7 class loved playing this game and we developed understanding without resorting to tediously drawing out lots of graphs.
Objective
To be able to draw and label lines parallel to the x or y axes ie x=1, y=3
Equipment
- Squared paper
- Pencil
- Coloured pens or pencils
- Ruler or straight edge
Preparation
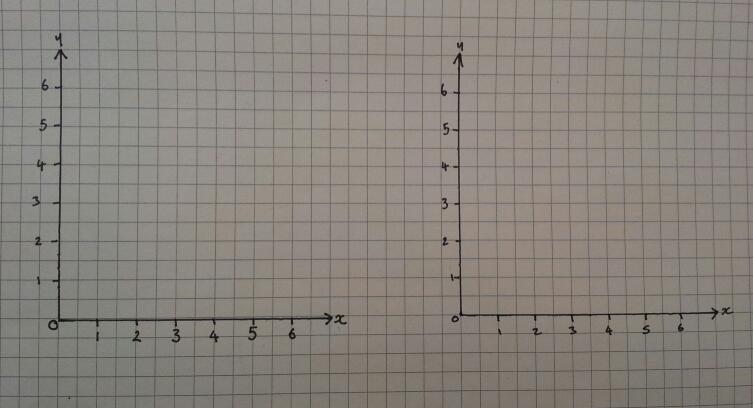
1. In pairs, agree the size of a set of axes and draw two identical sets each. Negative axes can be used as an extension.
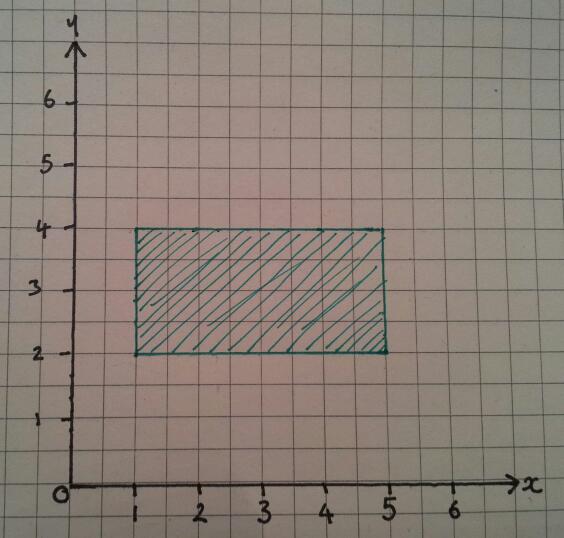
2. On one set of axes draw a rectangle, making sure the edges are on whole numbers.
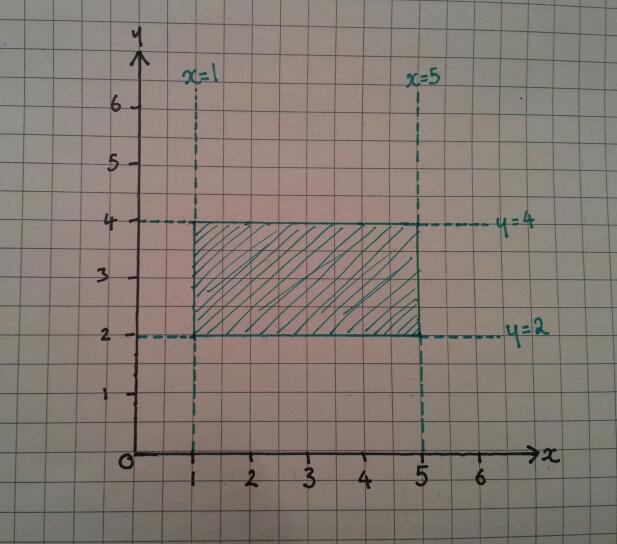
3. Extend the edges of the rectangle to give you two horizontal and two vertical lines. Label the lines accordingly. You are now ready to play!
Playing the game
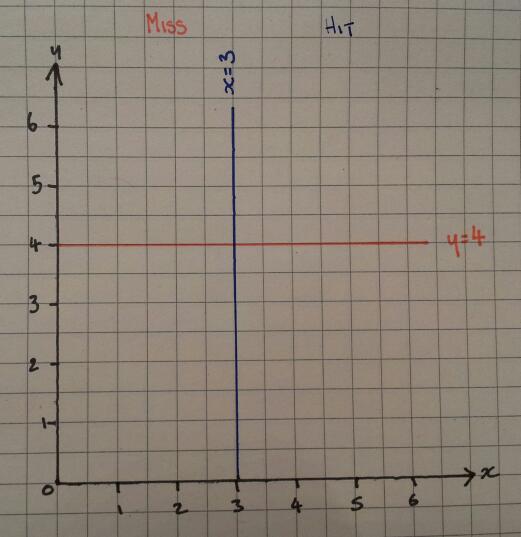
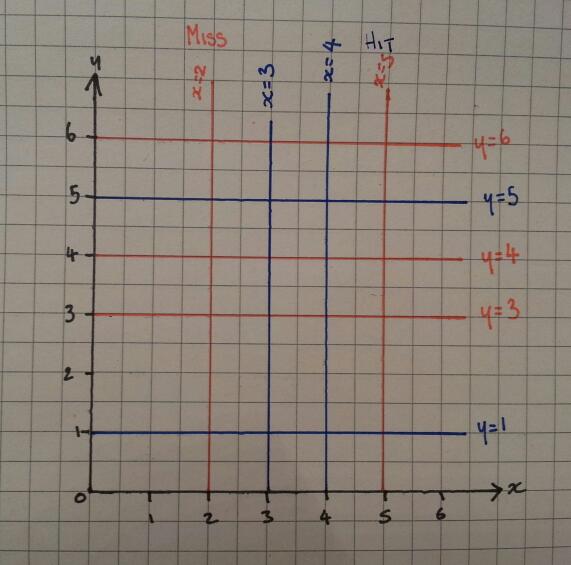
1. Players take it in turns to guess a straight line eg x=3. Their partner says ‘Hit’ if it is the edge of their rectangle and ‘Miss’ if it isn’t. This information is recorded on the players second grid so they can keep track of their guesses.
2. The game continues until a rectangle is revealed:
3. The player must then label where the lines intersect. The losing player may find it useful to continue guessing.
Extension: What do thy notice about the co-ordinates and the equations of their lines?
4. What is the area of the rectangle?
Extension: Is there a link between the co-ordinates and the area?

